Creating an email signature
If you sign your emails the same way most of the time, or if you want to use the same signature format as everyone else in your business, then you can create signatures in Office 365 to attach to your emails.
This article shows how to easily create an email signature that can be used for your outgoing business or personal emails. The article shows how to create a signature using Outlook, or the Office 365 web equivalent, Outlook on the web.
Creating a signature in Outlook on the web
To create a signature in Outlook on the web, proceed as follows.
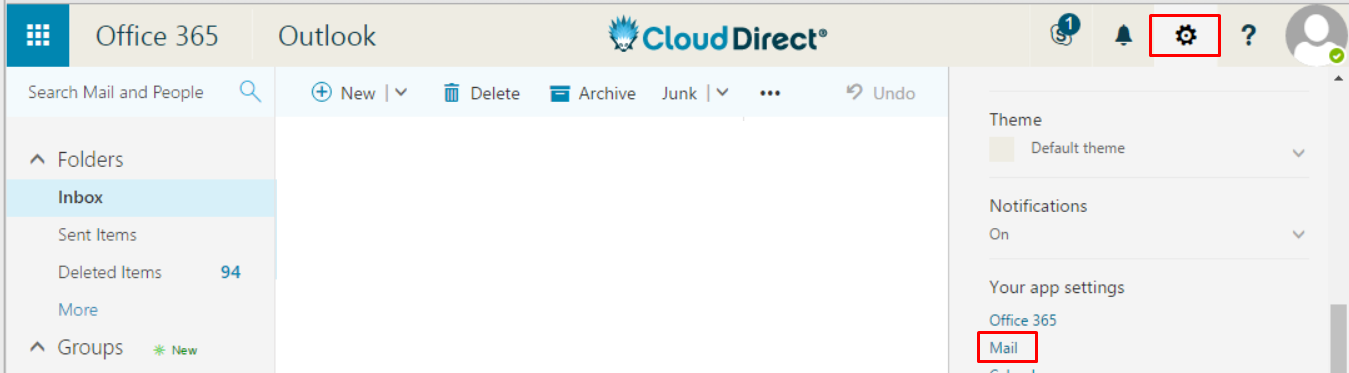
- Sign in to your Office 365, Outlook on the web, account at https://outlook.office365.com/.
- Click the Settings icon, then scroll down the options and click Mail.
The Mail options page opens.
- In the left hand menu column, under Mail, Layout, click Email signature.
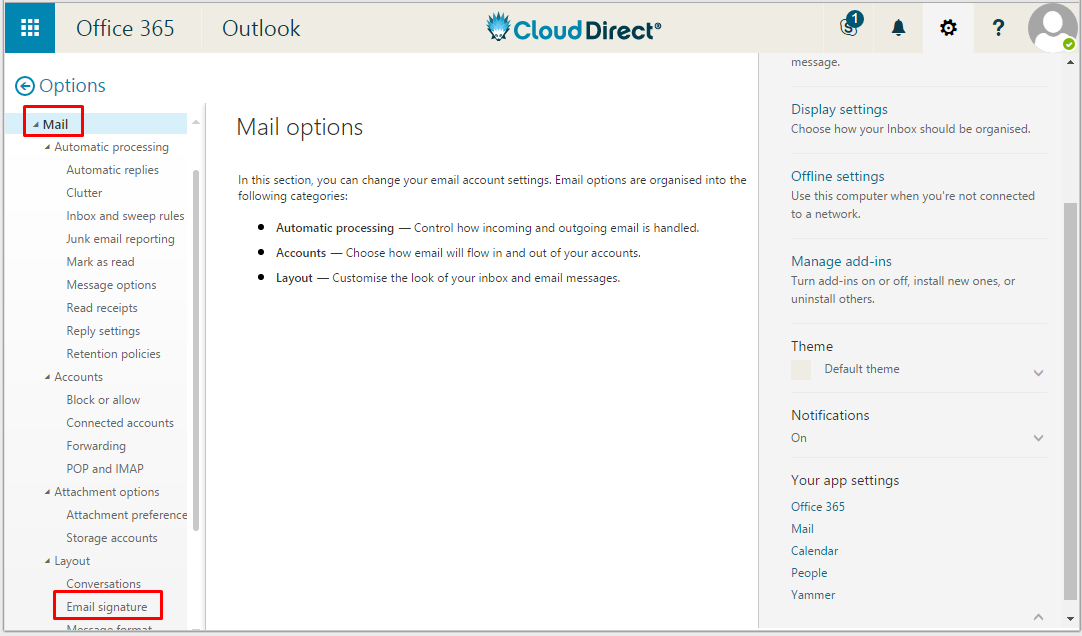
The Email signature page opens.
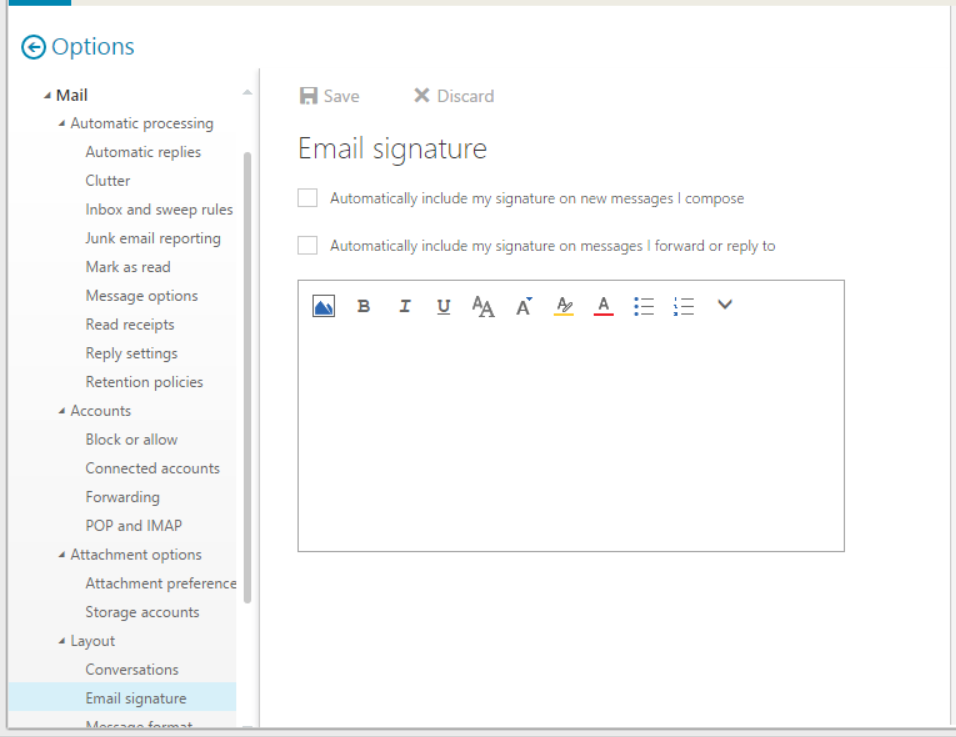
- In the text box, type the signature details you want to use. Use the formatting mini toolbar to change the appearance of the signature.
Note:
If you have your contact information already saved, you can simply copy and paste, including images, into the text box.
- If you want your signature to display at the bottom of all outgoing emails that you compose, then tick the checkbox, Automatically include my signature on messages I compose.
- If you want your signature to display at the bottom of emails that you have forwarded or replied to you, then tick the checkbox, Automatically include my signature on messages I forward or reply to.
- Click Save, at the top of the page, to save your signature.
Note:
If you don't want a default signature for all messages, then leave the two checkboxes unticked. If you wish, you can then insert your signature into an individual email message as follows.
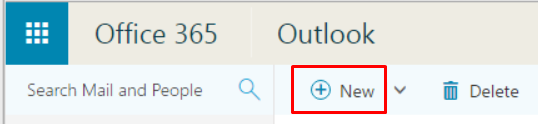
Open Outlook on the web, and click New to open a new message form in the reading pane.
Click the ellipsis and, from the dropdown, click Insert signature.
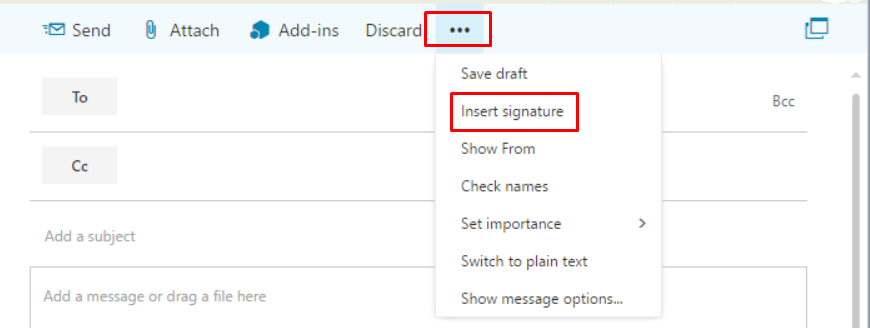
Your signature is inserted in the email.
Creating a signature in Outlook
To create a signature in Outloook, proceed as follows.
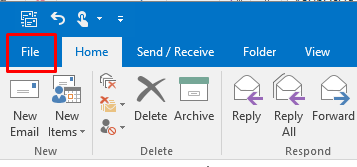
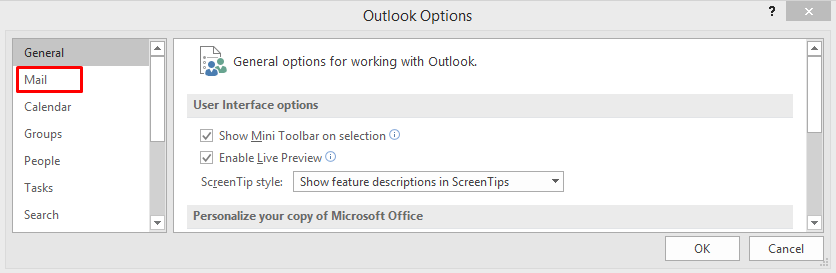
- From within Outlook, click the File tab to open the Account Information page.
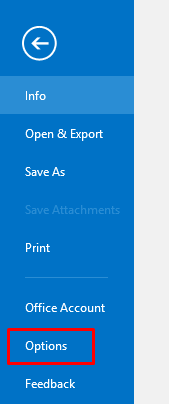
- In the left hand menu column, click Options.
The Outlook Options page opens.
- In the left hand menu column, click Mail.
- Click Signatures.
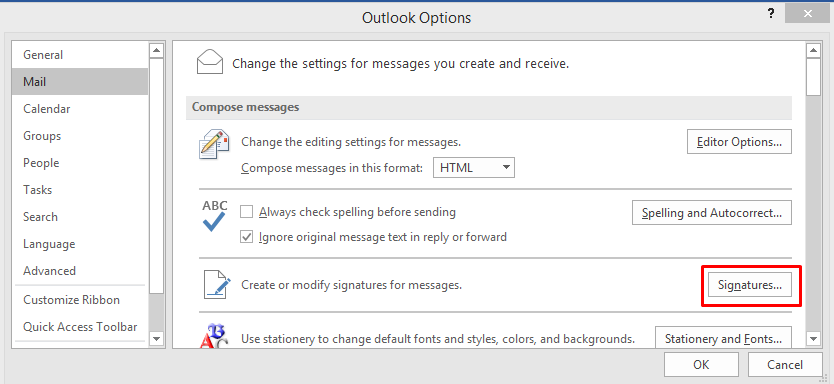
The Signatures and Stationery page opens.
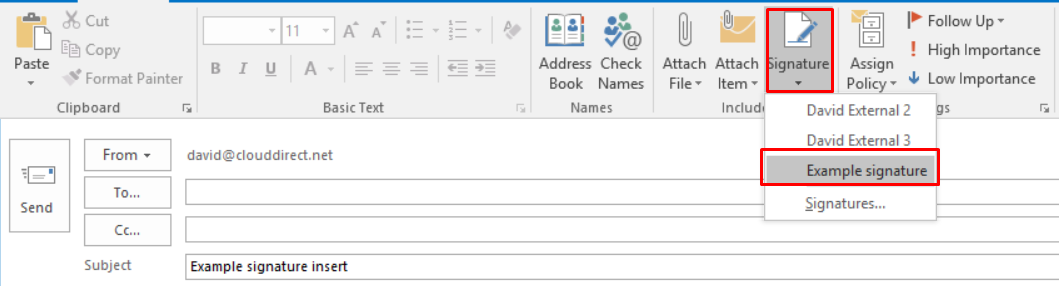
Useful Tip:
You can take a shortcut to the Signatures and Stationery page, if you have a Signatures icon shown on the menu ribbon above a "New Email" page. From within a "New Email" page, simply click the Signature button then click Signatures from the resultant dropdown. (This shortcut is only available to Office setups that include a Signature button on this ribbon).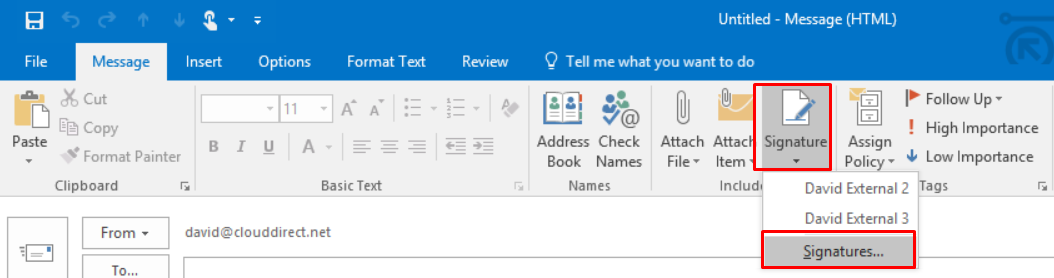
- On the Signatures and Stationery page, just below the Select signature to edit box, click New.
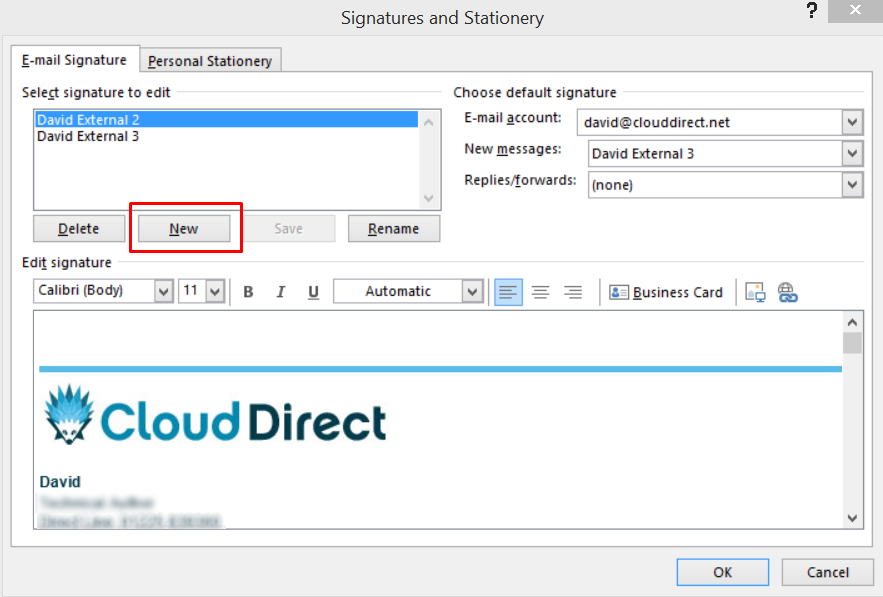
A small dialogue box appears.
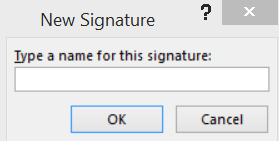
- Type a name for your new signature.
- Click OK.
Your new signature name appears, highlighted, in the list of signatures.
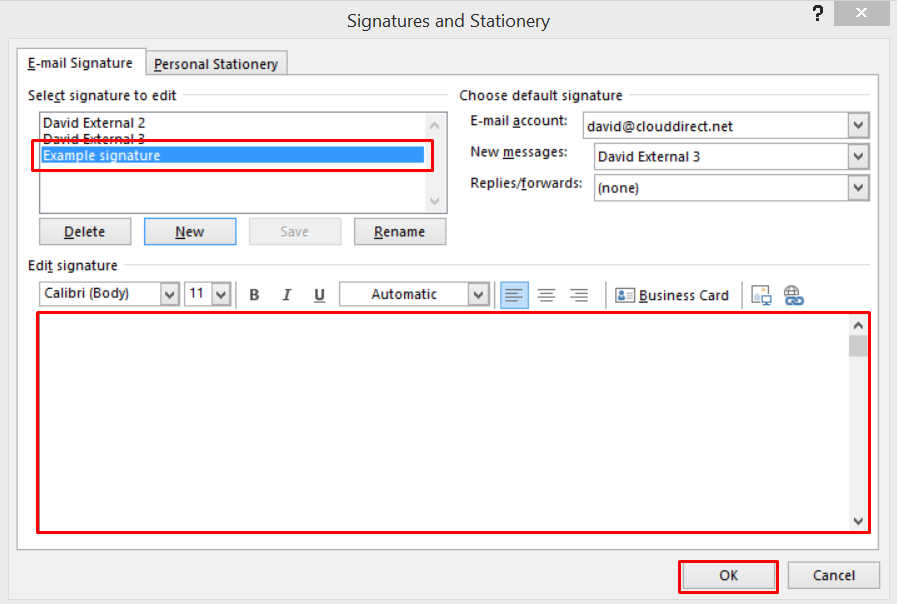
- Compose your signature in the Edit signature text box.
Note:
If you have your contact information already saved in Outlook, you can simply import all that information as a business card by clicking the Business Card button, at the top of the Edit signature text box.
You can add images to your signature, like a logo or banner, by pasting them into the Edit signature text box, or clicking the Insert Picture button  to the right of the Business Card button. URLs will be automatically hyperlinked, but if you want to add your own link, you can click the Insert Hyperlink button
  on the extreme right.
- Click OK, to save your signature.
To ensure this signature is included with every new message, and also with replies or forwards, that you send, set it as a default as follows.
- To set a default signature to be sent with all new messages, click the New messages dropdown, and select the required signature name from the list.
- To set a default signature to be sent with all message replies or forwards, click the Replies/forwards dropdown, and select the required signature name from the list.
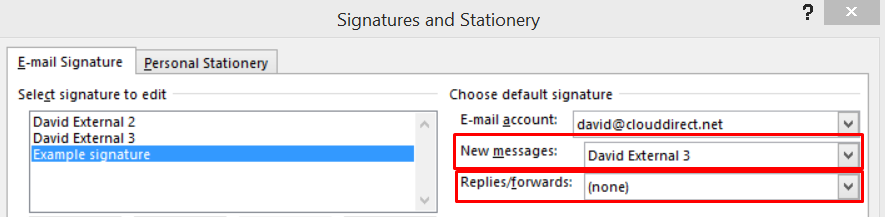
Note:
If you don't want a default signature for all messages, then select the none option from the dropdowns. If you wish, you can then insert your signature into an individual email message by clicking Signature in the Compose Message window, and selecting the signature you just created.