
Setting up throttling
By default, LiveVault Server Vaulting uses as much available network bandwidth as it needs to back up or restore your data. However, LiveVault lets you specify the maximum amount of network bandwidth that it can consume when backing up or restoring data from a specific computer to an appliance, or from a computer to a vault. For example, you can choose to set a limit on backup bandwidth usage if bandwidth availability is limited during certain times. This process of restricting bandwidth use for backup and restore is known as throttling. LiveVault throttles its bandwidth usage to stay at or below the limit you specify. You can also specify a bandwidth definition for backups from an appliance to a vault.
Note:
This limit applies to all backup policies for the computer (server); it cannot be applied to specific backup configurations.
If you encounter any problems, or have any queries, when setting up throttling, please contact the Cloud Direct Technical Support team on 0800 0789 438, or email support@clouddirect.net.
Prerequisites
This article assumes that you have successfully logged in to the LiveVault Portal and are now on the Welcome! HOME page. If not, then please refer to article "Accessing the LiveVault Portal".
Modifying a computer's backup or restore bandwidth availability
From the Welcome! HOME page, in the left hand navigation pane,
- Select the computer for which you want to modify the bandwidth.
The Computer Summary page opens.
- Select the Properties tab.
The Properties page opens.
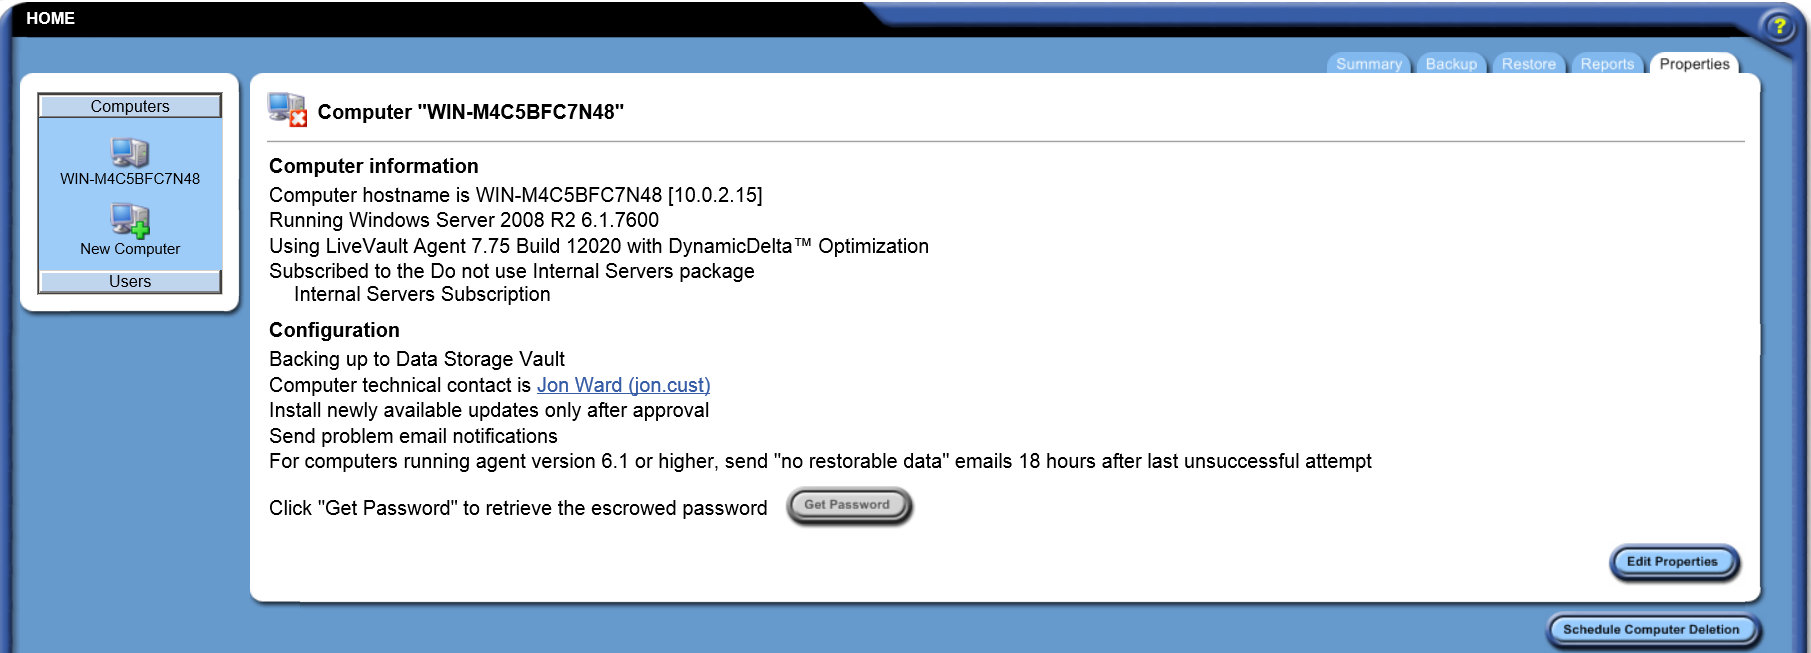
- Click Edit Properties.
The Edit Computer page opens.
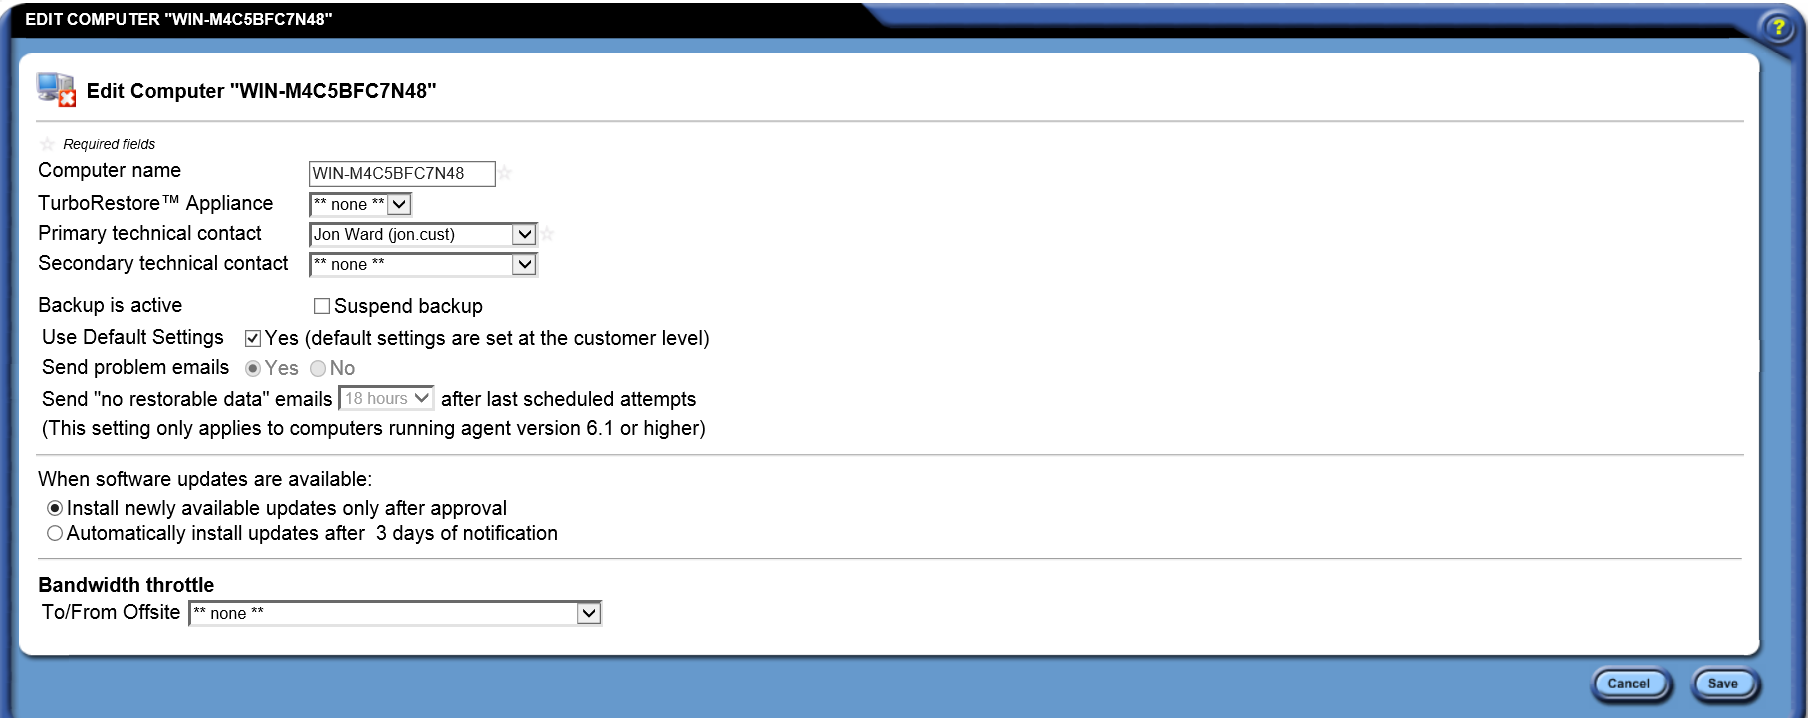
If the LiveVault agent backs up to both an offsite Vault and a TurboRestore Appliance (TRA), then there will be sections on this page for modifying the bandwidth of each. This lets you set varying bandwidths for operations between the computer, the TRA, and the offsite Vault.
Limiting offsite Vault and TRA bandwidth
If a TurboRestore Appliance (TRA) is used for backup, then it will be identified on the page, and a Bandwidth throttle options box will be available.
Limiting offsite vault bandwidth
To limit offsite bandwidth for backup or restore, proceed as follows,
- On the To/From Offsite dropdown menu, select one of the available bandwidth settings.
Note:
If you have the appropriate rights, you can also set a custom application bandwidth.
By selecting an offsite Vault bandwidth setting, further options appear as follows,
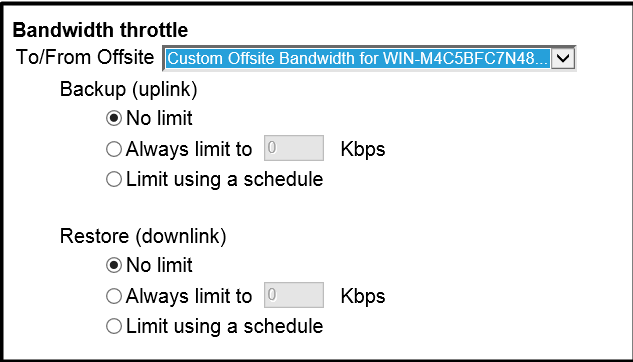
- To set customer bandwidth, for both Backup (uplink) and Restore (downlink), select one of the following three options; a, b or c,
- No limit - Set to always use the maximum bandwidth possible.
- Always limit to - Set to always limit the bandwidth to the number of Kbps (kilobits per second) that you specify.
- Limit using a schedule - Set to see a schedule that lets you customize the bandwidth usage. A grid appears, containing hours of the day (columns) and days of the week (rows). Each horizontal row identifies a day of the week, with Sunday at the top. The first time period (left edge of the grid) is 12 a.m. (midnight). Each square on the grid represents one hour. Configure the schedule as follows,
i.Specify Active (shown in dark blue) and Inactive (shown in light blue) periods on the schedule. Active and inactive periods refer to the times of day when network activity is higher or lower. Generally speaking, an inactive period might be the middle of the night when there is less network traffic. An active period might be 9 a.m. to 5 p.m. Monday to Friday.
ii.Set the bandwidth for both Active and Inactive periods as follows,
- No limit: Select to indicate there should be no limit during the Active/Inactive periods.
- Limit to: Select to enter a value of Kbps to limit the bandwidth to during Active/Inactive periods.
Limiting TurboRestore Appliance (TRA) bandwidth
The procedure for limiting the bandwidth on a TRA is the same as that for limiting the offsite Vault bandwidth described above.
- If required, set up bandwidth limiting for the TRA. If not required then proceed to Step 7.
- Click Save.
