
Removing a LiveVault agent
To avoid further billing and to eliminate server status emails from being sent, you must uninstall the agent software and remove your computers from the LiveVault Portal. To prevent accidental deletion, you must first uninstall the agent software from the computer before you can delete it.
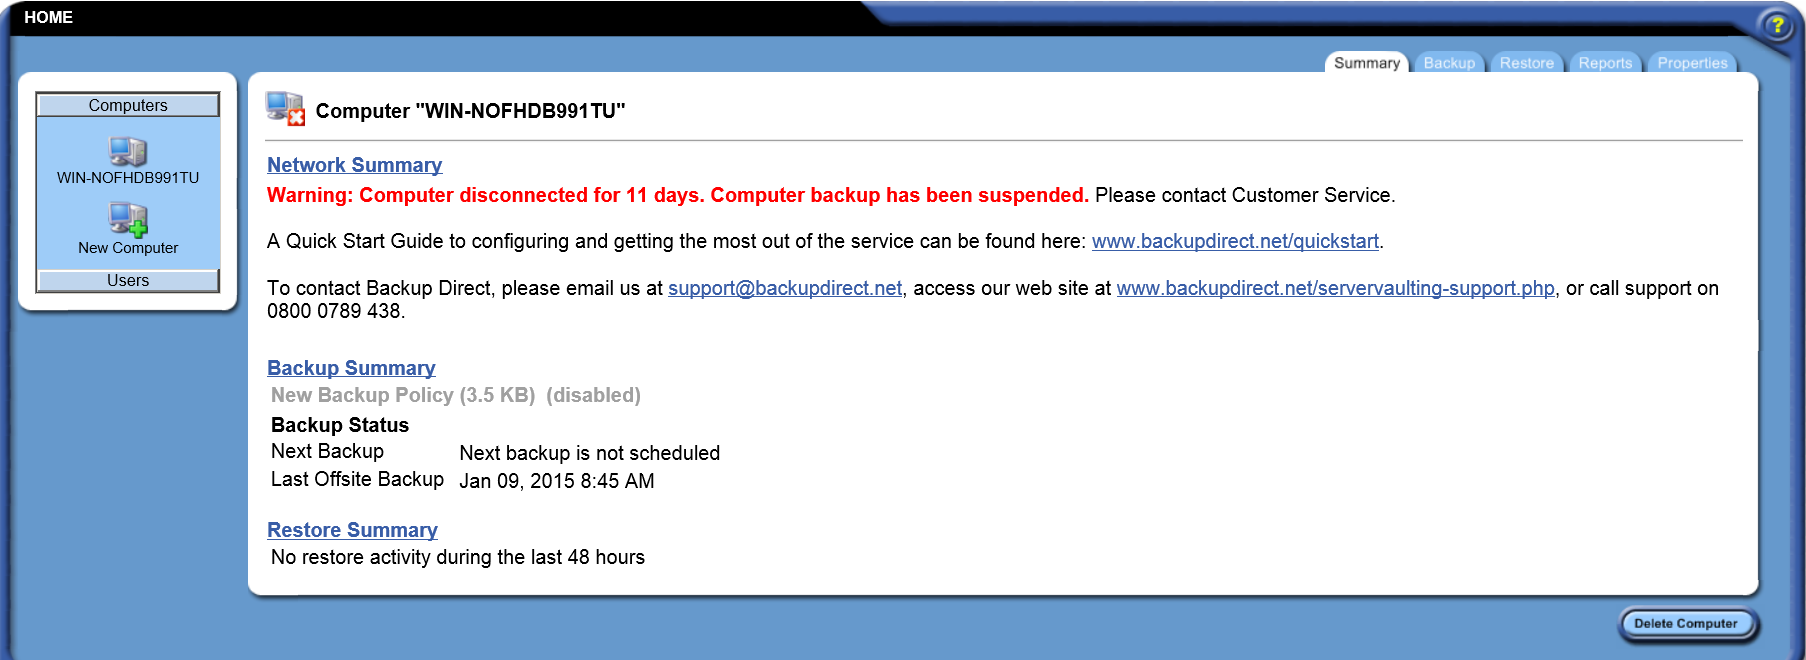
When you delete a computer, you also delete all historic backed up information for that computer. Therefore, do not delete a computer if you want to have access to the computer's backup information for future restore operations. Instead, you may disable the computer using Suspend Backup. Note that suspending backup for a computer will not prevent you from being billed for LiveVault Portal services.
This article describes the procedures to:
Removing a LiveVault agent
Uninstalling the LiveVault agent software from the computer
The procedure to remove the LiveVault agent software from a server may differ slightly depending on the version of Windows or Linux. Administrator permission may be required. If you're prompted for an administrator password or confirmation, type the password or provide confirmation.
Note:
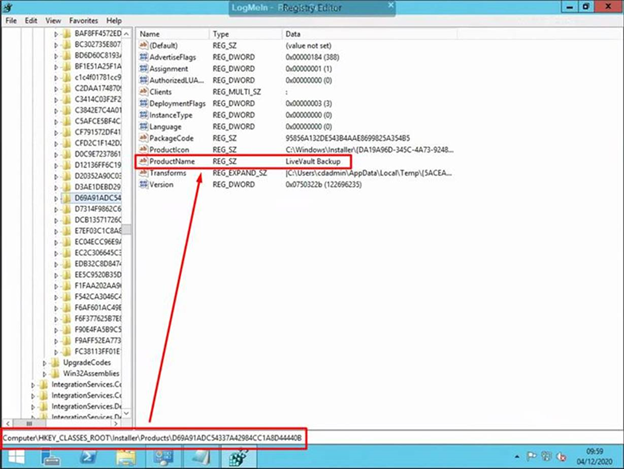
If you are unable to install, uninstall or update the LiveVault agent, simply delete the following Registry Key. The registry path is:
HKEY_CLASSES_ROOT\Installer\Products\. Search for LiveVault, and then delete the containing folder.
To remove the LiveVault agent software from a server, follow the procedure below:
Windows
To remove the LiveVault agent software from a Windows computer,
- Go to the Windows Start menu,
- Select Control Panel.
- Select Add or Remove Programs, or Uninstall Programs, depending on your version of Windows.
- Select the LiveVault Backup program and click Remove, or Uninstall as appropriate.
- Select Yes when asked to remove all registration and configuration information from the computer.
- After removing the program, delete the Backup Engine directory, which you specified when adding the computer.
- Delete the \Program Files\Autonomy if it exists.
Linux
To remove the LiveVault agent software from a Linux computer,
- Log in as root on the computer.
- Run the following script to uninstall the service software:
cd <install_dir>
sh uninstall.sh
- The uninstall script deletes all software that was installed by LiveVault. The system prompts you if you want to remove all registration and configuration information (located in <data_dir>) in addition to the software.
- When LiveVault has been uninstalled, the following message is displayed:
UnInstallation complete.
Deleting a computer from the LiveVault portal
Deleting a computer removes it from the LiveVault portal and destroys all backed-up data and configuration information for the computer.
Caution:
When you delete a computer, you also delete all historic backed up information for that computer. Do not delete a computer if you want access to any historic backed up information. Instead, disable the computer, as described later in this article, in Suspend backup for an entire computer.
To delete a computer, proceed as follows,
- Follow the instructions earlier in this article to uninstall the agent software. (See Uninstalling the LiveVault agent from the computer).
- In the navigation pane, select the name of the computer you want to delete.
- The Summary tab for the computer opens.
- Click Delete.
Note:
The Delete button is not available if the agent software is still on the computer.
The DELETE COMPUTER page opens.

- Click Delete.
The computer is deleted from the LiveVault portal. The screen returns to the HOME Welcome page. Note that the deleted computer is no longer visible in the left hand navigation pane.
Retiring a computer
The procedure to retire a computer depends on whether the computer is disconnected with no backup policy, or connected. These situations are described below.
Computer disconnected, with no backup policy
If the agent computer is disconnected and there is no backup policy associated with it, you can simply click the Delete button, which is located at the bottom corner of most pages.
The computer is deleted from the LiveVault portal. The screen returns to the HOME Welcome page. Note that the deleted computer is no longer visible in the left hand navigation pane.
Computer connected
If the agent computer is connected, then proceed as follows,
- Uninstall the agent software from the computer you want to delete.
- In the LiveVault portal, select the computer to be deleted.
The Summary tab for the computer opens.
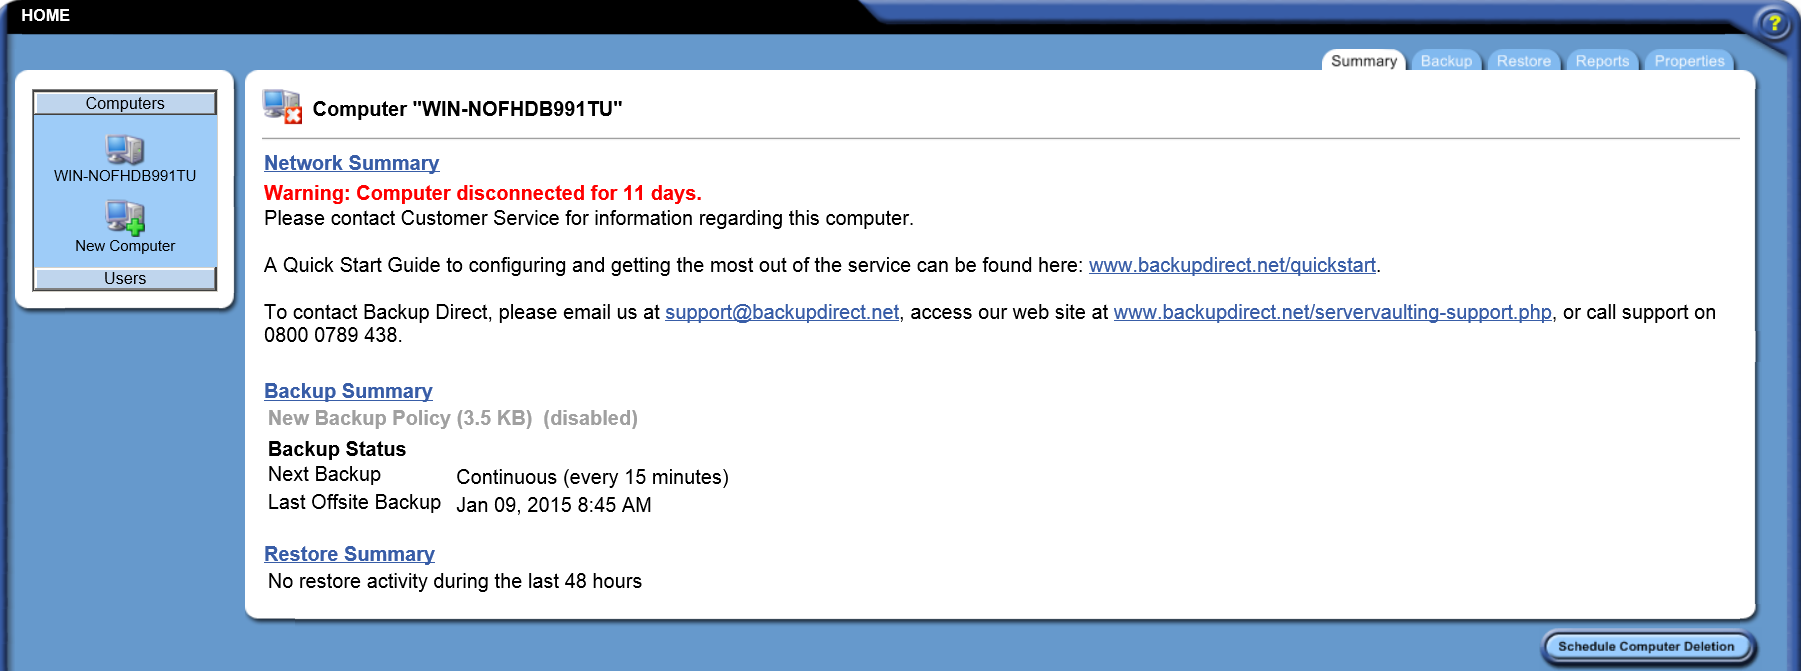
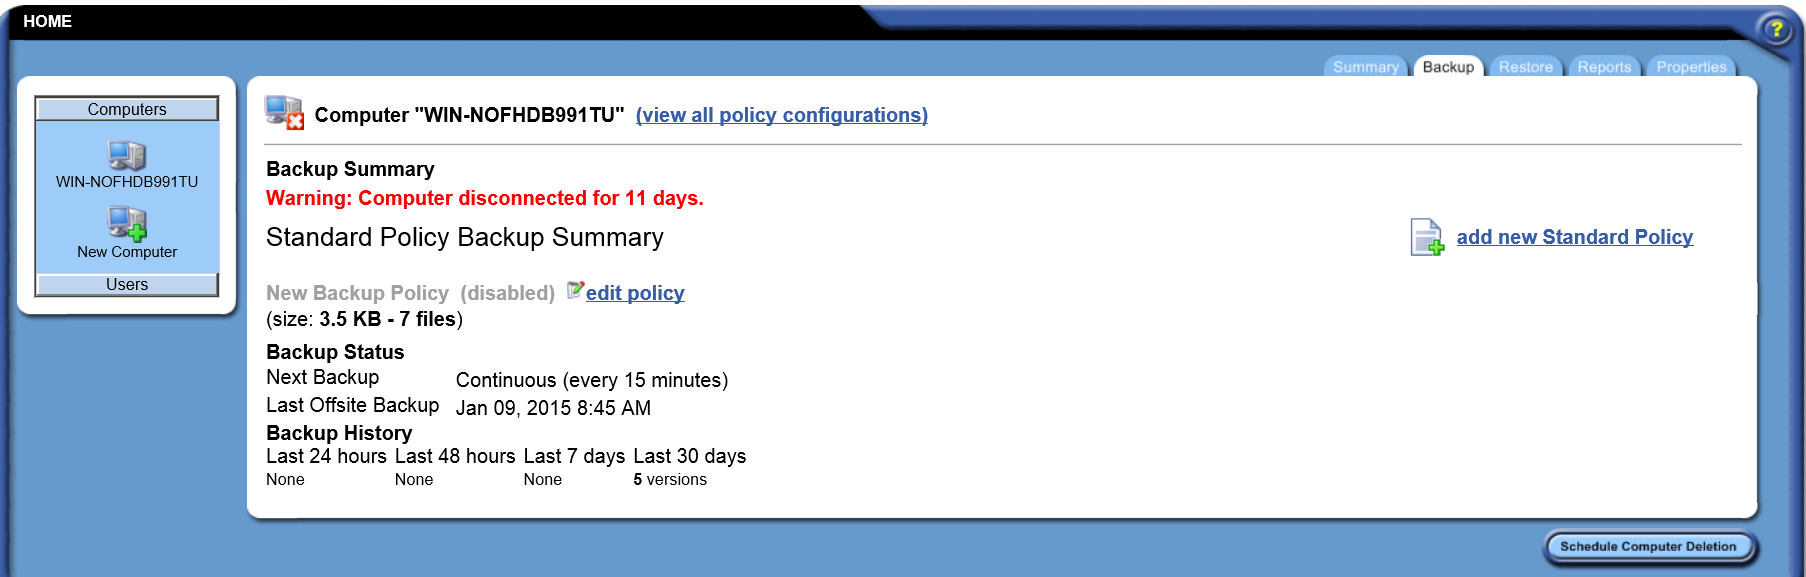
- On the Summary tab, in the bottom right hand corner, click Schedule Computer Deletion.
The Delete Computer page opens.

- Select a date from the calendar, and click Save.
You can cancel the scheduled deletion at any time before it occurs by clicking Cancel Computer Deletion on the Summary page.
Suspending backup
You can suspend backup for an entire computer, which suspends backup for all policies on the computer. Suspend backup for an entire computer instead of deleting it if you want to have access to that computer's backup information for future restore operations.
Suspending backup for a computer will not prevent you from being billed for LiveVault Portal services. To avoid further billing and to eliminate server status emails from being sent you, you must uninstall the agent software and delete your computer from LiveVault Portal.
Suspend backup for an entire computer
To suspend backup for an entire computer,
- In the LiveVault portal left hand navigation pane, select the computer for which to suspend backup.
The Summary tab for the computer opens.
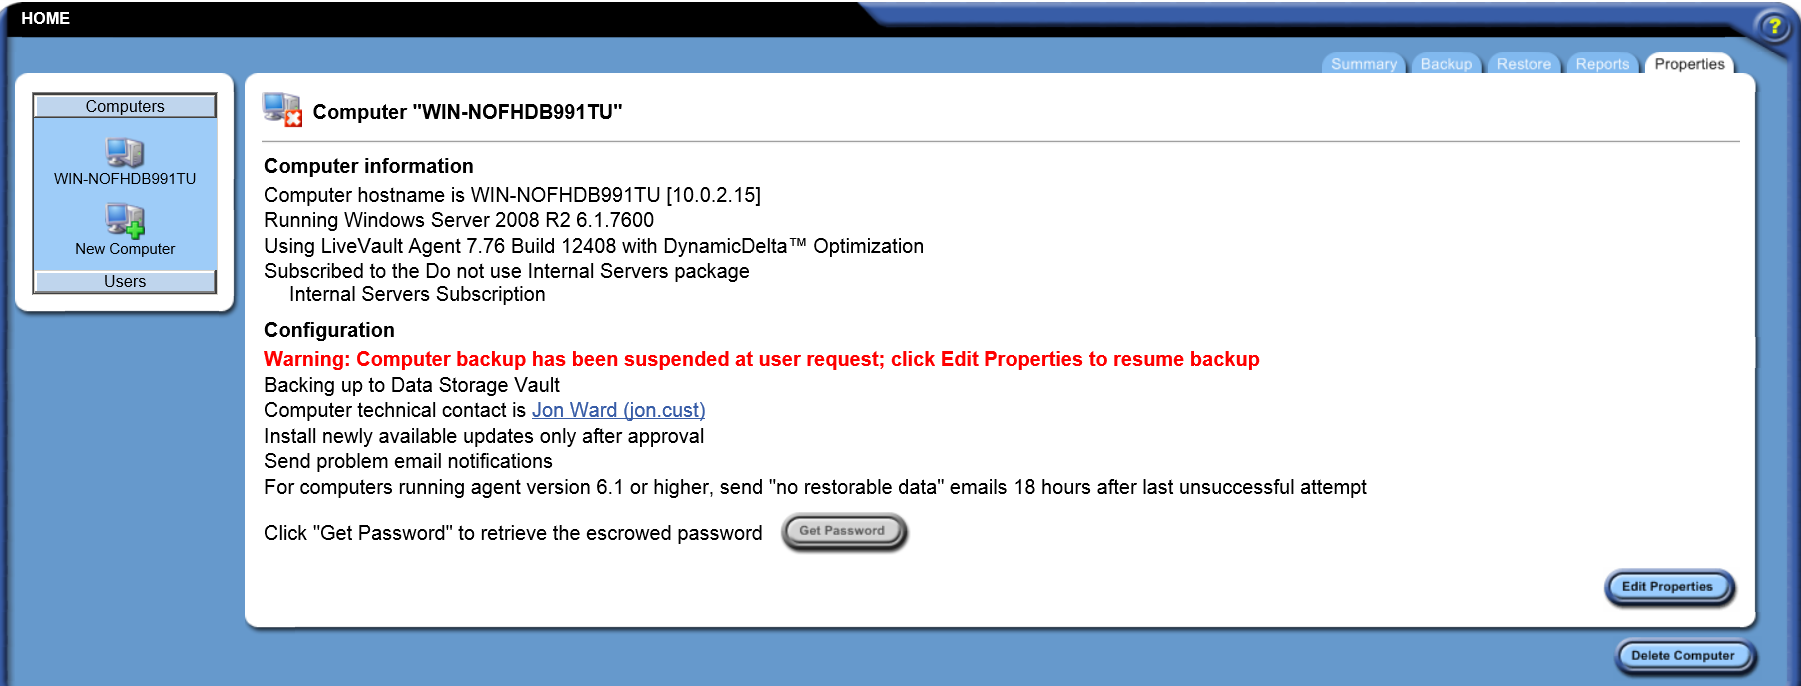
- Select the Properties tab.
The Properties tab opens.
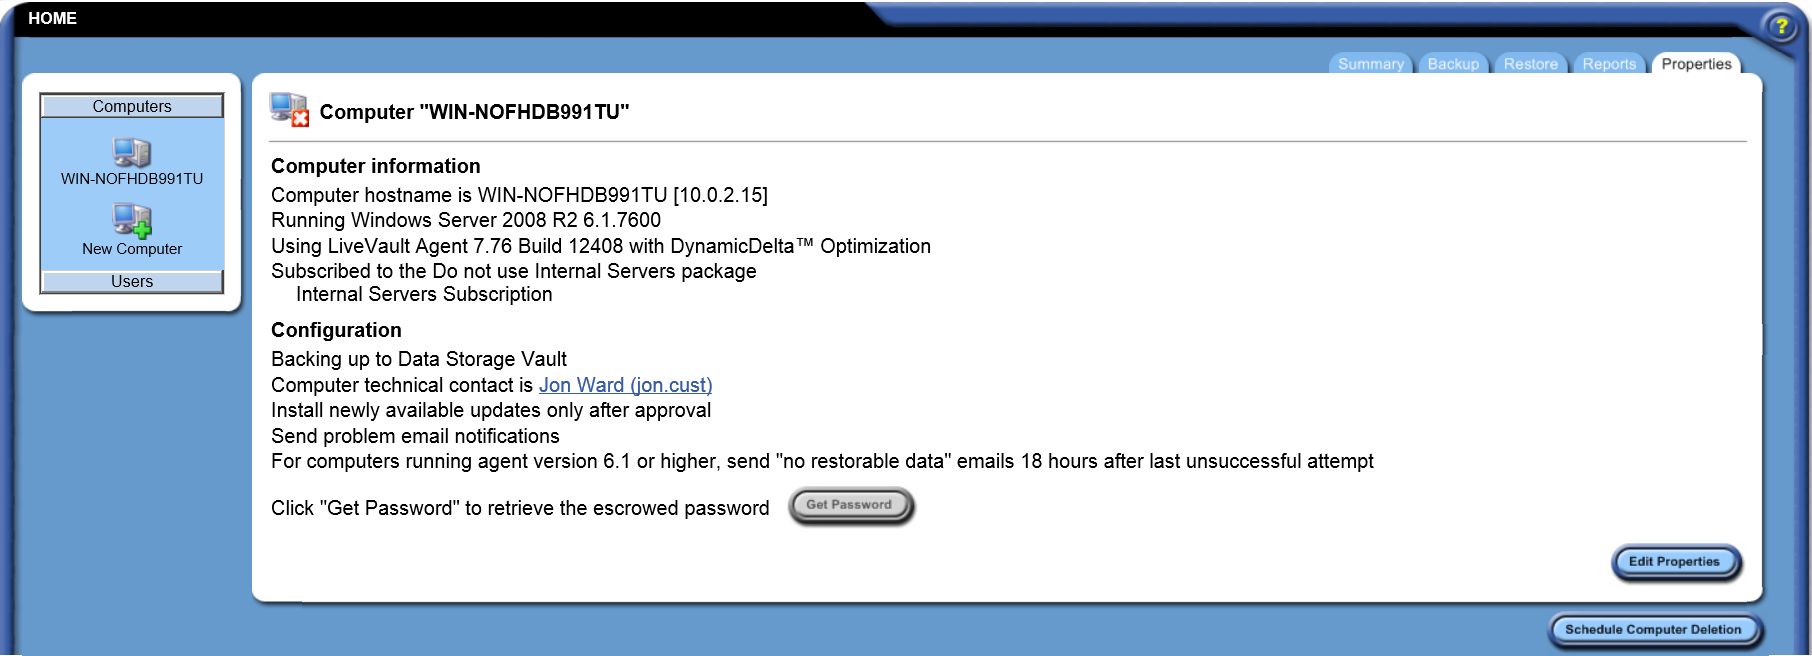
- Click the Edit Properties button.
The Edit computer page opens.
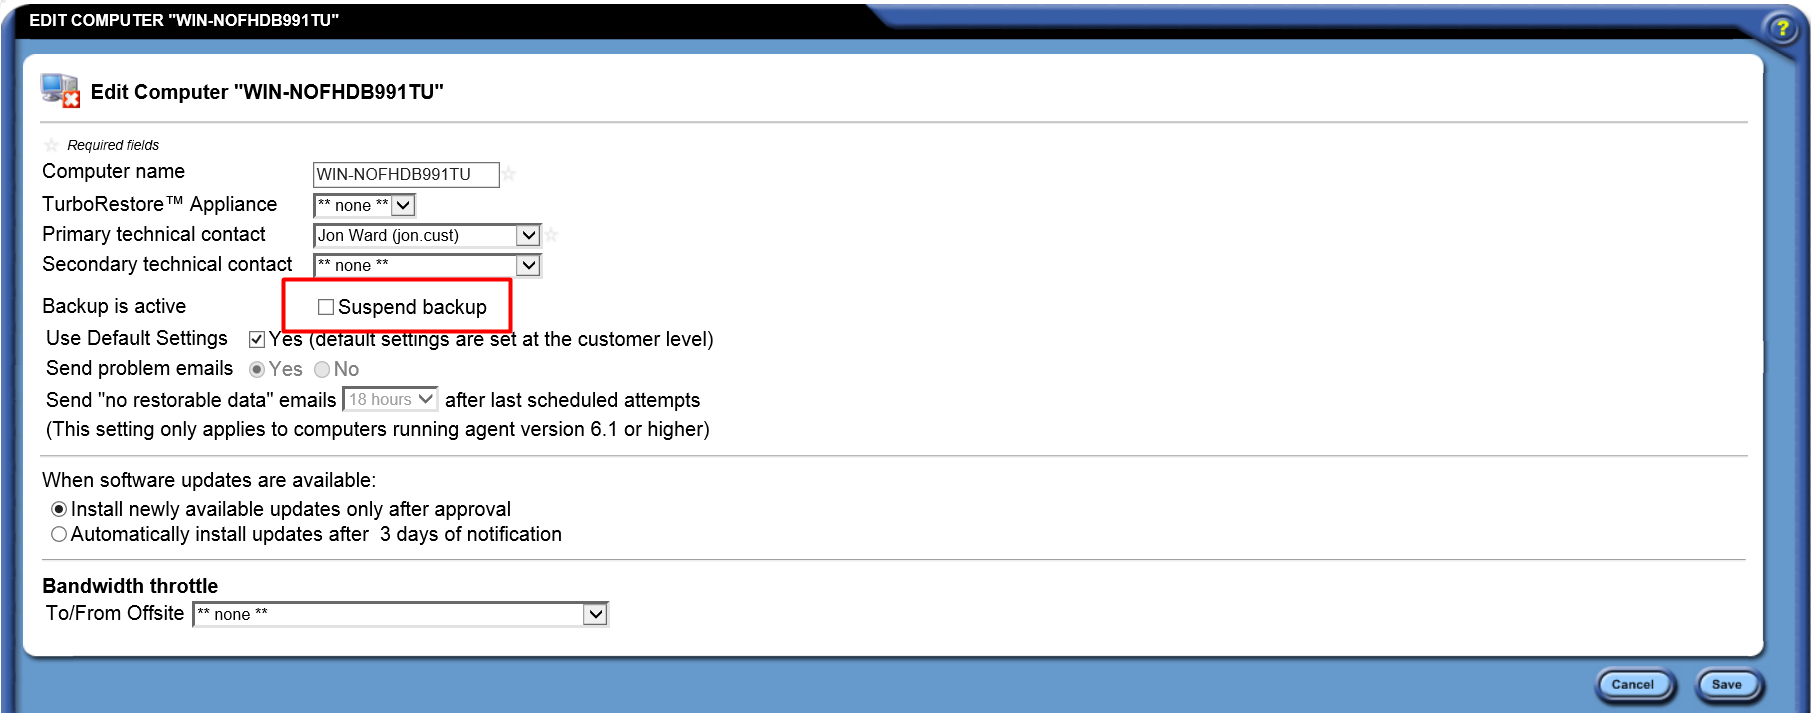
- Tick the Suspend Backup checkbox.
- Click Save.
This suspends backup for all policies on the computer.
Resume backup for a computer
To resume backing up a computer,
- In the LiveVault portal left hand navigation pane, select the computer for which to resume backup.
The Summary tab for the computer opens.
- Select the Properties tab.
The Properties tab opens.
- Click Edit Properties.
The Edit Computer page opens.

- Tick the Resume Backup checkbox.
- Click Save.
Backup resumes for all policies on the computer.
Suspend backup for an individual policy
You can also suspend backup for an individual backup policy. Suspending a backup policy stops that policy from running until you or another user enables it. Suspending backup does not affect restores.
To suspend backup for an individual policy
- In the LiveVault portal left hand navigation pane, select the computer for which to disable an individual backup policy.
- Select the Backup tab.
The Backup tab opens.
- Click edit policy for the selected backup policy.
The Backup Configuration page opens.
- Select the Options tab.
The Options tab opens.
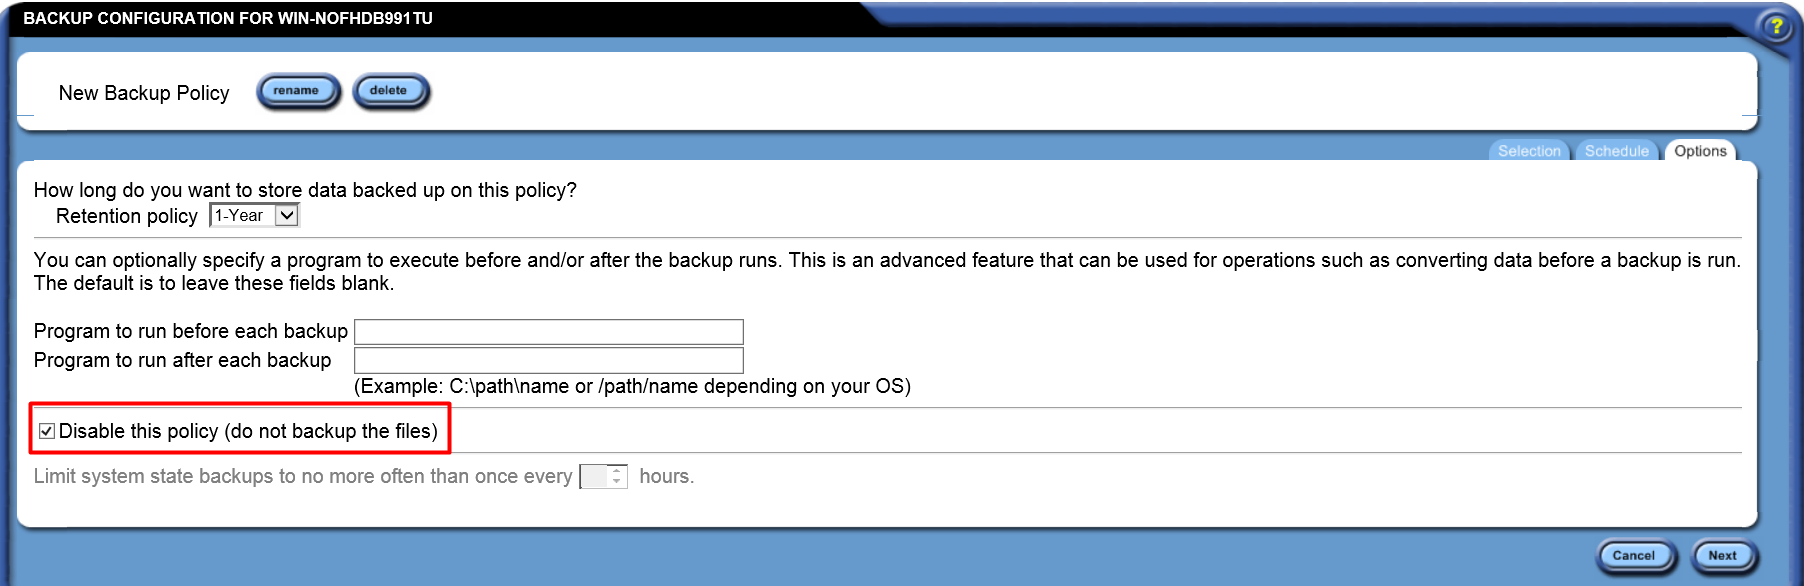
- Tick the Disable this policy (do not backup the files) check box.
- Click Next.
The Backup Confirmation page opens.
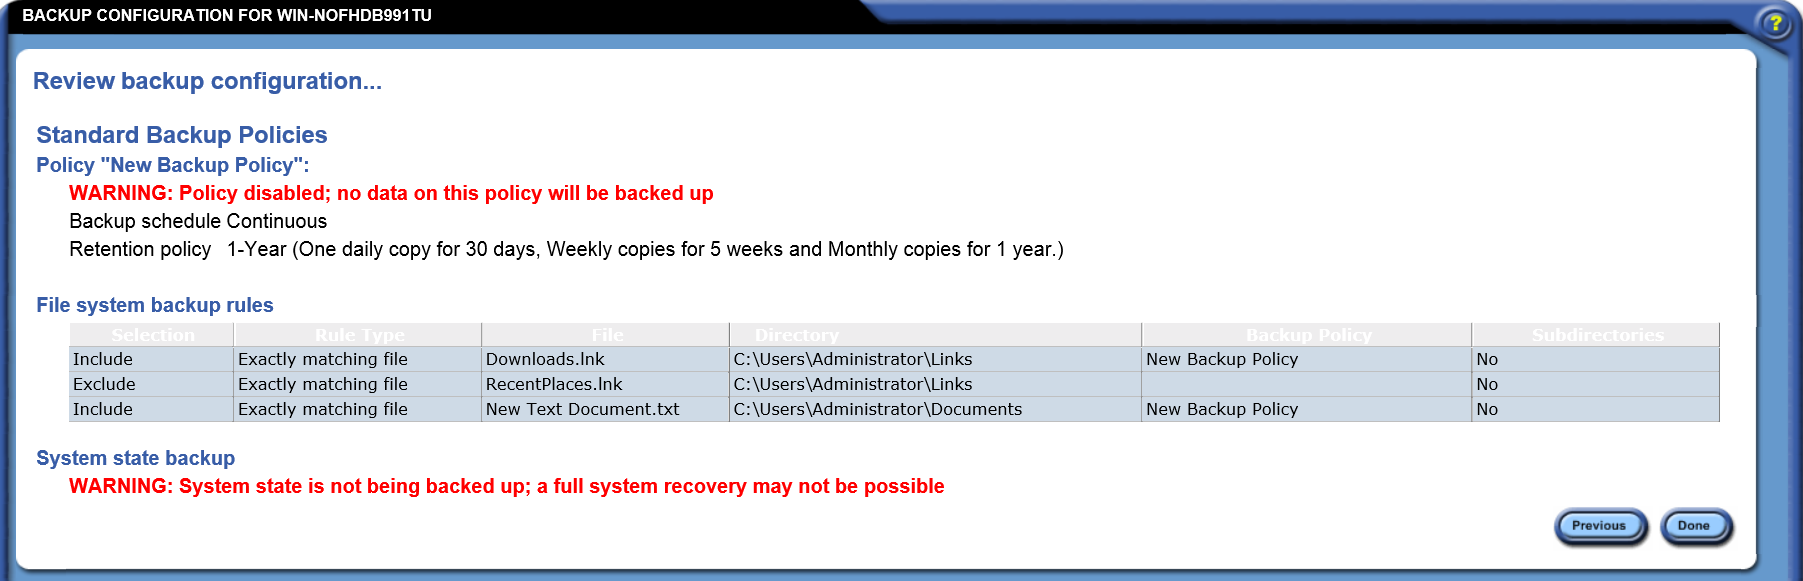
- Click Done.
Backup of the selected backup policy is disabled.
