
Creating and modifying a distribution group in Office 365
A distribution group, or distribution list, is a collection of two or more people that appears in your organisation's address book. When an email message is sent to a distribution group, it goes to all members of the group. An Office 365 administrator can create and manage distribution groups for an organisation.
Internal users (users that have a mailbox in your organisation) and external users (people that don't have a mailbox in you organisation) can be added as members of a distribution group. However, only external users that have been added to your organisation's address book (also known as shared contacts), can be members of a group.
Why use distribution groups?
- They make it easy to send an email message to lots of people at once.
- They help people inside and outside your organisation communicate and collaborate more easily. You can specify which users in your organisation can send email to a distribution group. You can also specify whether users outside of your organisation send email to a distribution group.
- If you or someone in your organisation sends email to a lot of users at once, you can send to a distribution group so you don't exceed the maximum number of recipients per message.
This article describes how an Office 365 administrator may create a distribution group in Office 365, and then modify an existing distribution group.
The article contains the following sections:
Signing in to your Office 365 account
To sign in to your Office 365 account,
- Open a web browser and, in the Address box, enter the following URL, https://www.office.com/.
The Office 365 sign-in page opens.
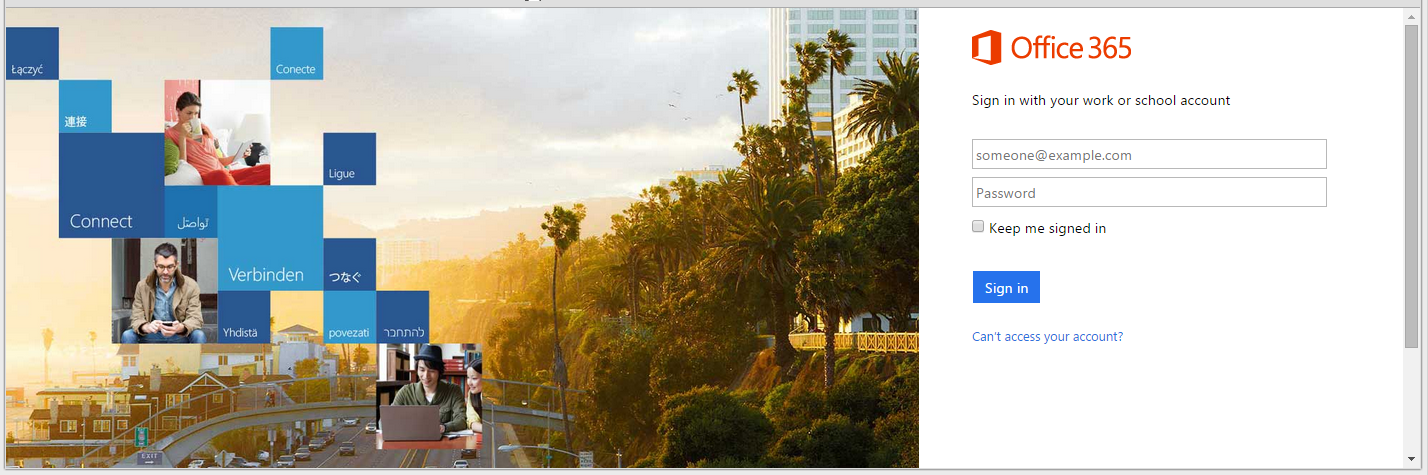
- Enter your username and password.
- Click Sign in.
- The Office 365 admin center opens on the DASHBOARD.
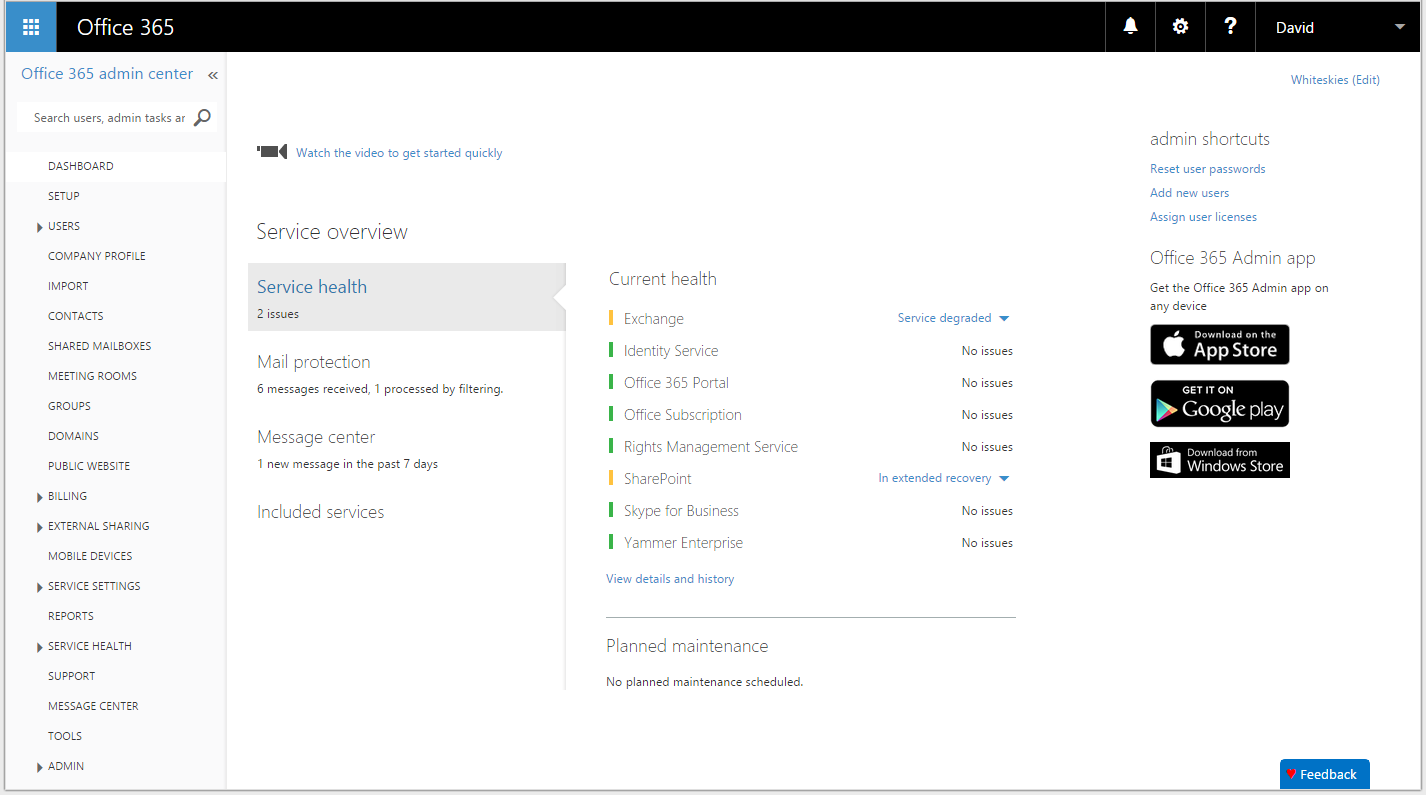
You are now signed in to your Office 365 account and, provided you have administrator privileges, you may proceed to create a distribution group.
Creating a distribution group
To create a distribution group in Office 365, proceed as follows.
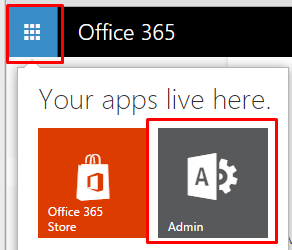
- From your Office 365 dashboard, click the app launcher icon, and then click Admin.
From the left hand navigation pane, click GROUPS.
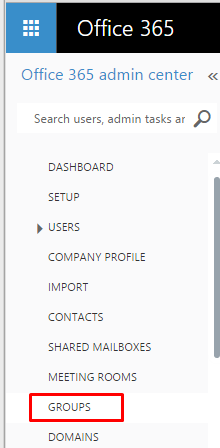
The GROUPS page opens.
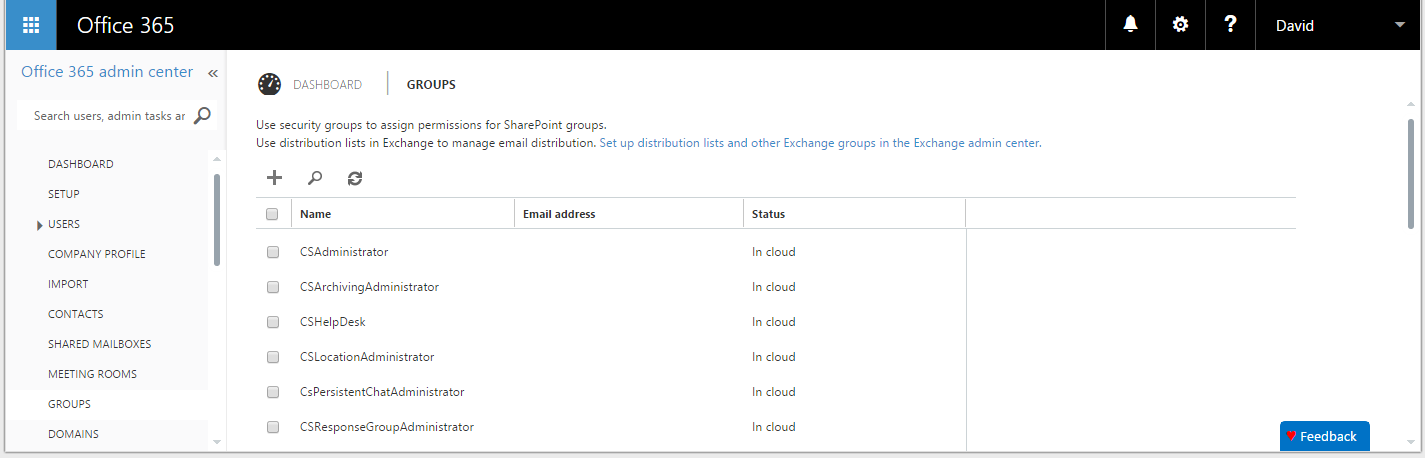
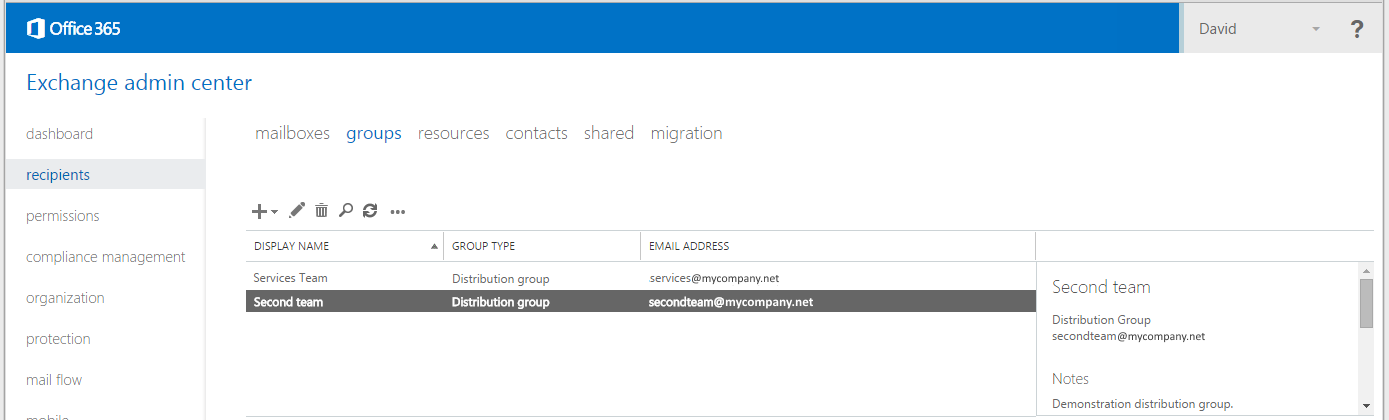
- On the GROUPS page, click the, Set up distribution lists and other Exchange groups in the Exchange admin center link.

The Exchange admin center opens, on the groups page, in another window.
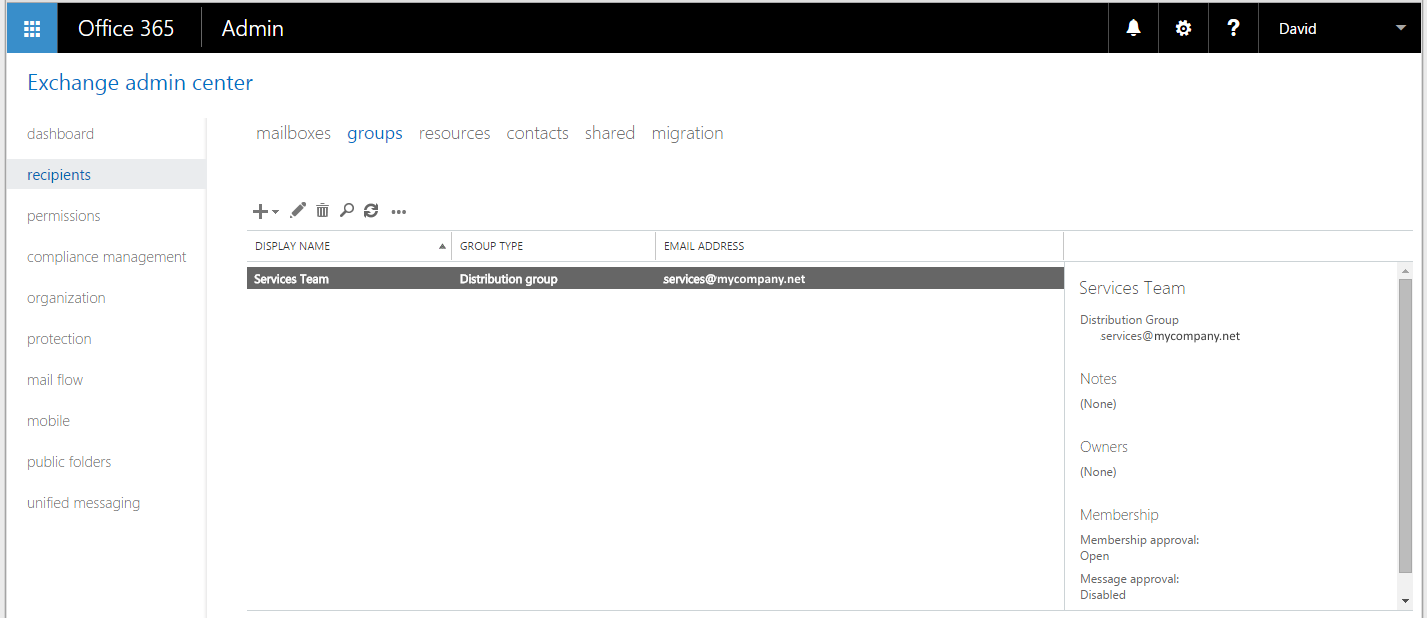
- In the Exchange admin center, click the New icon, then select Distribution group.
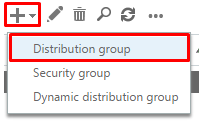
Note:
The options, Security group and, Dynamic distribution group are not covered by this knowledge article.
Security group -Security groups are used to control access to shared resources. Using security groups, you can assign permissions to security groups in the Active Directory or on resources. Security groups can be mail enabled, if there is new information in the folder that the security group is securing, then everyone in that security group can be notified by email.
Dynamic distribution group - Unlike regular distribution groups that contain a defined set of members, the membership list for a dynamic distribution group is calculated each time a message is sent to the group, based on the filters and conditions that you define. When an email message is sent to a dynamic distribution group, it's delivered to all recipients in the organization that match the criteria defined for that group.
The new distribution group page opens.
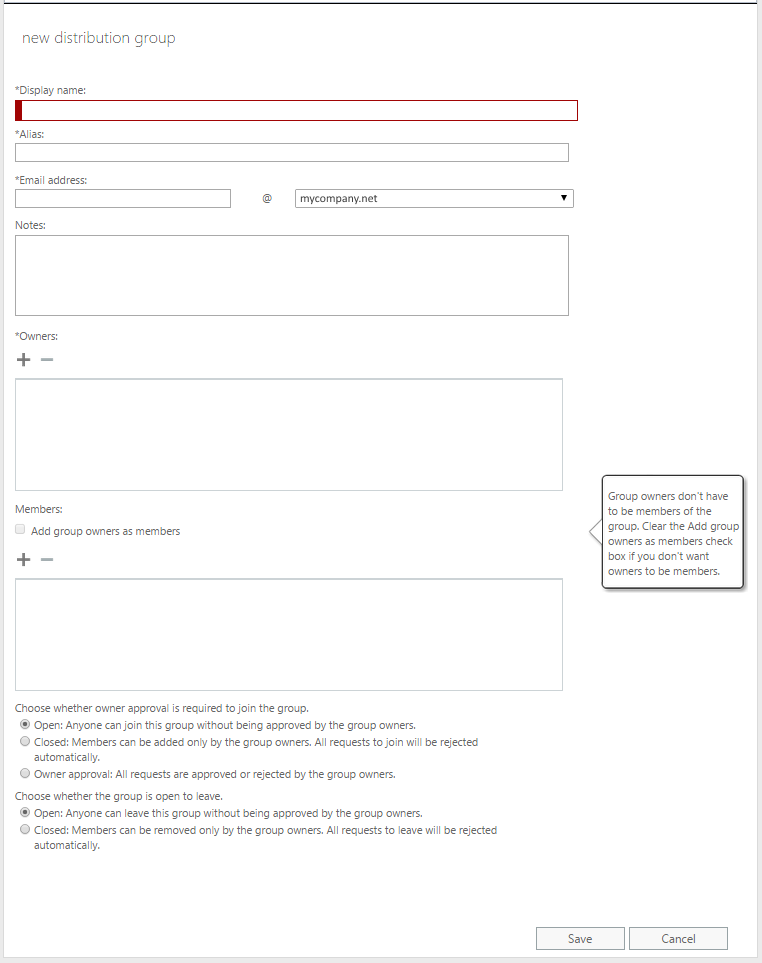
- Complete entries on the new distribution group page, as follows:
- Display name – This is the name of your new distribution group. It appears in the address book, on the To: lines in email, and on the GROUPS page. It's required and should be user-friendly so people recognize what it is.
- Alias – The alias is used to generate the email address of the group. Enter the same name as in the first part of the email address.
- Email address – When you click in the first box, it is auto-filled by default to be the same as the alias address. In the second box, select the second part of the email address from the drop-down options. Emails sent to this address are forwarded to all members of the group.
- Notes – An optional field. It is useful to write a description so people know what this distribution group is used for. This will show up on the group's contact card and in the address book.
- Owners – Distribution groups must have at least one owner who is responsible for managing the group. By default, the admin who creates a group is automatically added as the owner of the group. To add other owners, click the Add icon
 , and select another owner from the list shown.
Note:
People listed as owners of a group can make changes to the group in Outlook Web App. Shared contacts can't be owners of a group. After you create a distribution group, you can change the list of owners if required.
- Members
i. Tick the checkbox, Add group owners as members, to automatically add the identified owners as members of the distribution group.
ii. To add other members, click the Add icon, and select another member from the list shown.
Note:
You can add internal users (users with mailboxes in your organisation) and external users, to a distribution group. Only external users that have been added to your organisation's address book (also known as shared contacts), can be members of a distribution group.
- Choose whether owner approval is required to join the group - Click the appropriate radio button:
- Open – Anyone can join the group, without owner approval.
- Closed – All requests to join the group are automatically rejected.
- Owner approval – All requests are approved or rejected by group owner(s).
- Choose whether the group is open to leave - Click the appropriate radio button:
i. Open – Anyone can leave this group, without owner approval.
ii. Closed - All requests to leave the group are automatically rejected.
5. Click Save.
The Exchange admin center re-appears, with the newly created distribution group listed.
Modifying a distribution group
Changes to a distribution group may be made by an Office 365 administrator using the Office 365 admin center. The administrator must first locate the required distribution group, and then implement required changes.
Note:
Changes to existing distribution groups may also be made by the distribution group owner(s), using Outlook Web App settings. This method is beyond the scope of this article.
Locating the required distribution group
To locate the distribution group that requires changing, proceed as follows.
- Sign in to Office 365. If required, refer to, Signing in to your Office 365 account.
- From your Office 365 dashboard, click the app launcher icon, and then click Admin.
From the left hand navigation pane, click GROUPS.
The GROUPS page opens.
- Click the Search icon.
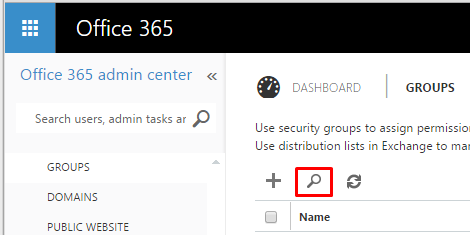
A Search textbox appears.
- Type in the name, or part name, of the required distribution group, and press Return.
The search results are listed.

- Tick the checkbox next to the required distribution group.
The right hand pane now shows Distribution list details.
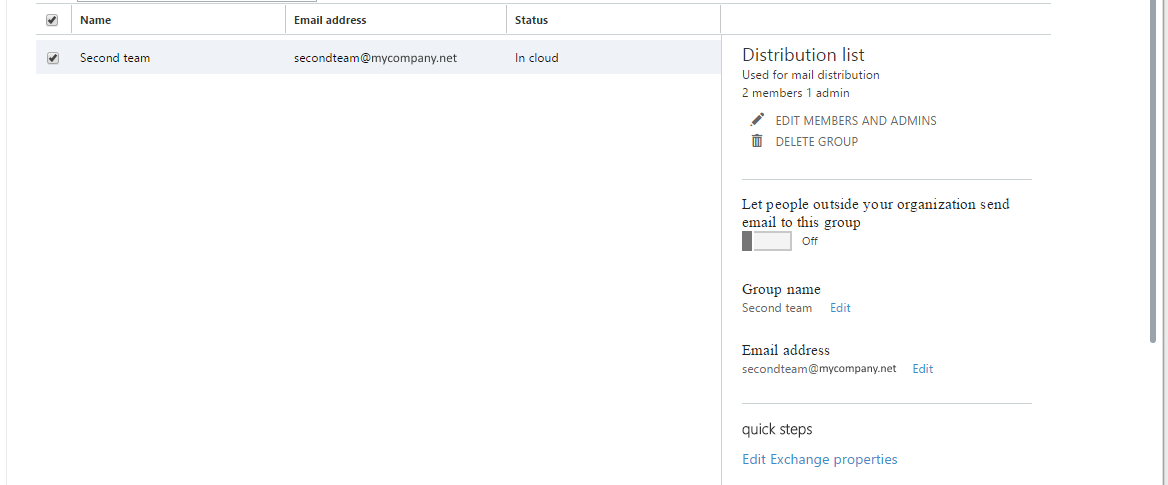
Modifying a distribution group
A distribution list may be modified by an Office 365 administrator after accessing the required Distribution list details page (see previous illustration).
The following sections describe how to modify distribution group attributes:
- Editing members and admins
- Adding members and admins
- Deleting a distribution group
- Letting people outside the organization send email to this group
- Editing the group name
- Editing the group email address
- Editing Exchange properties for the group
Editing members and admins
To edit existing member or admin details, then,
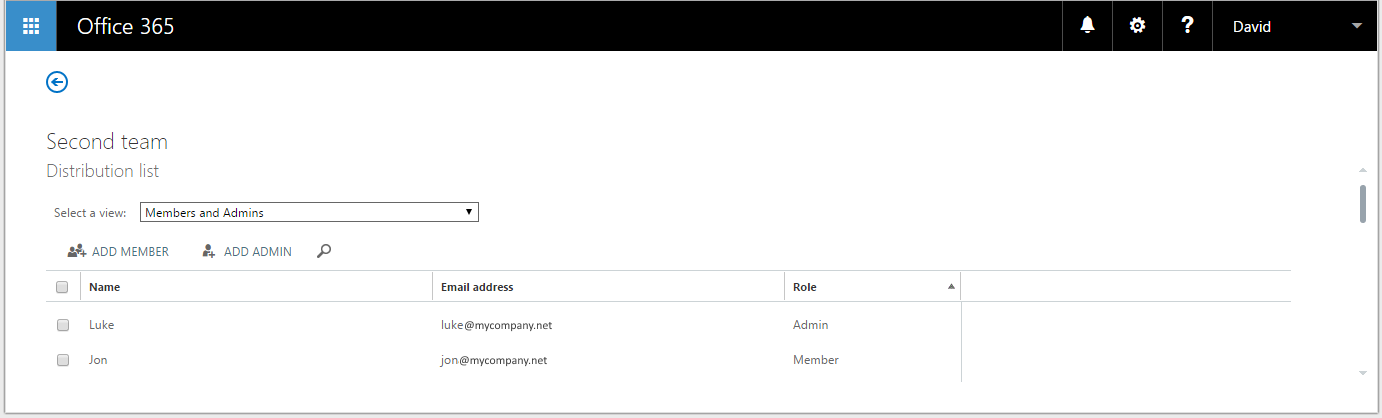
- From the right hand pane, click, EDIT MEMBERS AND ADMINS.
The distribution group details page opens, showing a list of members and admins.
Note:
To view a list of admins only, click the Select a view drop-down menu, and select Admins from the list.
- Tick the checkbox next to the required member or admin.
The following options appear when a member checkbox is ticked.

Note:
If an Admin checkbox is ticked then the option, GIVE ADMIN STATUS, is replaced with, REMOVE ADMIN STATUS.
- To give the member Admin status, click, GIVE ADMIN STATUS.
After a short wait, the member's role changes to Admin.
- To remove a member from the distribution group,
- Click, REMOVE FROM GROUP.
A warning message appears.
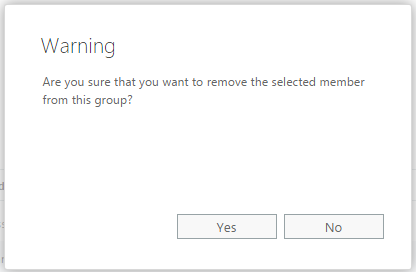
- Click Yes.
After a short wait, the member is removed from the distribution group.
Adding members and admins
To add a member or an admin to the distribution group, then,
- Click ADD MEMBER (or click ADD ADMIN, as required).
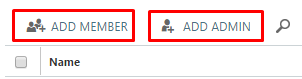
A new window opens, containing a search box.
Note:
If ADD ADMIN was clicked in Step 1, instead of ADD MEMBER, then a similar search box would open, but the search box title, Add members to the group… would be replaced with Add new admin to the group…
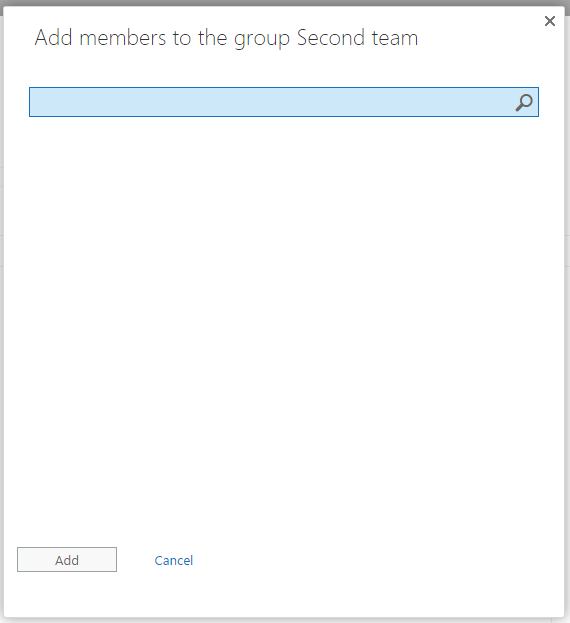
- In the search box, enter the name, or part name, of the required new member.
The search results appear beneath the search box.
- Click on the required new member name.
The new member details appear in a selected list.
- Repeat Step 2 and Step 3 for each new member required to join the distribution group.
- Click Add.
The new member(s) is added to the distribution list. A short confirmation message appears.
- Click Close to close the confirmation message.
Delete a distribution group
To delete a distribution group, proceed as follows
- From the Distribution list details page, right hand pane, click, DELETE GROUP.
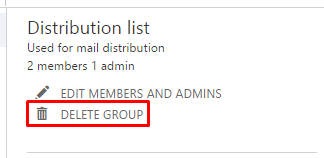
A warning message appears.
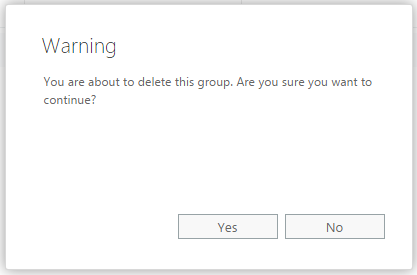
- Click Yes.
After a short wait, the distribution group is deleted, and can no longer be used.
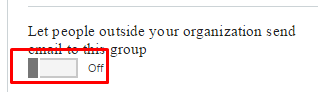
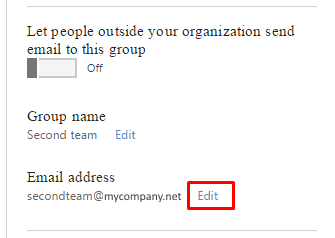
Let people outside the organization send email to this group
- To let people outside the organization send email to this group, simply click the on/off switch to On.
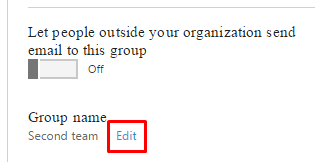
Edit group name
To edit the distribution group name, then
- From the Distribution list details page, right hand pane, Group name section, click, Edit.
The Edit group name page appears.
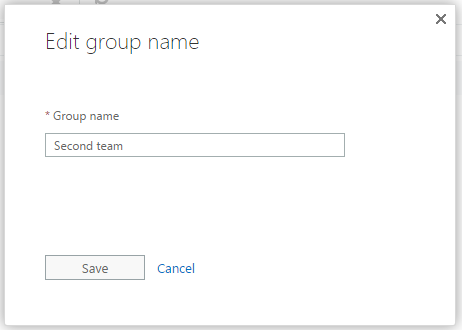
- In the Group name text box, modify the name of the distribution group as required.
- Click Save.
The distribution group name is changed.
Edit email address
To edit the distribution group email address, then
- From the Distribution list details page, right hand pane, Email address section, click, Edit.
The Edit email address page appears.
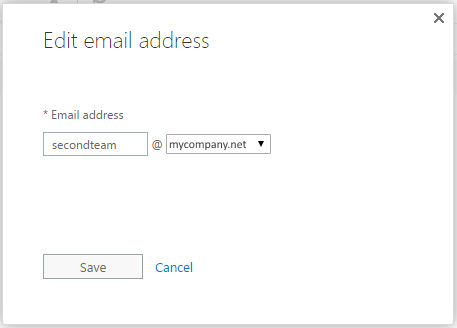
- Modify the email address as required.
Note:
The second part of the email address must be selected from the drop-down options.
Emails sent to this address are forwarded to all members of the group.
- Click Save.
The email address is changed.
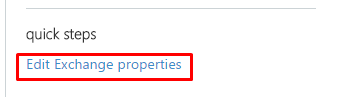
Edit Exchange properties for the group
Exchange properties enable comprehensive changes to be made to the distribution group attributes. These changes are generally as previously described in Creating a distribution group, so this section provides only a short summary.
To edit the Exchange properties for the distribution group, then,
- From the Distribution list details page, right hand pane, quick steps section, click, Edit Exchange properties.
The Exchange properties window opens on the general page.
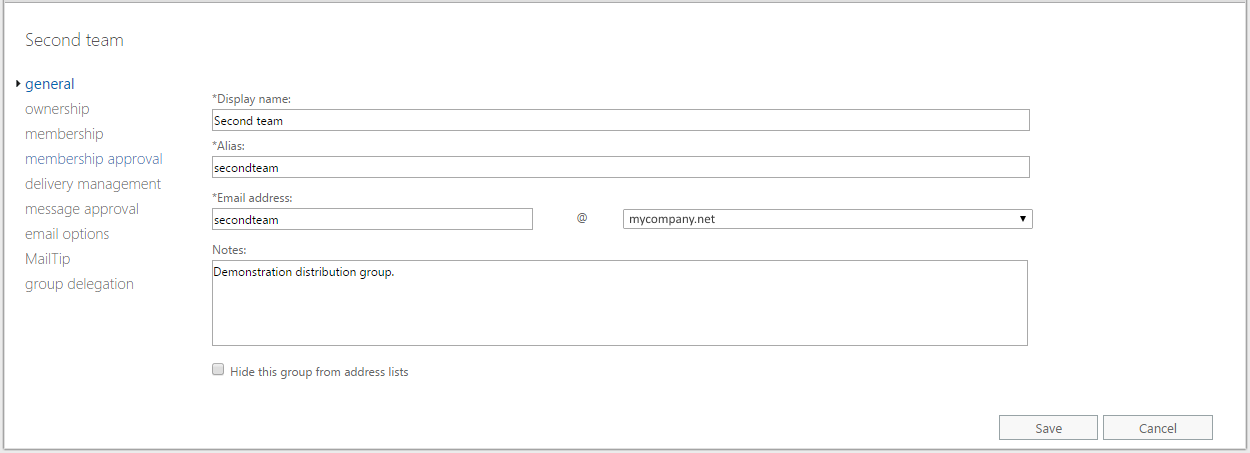
From the General page, you may modify; Display name, Alias, Email address, and Notes.
Further Exchange properties option pages are accessible by clicking the headings in the left hand navigation pane. These are:
- Ownership – Add, or remove, owners.
- Membership – Add, or remove, members.
- Membership approval – Choose whether owner approval is required to join, or leave, the group.
- Delivery management – Place restrictions on who can send messages to the distribution group.
- Message approval – Identify a moderator who approves messages to be sent to the group. Identify individuals who can send messages to the group without moderator approval.
- Email options – Set a default reply address.
- MailTip – Create a MailTip, to display when people send email to this group.
- Group delegation – Set Send-As permissions, i.e. send an email directly from this group, or send an email on behalf of this group.
