
Sending email as, or on behalf of, a person or group (for Outlook on the web users)
You can send email as a person or group if you have been granted Send As permissions to that specific user's mailbox or group. You can send email on behalf of a person or group if you have been granted Send on Behalf permissions to that specific user's mailbox or group.
Permission to act on behalf of another user or group is commonly referred to as delegate access. The Send As permission is an example of a delegate access permission that can be granted to a user by an administrator. The Send on Behalf permission is another example of a delegate access permission that can be granted to a user by another user. With Send on Behalf permissions, a user may send emails that are marked as, "on behalf of" another user. This is not the same as Send As permissions, which allow emails to be sent as if they actually came from another user. Other delegate access permissions that can be granted to a user include the permission to open and manage another user's calendar and email.
Note:
This feature is only available if you're using Office 365 email or other Microsoft Exchange-based email.
This article describes how to send email as, or on behalf of, a person or group using Outlook on the web (previously known as Outlook Web App, or OWA). For information about how to send email as, or on behalf of, a person or group using Outlook, see, KB0011018, Sending email as, or on behalf of, a person or group (for Outlook users).
This article describes how to access Outlook on the web, and then use Outlook on the web to:
Prerequisites
The steps in this article assume that you have already been granted Send on Behalf permissions, or Send As permissions, to the other person's mailbox or group.
Accessing Outlook on the web
Outlook on the web is the web browser version of Outlook that is used by businesses and organisations. You can use Outlook on the web to access the email, contacts, and calendar in your Office 365 for business or other Microsoft Exchange-based email via a web browser. The web address you'll use to sign in to Outlook on the web depends on the type of account you have. For example, if you're using Office 365 for business, go to the Office 365 sign-in page.
Note:
Outlook on the web can only be used to access Office 365 for business and other accounts that are hosted on a server that's running Microsoft Exchange Server 2013. If your email address ends in @outlook.com, @hotmail.com, @live.com, or @msn.com, then you're using the free Outlook.com (formerly Hotmail.com) email service, and not Outlook on the web.
Signing in to your Outlook on the web account
To sign in to your Outlook on the web account, proceed as follows.
Note:
If you don't know your email address and password then contact the person who manages your email account to obtain these details before continuing.
- Open your web browser or, if it's already open, open a new window.
- Go to the sign-in page at Office 365 sign-in.

- Enter the full email address for your Office 365 for business, Office 365 Education, or other Exchange-based email (for example, someone@contoso.com).
Note:
If your email address is already visible on the Office 365 sign-in page, then simply click on the email address.
- If prompted, enter your password, then click Sign in.
You're now signed into your Outlook on the web account.
Sending a message as, or on behalf of, a person
To send a message as, or on behalf of, a person, proceed as follows.
- From your Outlook on the web account, click New above the folder list.

A new message form appears in the reading pane.
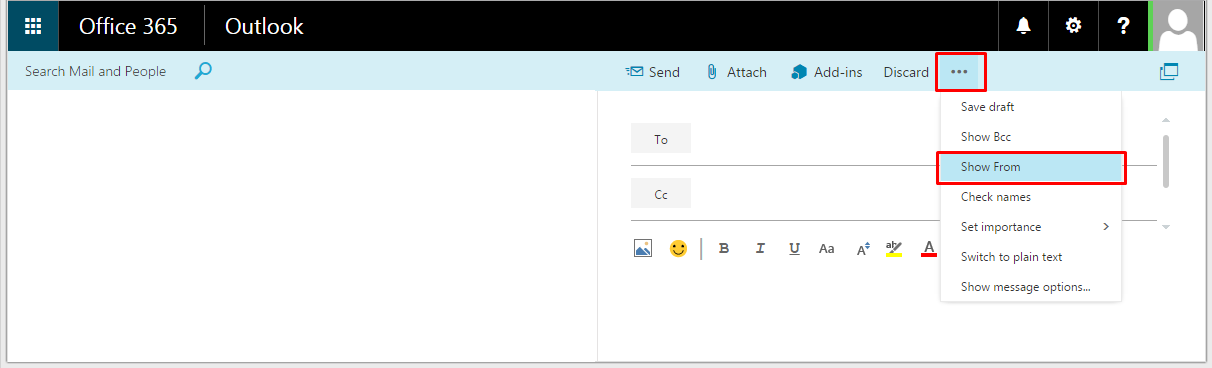
- In the blue ribbon menu above the reading pane, click the more options icon, and then click Show From.
- Select the email address that displays in the From field, and delete it.
- In the From field, start typing the name of the user for which you have permission to send email. The user's name should appear in a list beneath the text box.
- Select the user's name from the list.
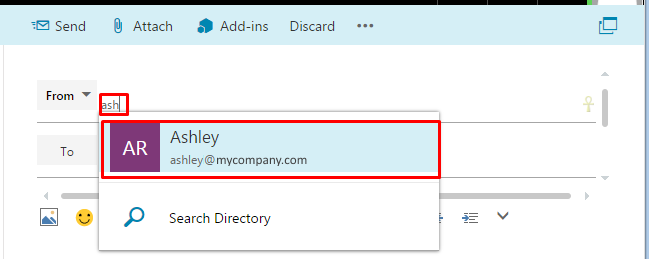
If you don't see the name of the person you want to send to, then click Search contact & directory to search the directory of your organisation.
- In the To field, add recipients then, in remaining fields add a subject and the contents of the message as required.
- In the blue ribbon menu above the reading pane, click, Send.
The recipient receives the email message sent on behalf of the user. For example, the From field on the received email is marked as:
From: David On Behalf Of Ashley.
Sending a message as, or on behalf of, a group
To send a message as, or on behalf of, a group, proceed as follows.
- From your Outlook on the web account, click New above the folder list.
A new message form appears in the reading pane.
- In the blue ribbon menu above the reading pane, click the more options icon, and then click Show From.
- Select the email address that displays in the From field, and delete it.
- In the From field, start typing the name of the group for which you have permission to send email. The group's name should appear in a list beneath the text box.
- Select the group name from the list.
If you don't see the name of the group you want to send to, then click Search contact & directory to search the directory of your organisation.
- In the To field, add recipients then, in remaining fields add a subject and the contents of the message as required.
- In the blue ribbon menu above the reading pane, click, Send.
The recipient receives the email message sent on behalf of the group. For example, the From field on the received email is marked as:
From: David On Behalf Of Support Team.
