
Editing Office 365 user details
This article is intended for use by Office 365 administrators.
An Office 365 administrator can edit user properties for everyone in the organisation that uses Office 365 services. Every user of Office 365 needs a license. When a new user is created, or user properties are edited, the administrator assigns licenses and sets permissions.
This article describes how to:
Accessing the Office 365 admin center
To access the Office 365 admin center, you must first sign in to your Office 365 account.
- Open a web browser and, in the Address box, enter the following URL, https://www.office.com/.
The Office 365 sign-in page opens.
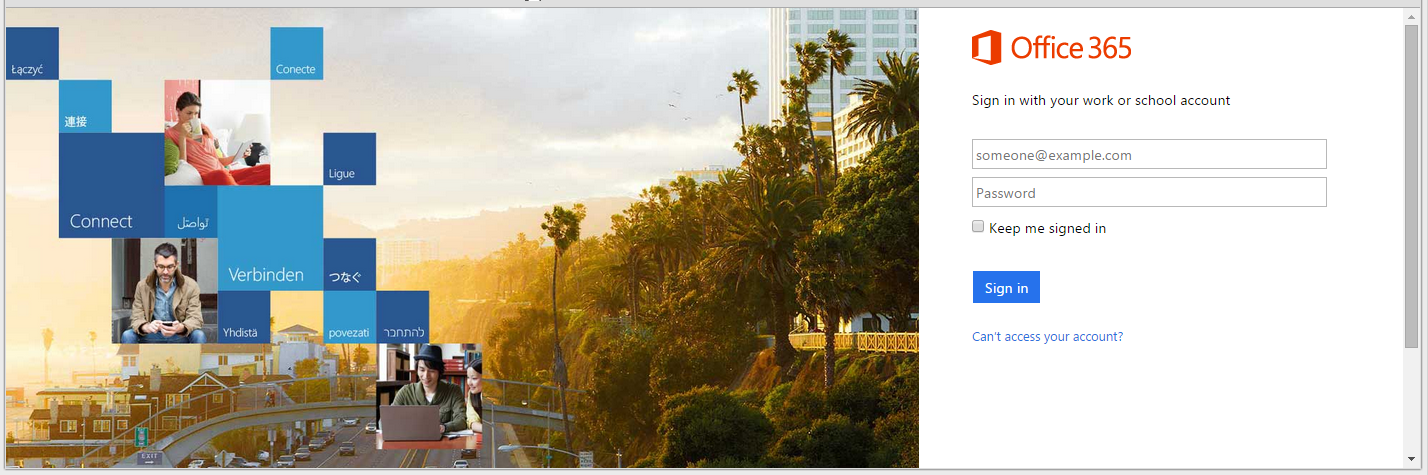
- Enter your username and password.
- Click Sign in.
- The Office 365, Outlook on the web application opens.

- Click the App Store icon in the top left hand corner of the screen.

- From the available apps shown, click the Admin tile.
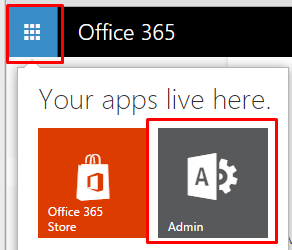
Note:
If you don't see an Admin tile then you don't have admin permissions. Please contact your site administrator, or Cloud Direct Technical Services (0800 368 1831, or TechServices@clouddirect.net), for assistance.
The Office 365 admin center opens.
You may now proceed to edit a user account.
Editing a single user
Note:
If the user that you are trying to edit is synchronised with your Active Directory service, then an error message appears. You'll be unable to edit the user using this procedure. To edit the user, use your local Active Directory management tools.
After signing in to your Office 365 account, then to edit a single user's information from the Office 365 admin center, proceed as follows.
- From the left hand navigation pane, click USERS, then click Active Users.
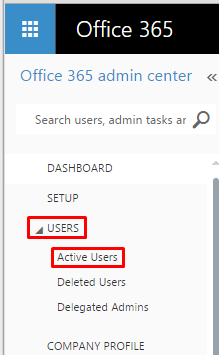
The ACTIVE USERS page opens.
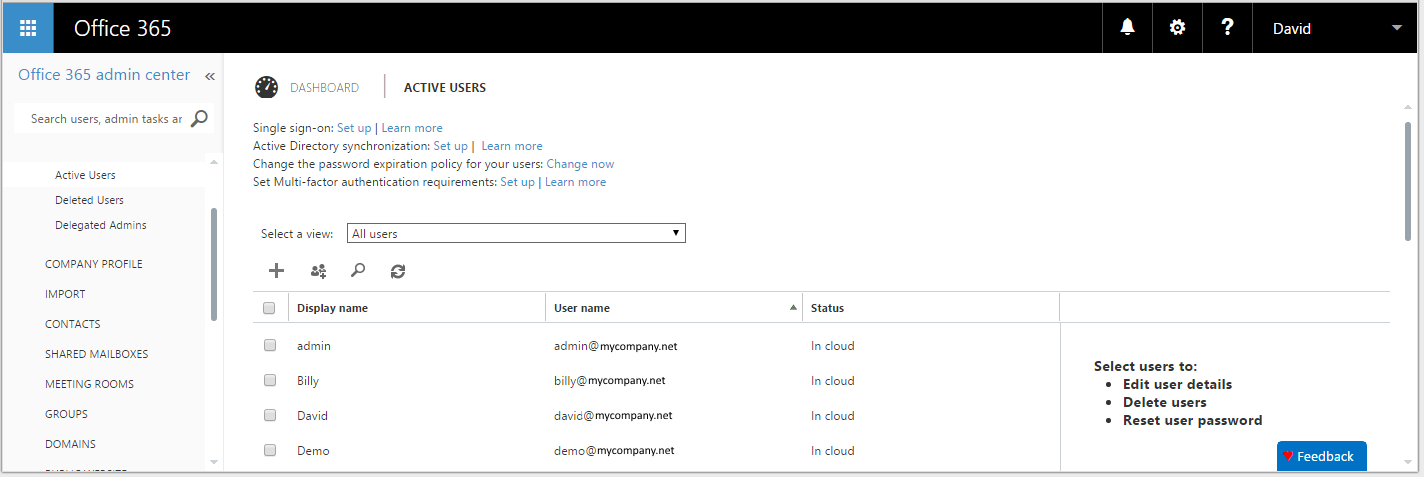
- On the ACTIVE USERS page, click the user that you want to edit.
The user details summary appears in a right hand pane.
- From the user details summary, click Edit.
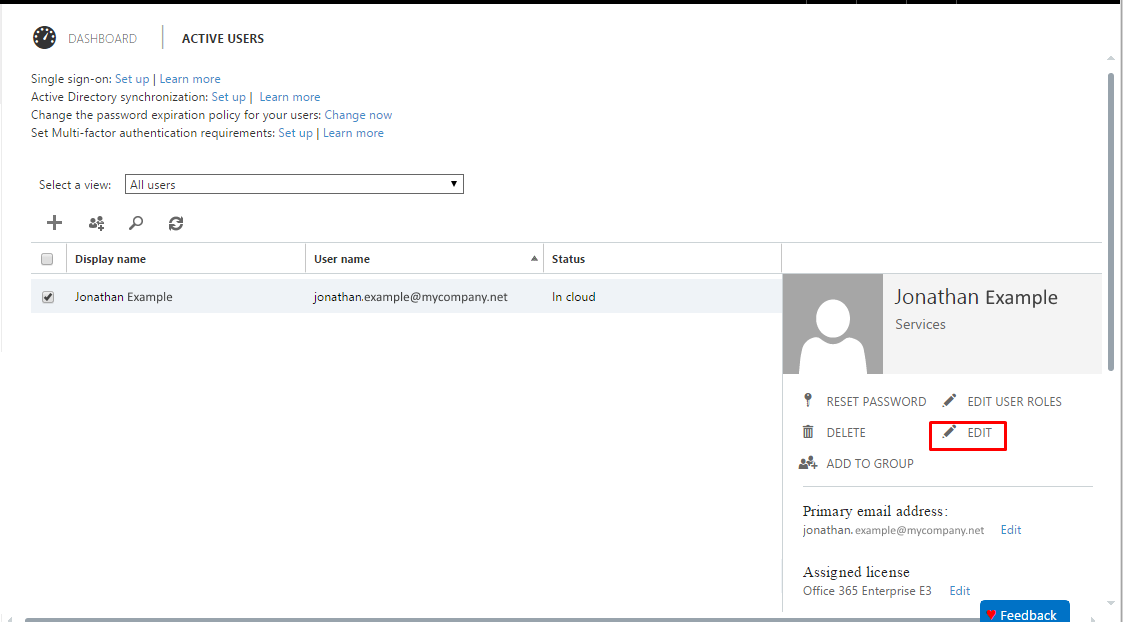
The full user details page for this user opens on the Details tab.

In addition to the Details tab, the following tabs associated with this user may now be selected by clicking on the left hand menu; Roles, Settings, Licenses, Email address, Mailbox permissions, and More.
- Click the Details, Roles, Settings, Licenses, Email address, Mailbox permissions, and/or More tabs, depending on the changes that you want to make, and make required changes.
Note:
If you block a user from having sign-in access to Office 365, it will take about an hour to take effect on all that user's devices and clients. Also, make sure that you remove or disable the user from your on-premises Blackberry Enterprise Service, or BlackBerry Business Cloud Services. You should also disable any Blackberry devices for the user.
- When all changes are completed, click Save.
Editing multiple users
Note:
If the users that you want to edit are synchronised with your Active Directory service, you won't be able to complete this procedure; the changes won't be applied on the Results page. To edit multiple users, use your local Active Directory management tools.
To edit user information, or assign licenses, for multiple users, proceed as follows.
- Follow Step 1 to Step 3 of Editing a single user, but at Step 2, tick multiple checkboxes to select multiple users.
Note:
The number of users selected appears in the user details summary shown in the right hand pane. All selected users will be affected by the same change(s).
The full details page opens, on the details tab, for the selected multiple users.
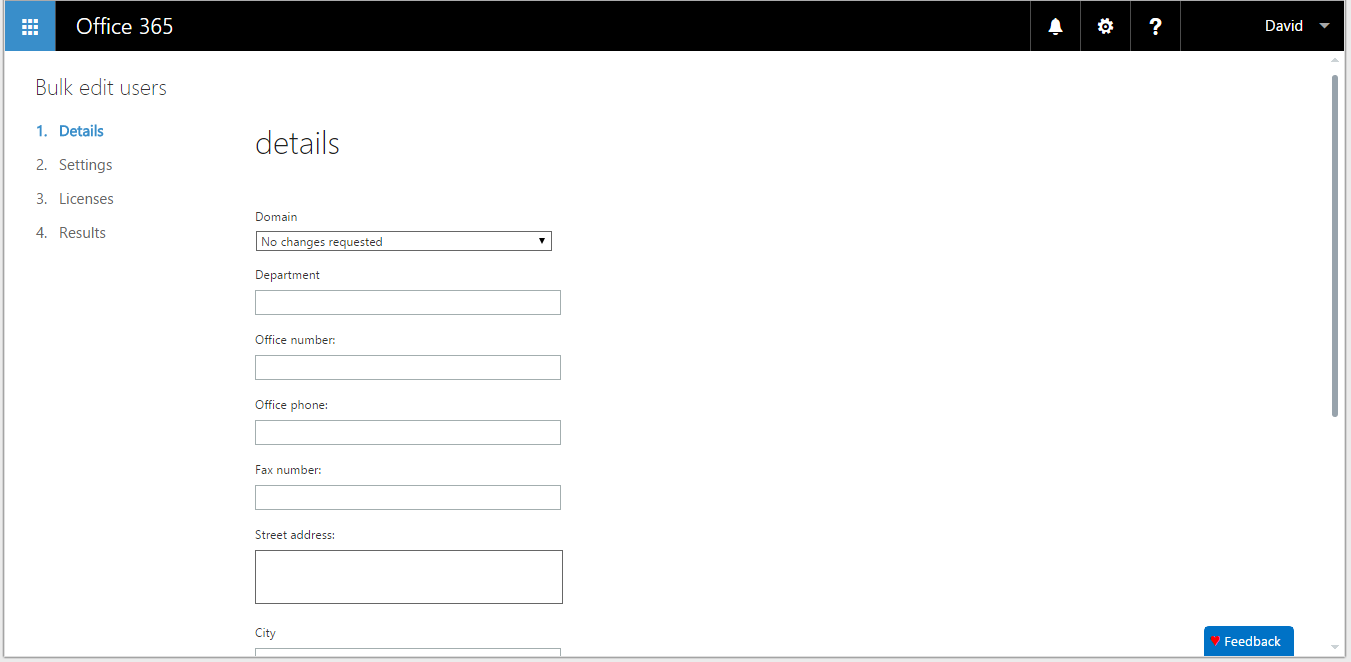
- Make any required changes on the details page.
- Scroll to the bottom of the page and click Next.
The settings page opens.
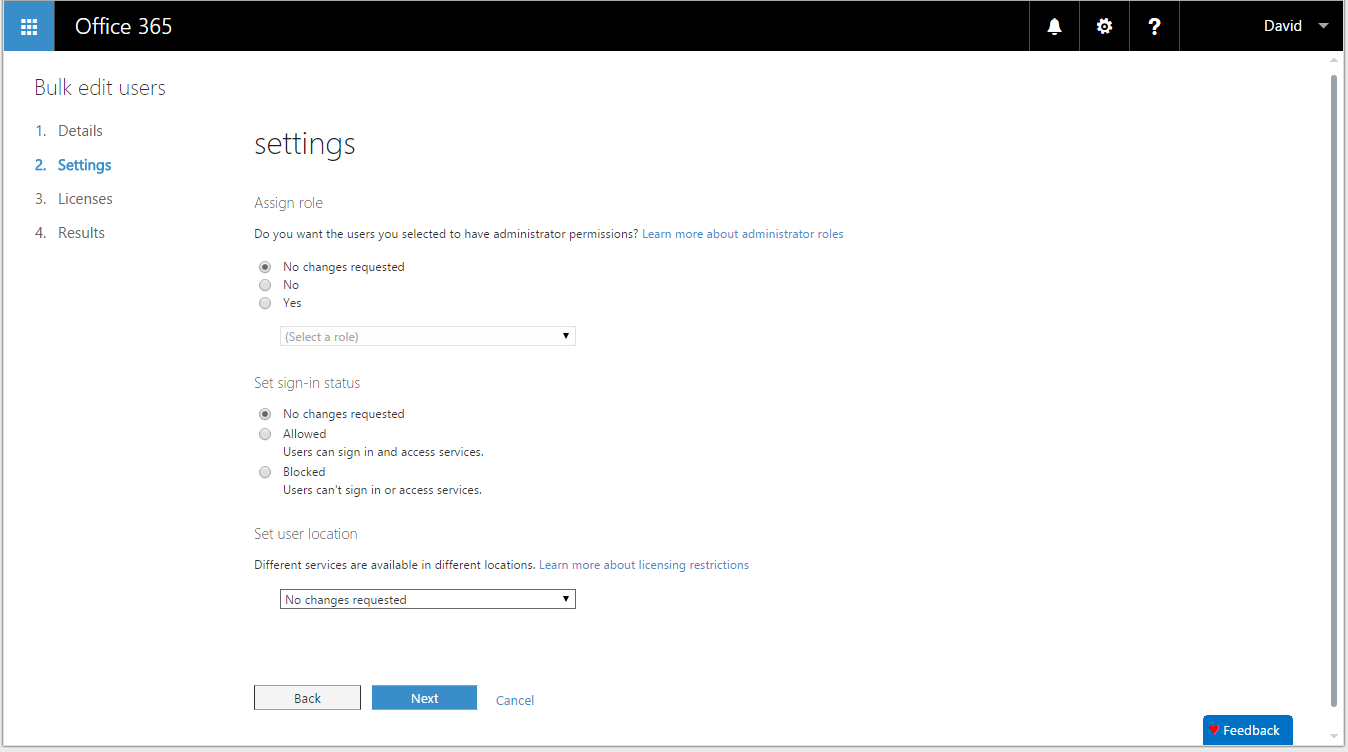
- Make any required changes on the settings page.
- Scroll to the bottom of the page and click Next.
Note:
If you block a user from having sign-in access to Office 365, it will take about an hour to take effect on all that user's devices and clients. Also, make sure that you also remove or disable the user from your on-premises Blackberry Enterprise Service, or BlackBerry Business Cloud Services. You should also disable any Blackberry devices for the user.
The assign licenses page opens.
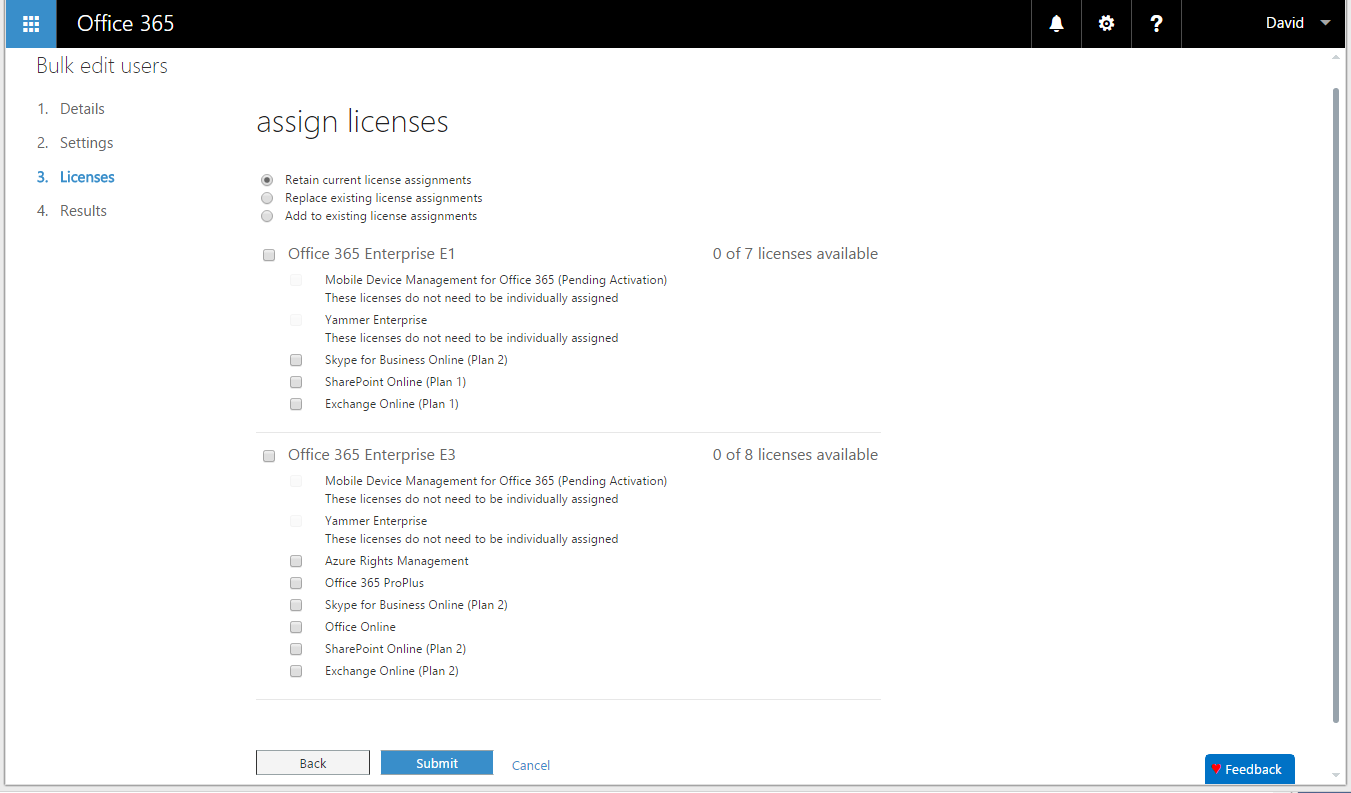
- On the assign licenses page, do one of the following,
- If you're not making any changes to the existing license assignments, click Retain current license assignments.
- To replace existing license assignments, click Replace existing license assignments, and then choose one or more licenses from the list.
- To add licenses to the existing license assignments, click Add to existing license assignments, and then choose one or more licenses from the list.
- Click Submit.
The Results page appears, showing the edit status of the chosen multiple users.

- Review the information on the Results page, and then click Finish.
Your changes will now take effect on all chosen users.
Note:
Some changes may take time to apply across multiple services.
