
Creating an SQL backup policy
LiveVault is able to protect Microsoft SQL databases continuously, significantly reducing the vulnerability of business data throughout the day. LiveVault strongly recommends that customers use the LiveVault service to protect their SQL database(s) and transaction logs, but not the database backups. This is because LiveVault is able to protect the database itself extremely efficiently, moving only byte- level changes as they occur.
An SQL backup policy is required in order to backup SQL database files. This article describes how to create an SQL backup policy in LiveVault. The article is in two parts:
Please read the notes in the first part before creating an SQL backup policy.
Prerequisites
Before commencing this task, it is assumed that the reader has access to the LiveVault portal with appropriate access permissions.
Preparing for Microsoft SQL backup
This topic pertains to Microsoft SQL backup policies, which LiveVault supports on SQL Server 2005 and later. To back up SQL Server 2000 or 7.x, you must use a standard backup policy. See knowledge article, KB0010613, Creating a standard backup policy.
The following paragraphs should be considered when preparing to create a Microsoft SQL backup:
- Backup considerations for SQL
- Preparing for log truncation
- Best practices for log truncation
- Backing up the master database
- SQL server FILESTREAM feature backup considerations
- SQL Server FILESTREAM feature restore considerations
- Adjusting the SQL max worker threads option
Backup considerations for SQL
Before creating an SQL backup policy, consider the following:
- On an SQL Server you can run multiple SQL Server services, each with their own ports, logins, and databases. Each of these services is called an instance. You can further categorise these as the default instance and named instances. This topic uses the term instance and SQL Server instance without making a distinction between default instances or named instances.
- SQL Server instances must be running for an SQL policy to successfully back them up.
- Ensure that a VSS SQL Writer is installed and running on the machine. In SQL 2005, the SQL VSS Writer service is set to Manual by default. For SQL backup policies to succeed, change it to Automatic, and then start the service.
- To use the transaction log truncation feature, install SQLCMD.exe. It is part of Basic Management Tools in the SQL installation.
- For SQL backups and restores to succeed on Windows clusters with multiple instances, all instances must be running on the same cluster node.
- By default, LiveVault backs up 75 databases on a 32-bit system and 150 on a 64-bit system. However, you can increase this number to 300 databases on a 32-bit system and 600 databases on a 64-bit system by adjusting the max worker threads to an appropriate value.
Preparing for log truncation
Log truncation allows SQL to reuse the space consumed by transactions that have already been committed to the database.
- Select the option to truncate transaction logs only if you will use LiveVault to back up the transaction logs. LiveVault performs a FULL backup and indicates to other applications that it has modified the database. If you use a different application to back up the transaction logs, do not select the option to truncate transaction logs.
- If you choose not to truncate the logs, LiveVault performs a COPY backup. Transaction logs for any databases using full or bulk-logged recovery models will continue to grow unless they are truncated by some other means.
- Master databases, model databases, and MSDB will not have their logs truncated.
- If you plan to truncate logs, you must have the SQLCMD.EXE utility installed. Ensure that the account under which you run the lvbackupservice service has sufficient rights to run SQLCMD.EXE and truncate transaction log files in SQL. By default, the lvbackupservice service runs under the Local System (NT AUTHORITY\System) account. In SQL 2012, and later, this Local System (NT AUTHORITY\SYSTEM) account is not automatically provisioned in the sysadmin fixed server role.
- Each SQL database can have its recovery model set to Simple, Bulk, or Full. LiveVault will protect SQL databases in all combinations of the Recovery Model and the Truncate Logs option the user chooses for those backup policies. In cases where the user sets a policy to Truncate Logs on a database where the Recovery Model is set to Simple, the backup log will contain a warning since LiveVault cannot truncate the logs on the database.
Best practices for log truncation
- On databases using the Simple recovery model, do not set the LiveVault backup option to truncate transaction logs.
- On databases using the Bulk or Full recovery models, set the LiveVault backup option to truncate transaction logs, or manage the logs by other means.
- When an SQL server has multiple databases with different recovery model settings, and you are using LiveVault to manage the logs, create separate LiveVault backup policies for each database, with the appropriate setting for truncating the logs to match the Recovery Model of the databases the policy is protecting.
Backing up the master database
Every instance of Microsoft SQL Server has a master database that contains information about users and databases that are part of the instance. To protect your SQL Server installation, include the master database when you create SQL backup policies.
To recover the master database, consider the following factors:
- You must manually attach any databases you created after LiveVault backed up the master database. This is because the master database contains information about which databases are part of the instance.
- If you made any user login changes after LiveVault backed up the master database, the changes will be lost. You must redo the changes after the restore.
SQL server FILESTREAM feature backup considerations
LiveVault supports SQL backup policies on the FILESTREAM feature available in SQL. For more information on the FILESTREAM feature in SQL Server, see your SQL Server documentation.
SQL Server FILESTREAM feature restore considerations
- LiveVault does not support SQL-aware copy restore of a single database containing FILESTREAM data containers. These databases can be restored using SQL file restore to a new location preserving the folder structure. When the restore is complete, you must manually attach the database. For more information, see knowledge article, KB0011144, Restoring an SQL database.
Adjusting the SQL max worker threads option
To adjust the SQL max worker threads to enable the backup of more SQL Server databases, proceed as follows.
- Launch SQL Management Studio.
- Provide the server name and login credentials.
- In the Object Explorer pane, right-click the SQL Server instance that you want to configure.
- Select Properties from the context menu.
- Select the Processors page.
- Type the number of worker threads required to back up your databases. Note that SQL Server requires three worker threads for each database that you want to back up. Do not enter more than 1024 threads on a 32-bit system.
- Click OK.
- Restart the SQL Server instance.
Creating a Microsoft SQL backup policy
Before creating an SQL backup policy, please read Preparing for Microsoft SQL backup.
Note:
When creating backup policies, always confirm the clock time and time zone designation on the LiveVault Agent machine. If the time or time zone is incorrect then, in rare cases, it can cause restorations from the initial backup to fail.
To create an SQL backup policy, proceed as follows.
- Access the LiveVault portal. See knowledge article, KB0010991, Accessing and navigating the LiveVault portal, if you require further information.
- In the LiveVault portal, left hand navigation pane, locate and then click on the computer you want to back up.
- Click on the Backup tab.
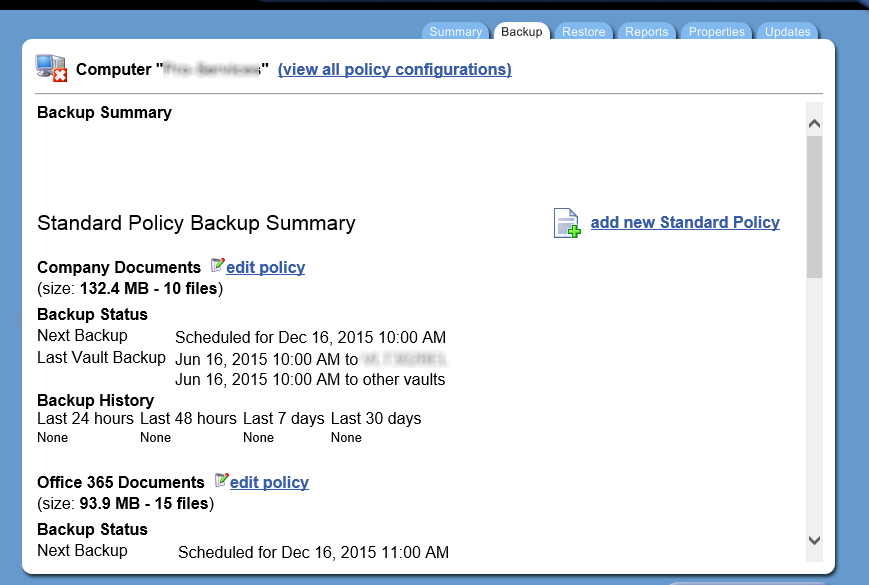
The Backup Summary page opens.
- Scroll to the bottom of this page and, under SQL Aware, click Add new SQL Server Policy.

The Backup Configuration page opens.
- In the New Backup Policy textbox, type a meaningful name for the policy, then click change name to complete the action.

- Set up LiveVault to back up all databases in an SQL server instance, or one or more individual database(s), by following either Step 6a, or Step 6b, below.
- To back up all databases in one or more SQL Server instances, proceed as follows.
- In the left hand navigation pane, click on the SQL Server.
- To back up all databases in one or more SQL Server instances, proceed as follows.
The right hand pane displays the SQL Server instances on that server.
Note:
SQL objects will not be visible if the SQL Server service is not running for all instances you are attempting to browse.
- In the right pane, tick the checkbox(es) for the SQL Server instance(s) containing the databases to be backed up.
The policy backs up all the databases in the instance(s) you select.
- To back up individual databases in an SQL Server instance:
- In the left hand navigation pane, click
 to expand the SQL Server.
 - From the expanded SQL Server list, select the SQL Server instance that contains the database(s) to back up.
The right hand pane displays the databases in the selected SQL Server instance.
- In the right hand pane, check the box for the database(s) to back up.
- Click on the Schedule tab to open the Schedule page, and then select or create a schedule for the backup policy.
- Optionally, click on the Options tab to open the Options page, and complete the following, as required:
- Using the dropdown options in the Retention policy field, select the number of days you want to store data backed up on this policy.
- Enter the name of a program script that will run before, or after, the backup occurs.
- If you want to truncate the transaction logs, select Truncate transaction logs at the end of a successful backup. This option should be selected only if the SQL recovery model is set to full or bulk-logged, and the database is not having transaction logs maintained or backed up by another application.

- Click Next.
The Backup Confirmation page opens.
- Check the summary of the policy which you have created. If you wish to make any changes click the Previous button and make required changes.
- Click Done.
Your SQL backup policy is set up.
You can view a summary of all your policies, as well as details of how they are configured and when they last ran. Existing policies may be edited, or new policies created, by following the procedural steps shown above.
