
Restoring files and folders with Azure Backup
Azure Backup is a service to back up and restore data in the Microsoft cloud. The Azure Backup Restore Wizard allows you to select previously backed up files to be restored, and choose the specific version from the backup to save to your local computer.
Note:
You also have the option to save the restored files to a new location. See knowledge article, KB0011469, Restoring Azure Backup files onto another computer.
The steps required to restore files and folders with Azure Backup are:
This article describes these steps.
Creating a Restore Plan for files and folders
The Restore Wizard guides you through the creation of a Restore Plan for files and folders. The wizard takes you through the following steps:
- Open the wizard and name your Restore Plan
- Specify type of data, and type of restore required
- Specify restore source and destination
- Enter encryption passwords if required
- Create a Restore Plan schedule
- Set notification options
- Review and finish
These steps are explained in the following paragraphs.
Open the wizard and name your Restore Plan
- From within the Azure Backup agent, Welcome tab, click the Restore button at the top of the screen or, alternatively, click the Restore Backup link in the left hand navigation pane.
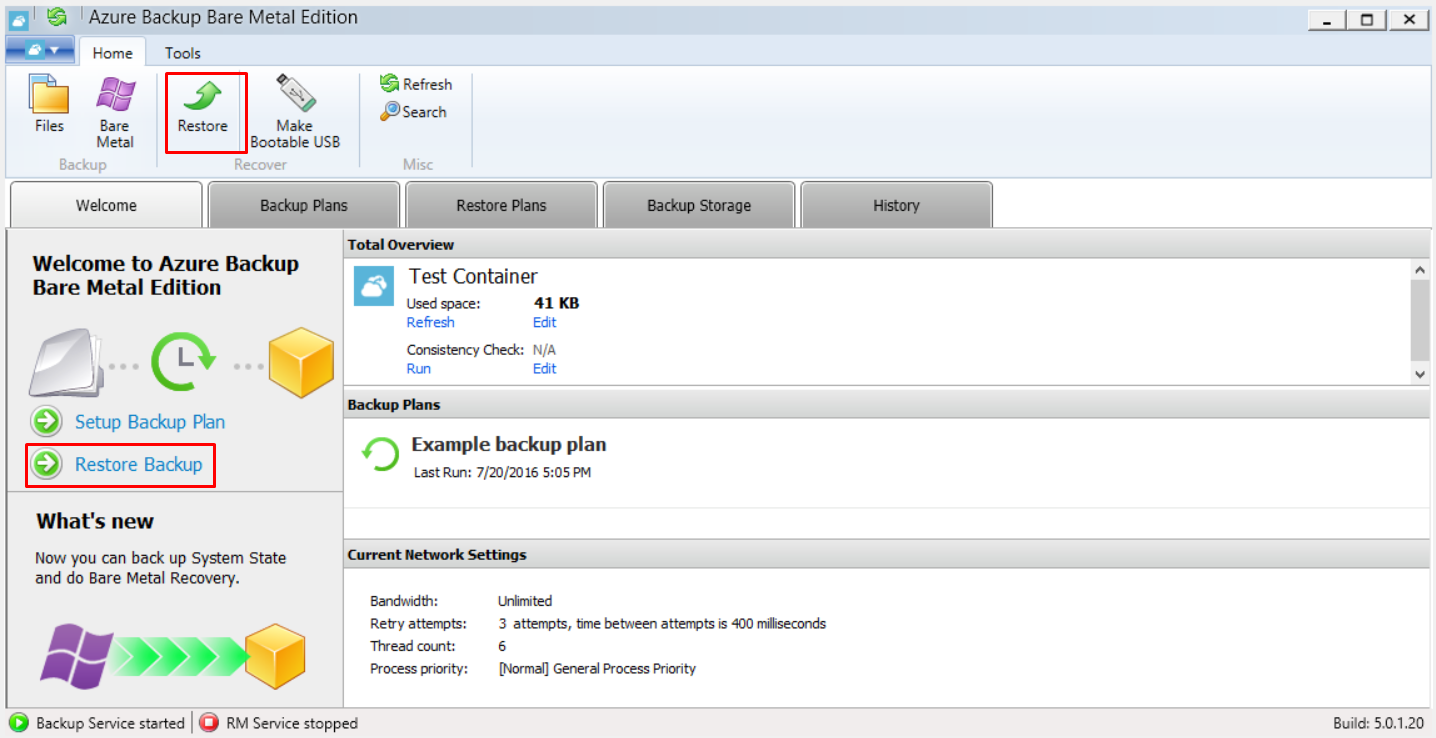
The Restore Wizard is launched.
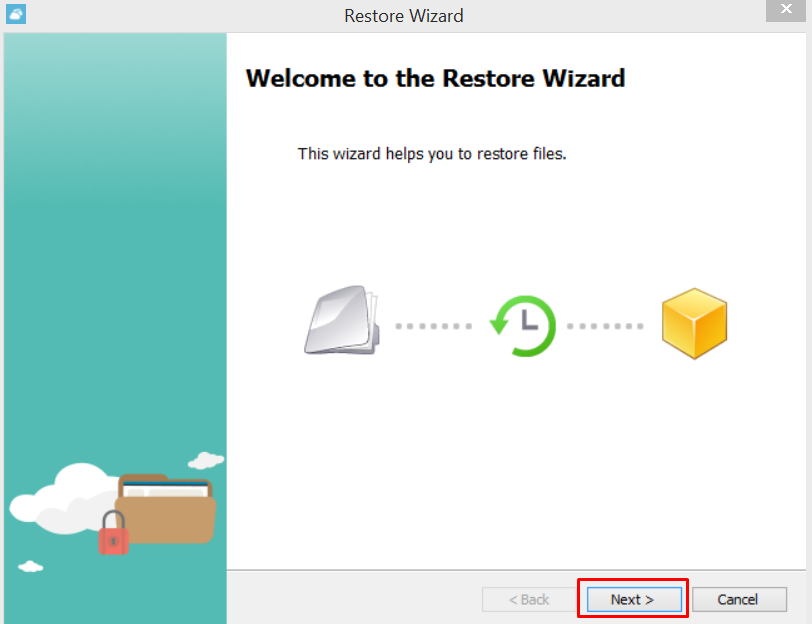
- Click, Next.
The Select Cloud Storage dialogue box opens.
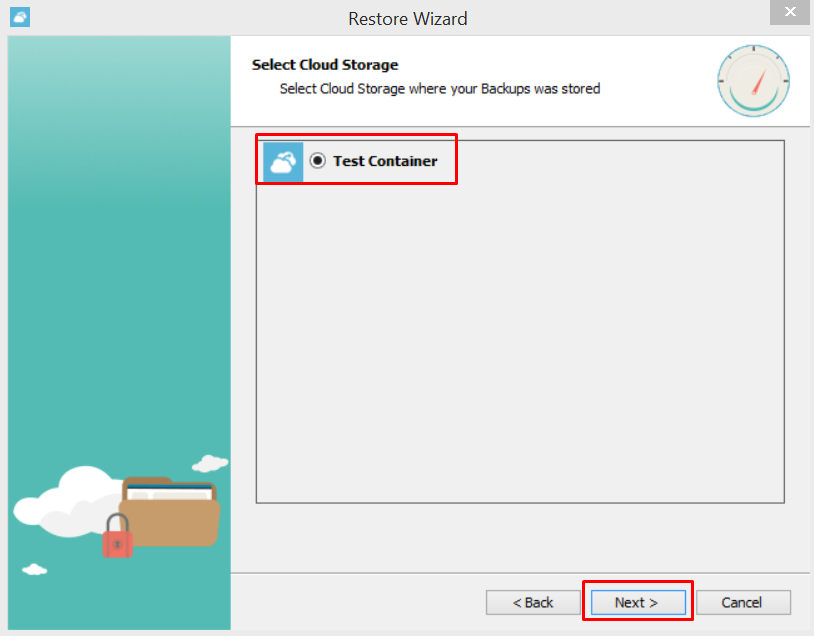
- From the list of cloud storage areas, click on the radio button next to the area where you originally backed up your files and folders.
- Click, Next.
The Plan Name dialogue box opens.
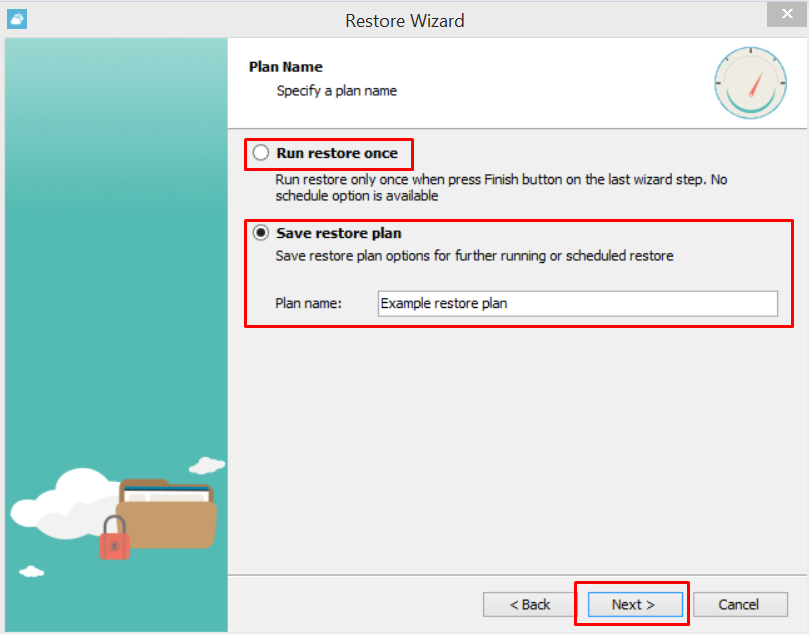
- Complete entries on this dialogue box as follows:
- Run restore once – Select to run this restore just once.
- Save restore plan – Select if you wish to run the same restore again, or want to set up a scheduled restore. This option will require you to name, and save, your Restore Plan. Enter a Plan Name in the box provided.
- Click, Next.
The Type of Data dialogue box opens.
Specify type of data, and type of restore required
You can now specify the type of data (for example, files and folders), that you would like to restore, and also the restore type (for example, latest version of files).
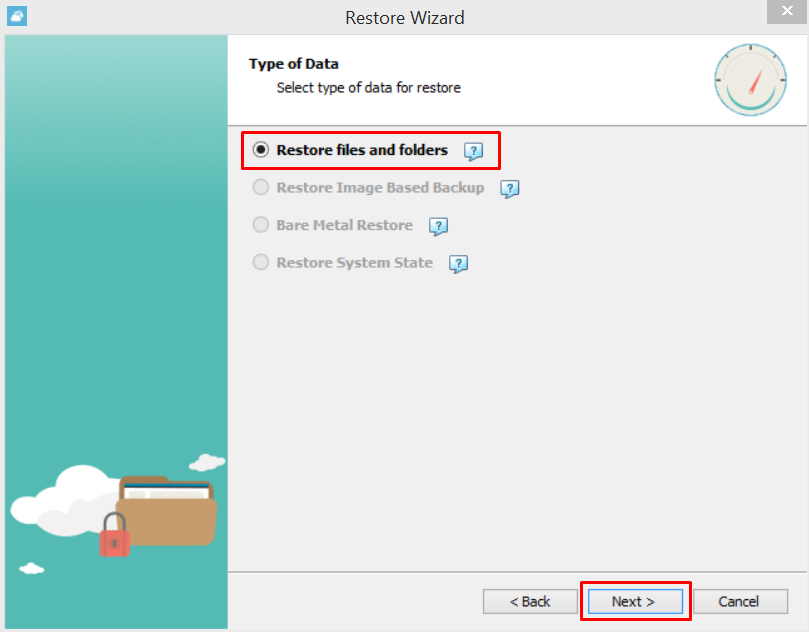
- From the list, select the type of data you want to restore.
- Click, Next.
The Restore Type dialogue box opens.
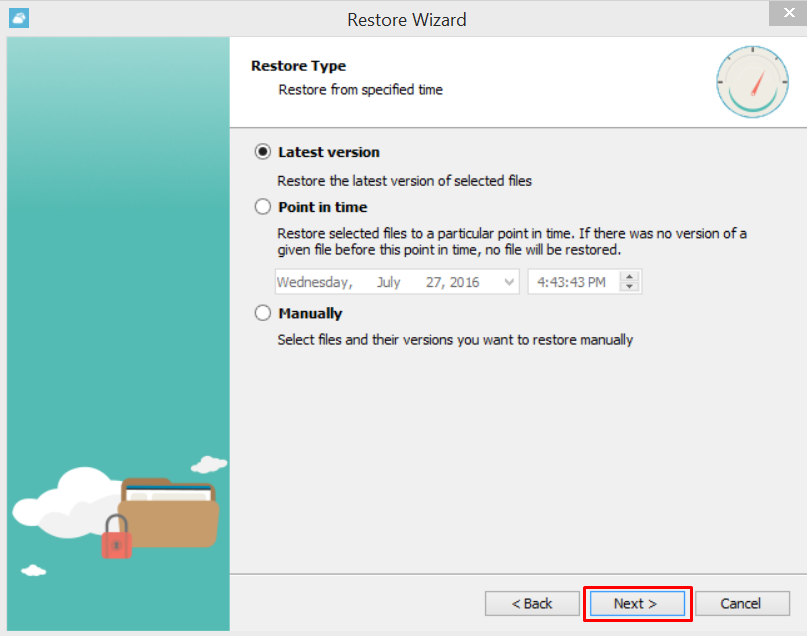
- Complete entries on this dialogue box as follows:
- Latest version – Click to restore the latest version of selected files.
- Point in time – Click to restore selected files to a specific point in time. From the dropdown options, select a date and time.
- Manually – Manually select the versions of selected files to restore.
- Click, Next.
The Restore Source dialogue box opens.
Specify restore source and destination
Specify the source of data to be restored, and also the location where you want the restored data to go to.
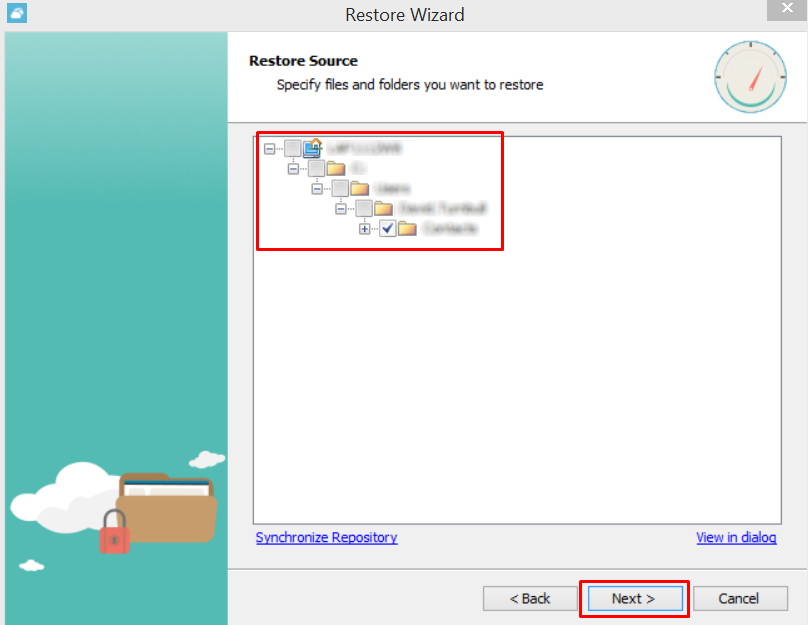
- Open the file/folder tree, and place a tick in the checkbox(es) of folders or individual files you wish to restore.
- Click, Next.
The Destination dialogue box opens.
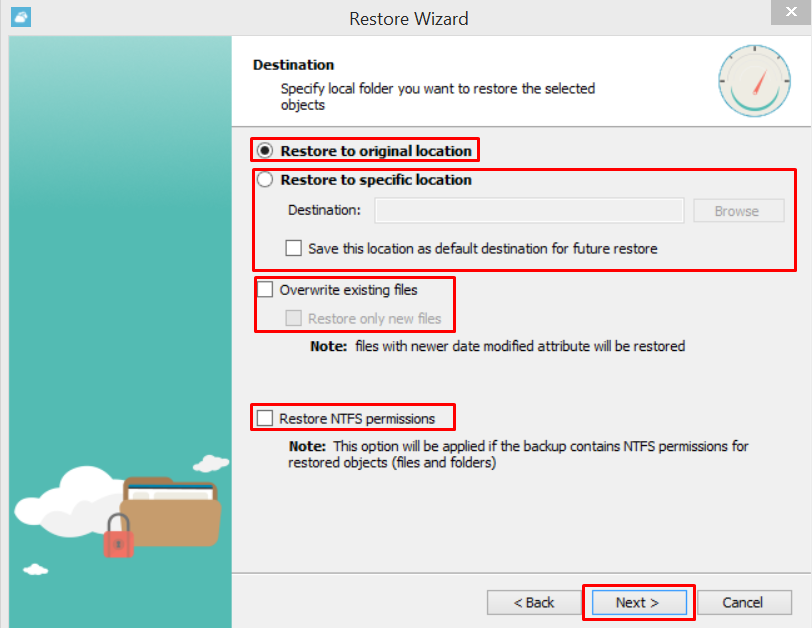
- Complete entries on this dialogue box as follows:
- Restore to original location – Select to restore files to their original location.
- Restore to specific location – Select to restore files to a specific location, then Browse to select the required destination. If required, tick Save this location as default destination for future restore.
- Overwrite existing files – Tick to allow the restored files to overwrite any existing files. Then, if required, tick Restore only new files to restore only files with newer modification dates.
- Restore NFTS permissions – Tick if the backed up data contains NFTS permissions for restored files and folders.
- Click, Next.
The Encryption Options dialogue box opens.
Enter encryption passwords if required
If your restore data contains encrypted files that are password protected then you must enter the required password into your Restore Plan in order to decrypt these files.
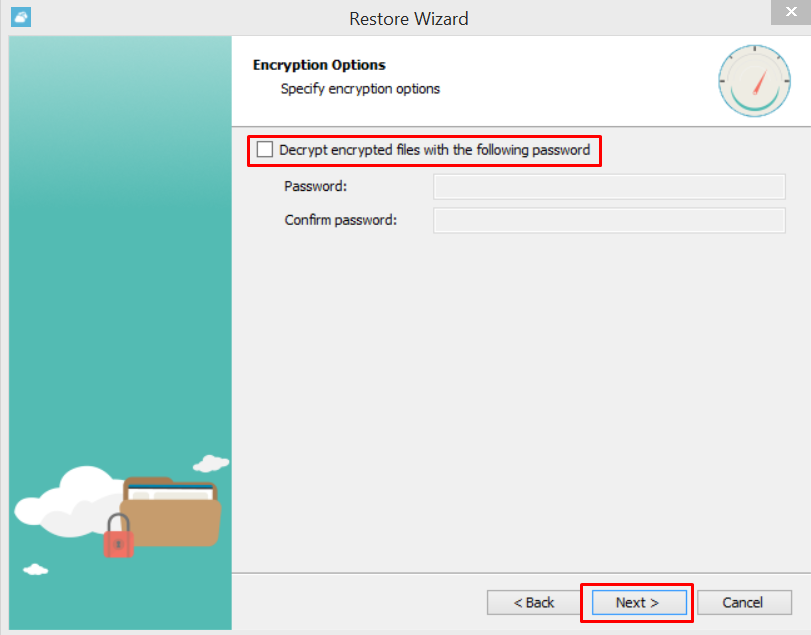
- If your restore data contains encrypted files that are password protected, then tick the Decrypt encrypted files with the following password checkbox, and enter the Password in the two text boxes.
- Click, Next.
The Schedule dialogue box opens.
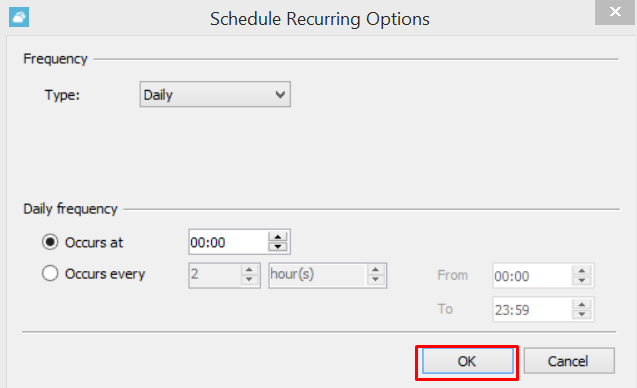
Create a Restore Plan schedule
Create a schedule for your restore plan, or create and save a plan without a schedule and initiate it manually whenever you need to.

- Complete entries on this dialogue box as follows:
- No schedule – Select if you wish to run the restore manually, without a schedule.
- Specific date – Select to run the restore (once) on a specific date and time. Enter the date and time in the following boxes.
- Recurring – Select if you want the restore to run to a recurring schedule. The following dialogue box will appear. Select required options then click OK.
- Synchronize repository before restore
- Stop the plan if it runs for… - Select to stop the restore if it is still running after a specified period. Enter the period in hours and minutes.
- Run missed schedule backup immediately when computer starts up – If the local computer is currently unavailable for the restore, tick this checkbox to have the Restore Plan actioned as soon as the computer starts up. This option is not available if No schedule was selected in Step a.
- Click, Next.
The Notification dialogue box opens.
Set notification options
When a restore completes, you can request a notification email to be sent, and/or set an entry to be made to the Windows Event Log.
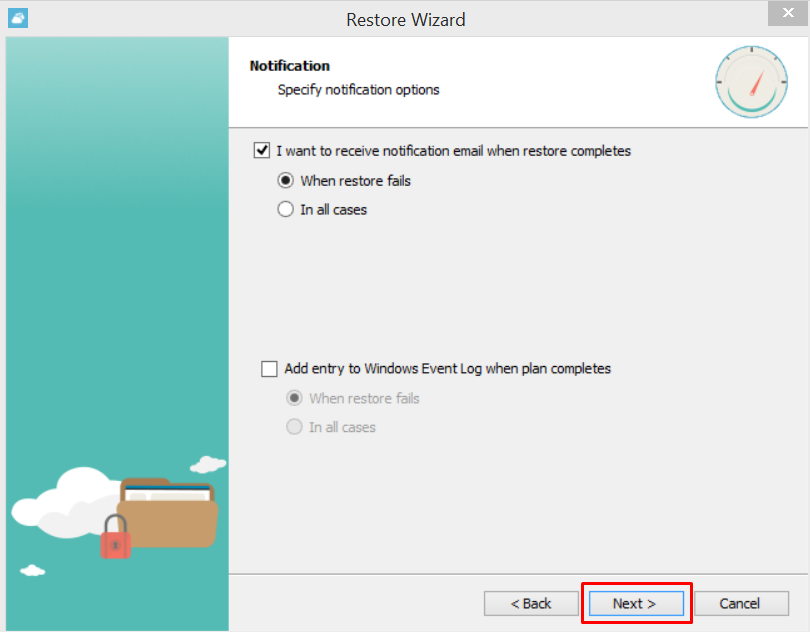
- Complete entries on the Notification dialogue box as follows:
- I want to receive notification email when restore completes – Tick the checkbox if you wish to receive a notification email when restore completes. Then select the required option; In all cases, or only When restore fails.
- Add entry to Windows Event Log when plan complete - Tick the checkbox if you wish to add an entry to the Windows Event Log when restore plan completes. Then select the required option; In all cases, or only When restore fails.
- Click, Next.
The Summary dialogue box opens.
Review and finish
Review your settings, save your Restore Plan, and exit the Restore Wizard.
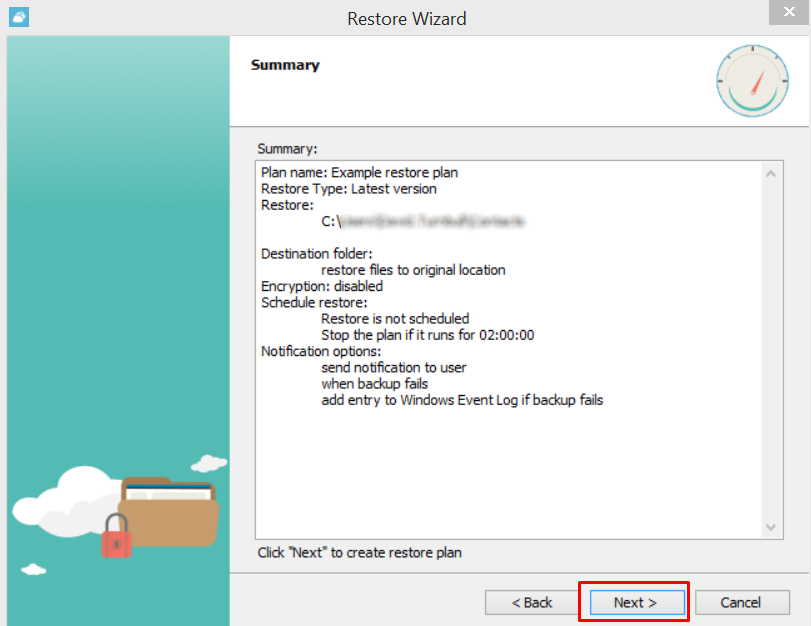
- Review the summary of your plan settings, then click Next to save your Restore Plan.
The following dialogue box appears.
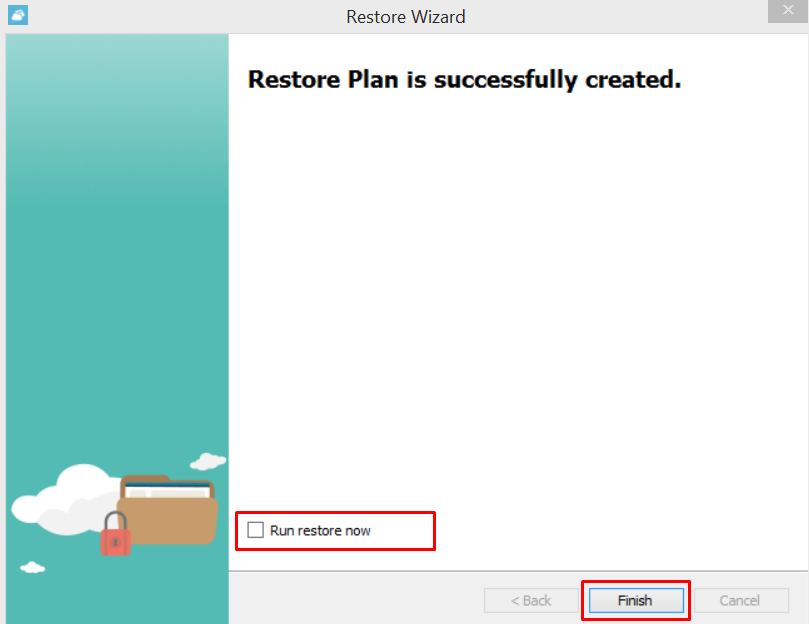
- To run the restore now, tick the Run restore now checkbox.
- Click, Finish.
Your Restore Plan is saved and the Restore Wizard closes.
Running your Restore Plan
If you set up a schedule when creating your Restore Plan, then restore will initiate on the specified dates and times. However, you can initiate a restore manually at any time (see, Initiating a manual restore).
If you ticked Run restore now before closing the Restore Wizard, then the restore begins immediately. The Cloud Direct Azure Backup agent Restore Plans page is displayed, showing your new Restore Plan against a green background. If required, the restore can be stopped at any time by clicking on the Stop hyperlink to the right of the Restore Plan name.
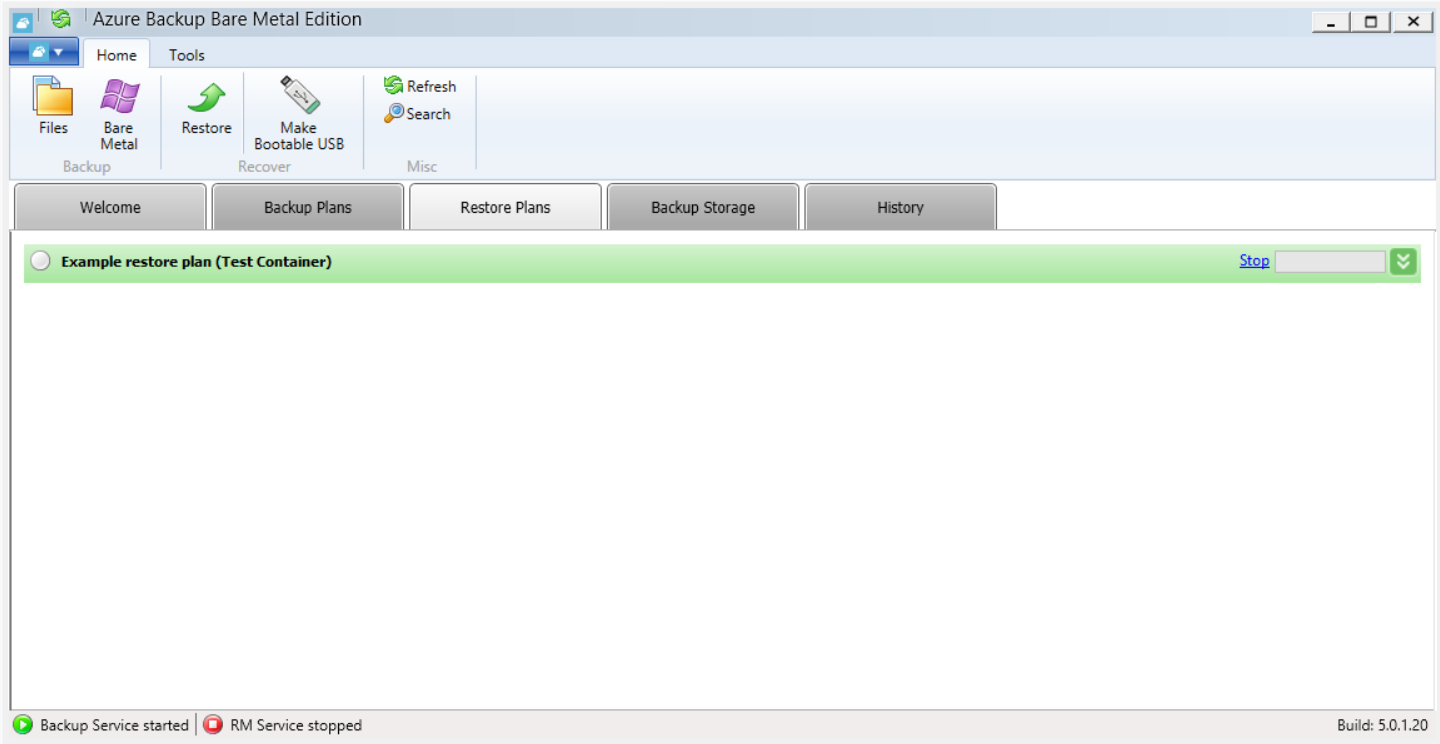
When the restore is complete, the background colour returns to grey.
Note:
To view a Restore Plan status, or change/delete the plan, then click the chevron next to the plan name.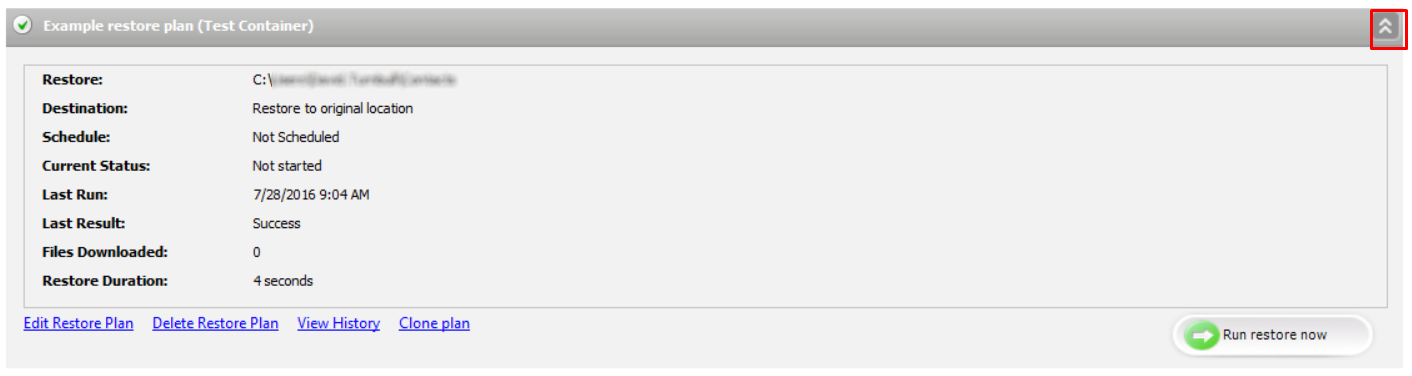
View status details, or click on the required link to edit or delete the Restore Plan.
Initiating a manual restore
You can initiate a restore manually at any time as follows.
- From within the Azure Backup agent, click the Restore Plans tab.
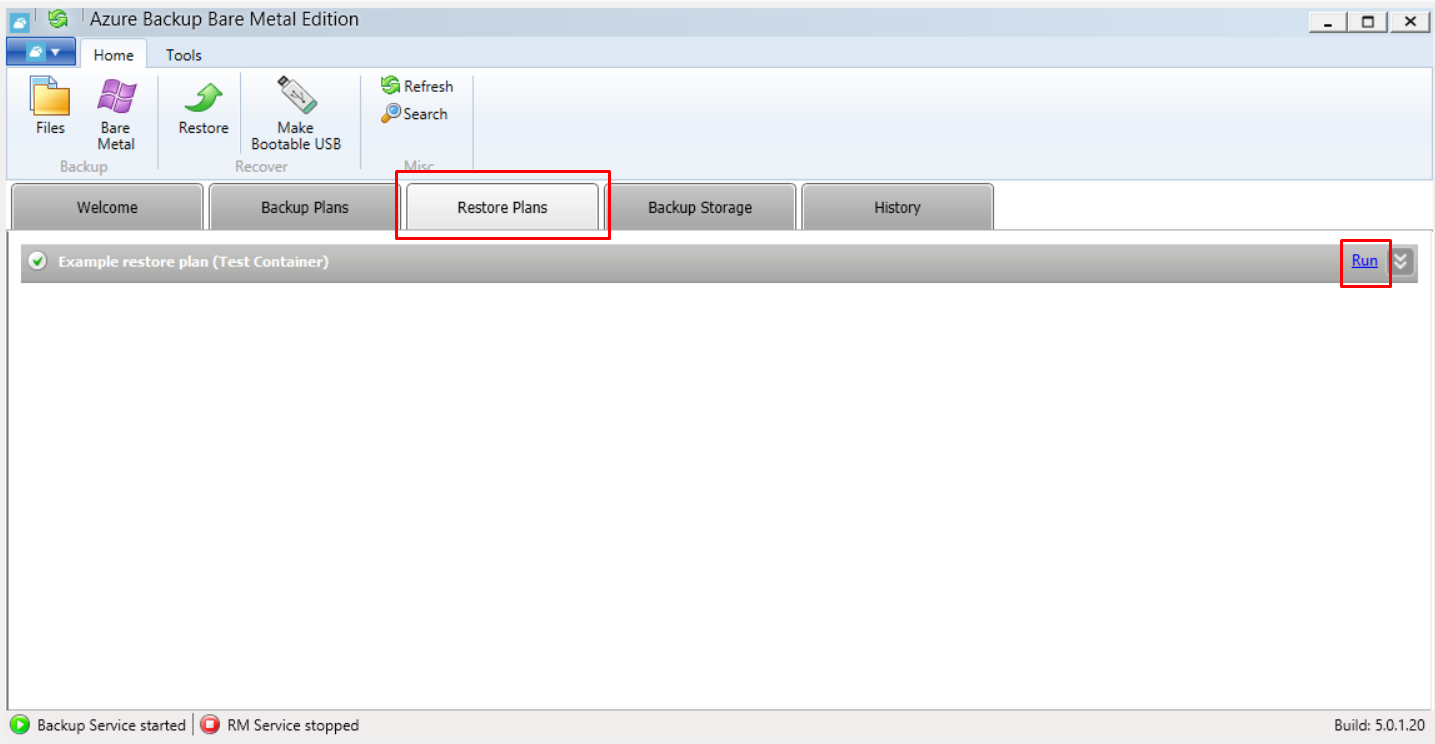
- Locate the required Restore Plan in the list, and click Run.
The restore begins. The background colour of the listed Backup Plan entry changes from grey to green. The Run hyperlink is replaced with a Stop hyperlink. Click Stop at any time to abort the restore process.
When the backup is complete, the background colour returns to grey.
Note:
To view a Restore Plan status, or change/delete the plan, then click the chevron next to the plan name.
View status details, or click on the required link to edit or delete the Restore Plan.
