


Sharing an Outlook calendar
It can be hard for someone, like a colleague at another company, to schedule a meeting with you if they can't see your Outlook calendar. You can send a snapshot of your calendar or, better yet, an invitation to subscribe to your calendar in an email message so people know when you're available.
If you have an Office 365 or other Microsoft-Exchange based account, you can also send a sharing invitation to other users so they can view your calendar in their own Calendar list.
This article describes how to share your calendar, using a desktop version of Outlook. The article contains the following sections:
- Sharing your calendar in an email
- Sharing your calendar with people inside your organisation
- Sharing your calendar with people outside your organisation
- Changing permissions after you have shared your calendar with other people
Note:
If you are using Outlook Web App, then please refer to Cloud Direct knowledge article, KB0011003, Sharing or publishing your Office 365 calendar using OWA.
Sharing your calendar in an email
With Outlook opened on your desktop, to share your calendar in an email, proceed as follows.
- At the bottom right hand corner of your Outlook window, click Calendar.

Your Calendar opens on the Home tab.
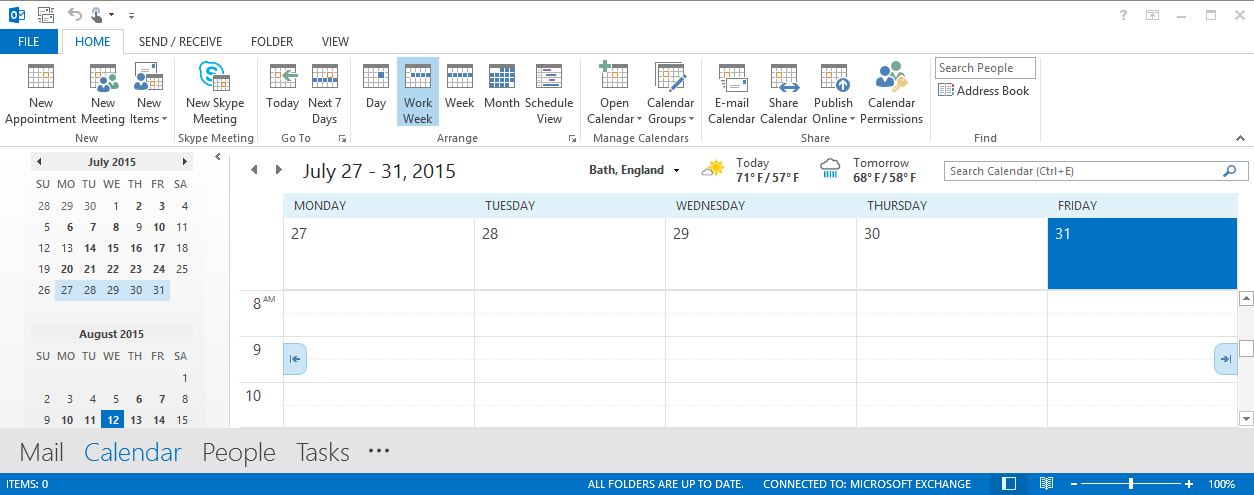
- In the Home tab, click E-mail Calendar.

A new email window opens, together with a Send a Calendar via E-mail window.

- Complete entries in the Send a Calendar via E-mail window as follows:
- Calendar – From the drop-down options, select the calendar you want to share.
- Date Range – From the drop-down options, select the time period that you want the sharing to be effective. For example, choose Today only, or Next 7 days.
- Detail – From the drop-down options, select the level of detail that the invited person will see; Availability only, Limited details, or Full details.
- Click OK.
A snapshot of your calendar appears in the body of the new email window, an i-Calendar (.ics) file is attached, and your calendar name appears in the Subject field.
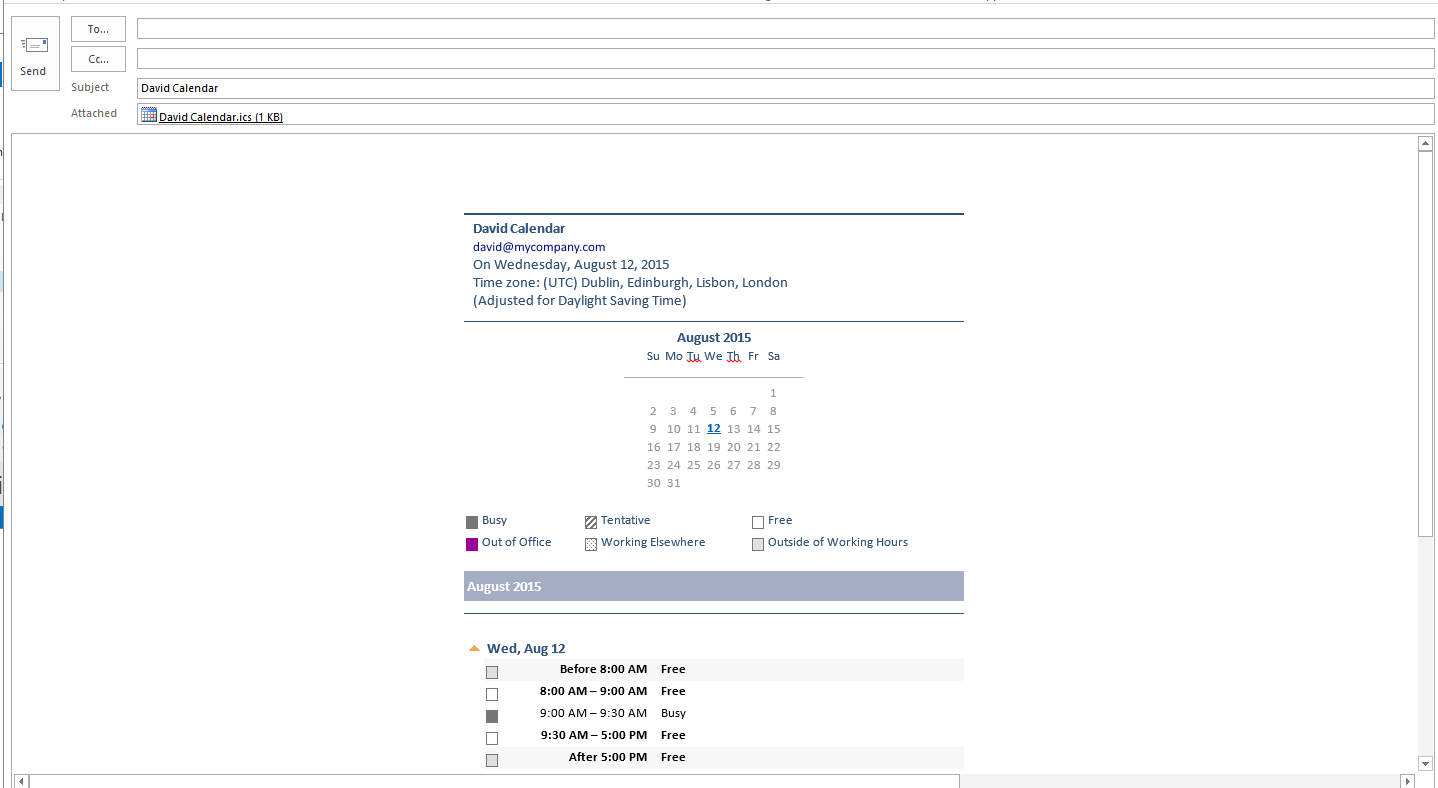
- Complete entries in the new email window as follows:
- In the To field, add who you want the message to go to.
- In the body field, add a message if you want.
- Click, Send.
The person you sent your calendar to will see a snapshot of your calendar in the message. The message also includes an attached iCalendar (.ics) file that they can open in Outlook or another calendar program. When the recipient clicks the iCalendar file, Outlook displays the file as a new calendar that they can view side-by-side with their own calendar. They can drag appointments or meetings between the two calendars, and find a time that works for both of you.
Sharing your calendar with people inside your organisation
With Outlook opened on your desktop, to share your calendar with people inside your organisation, proceed as follows.
- At the bottom right hand corner of your Outlook window, click Calendar.
Your Calendar opens on the Home tab.
- In the Home tab, click Share Calendar.

A new email window opens.
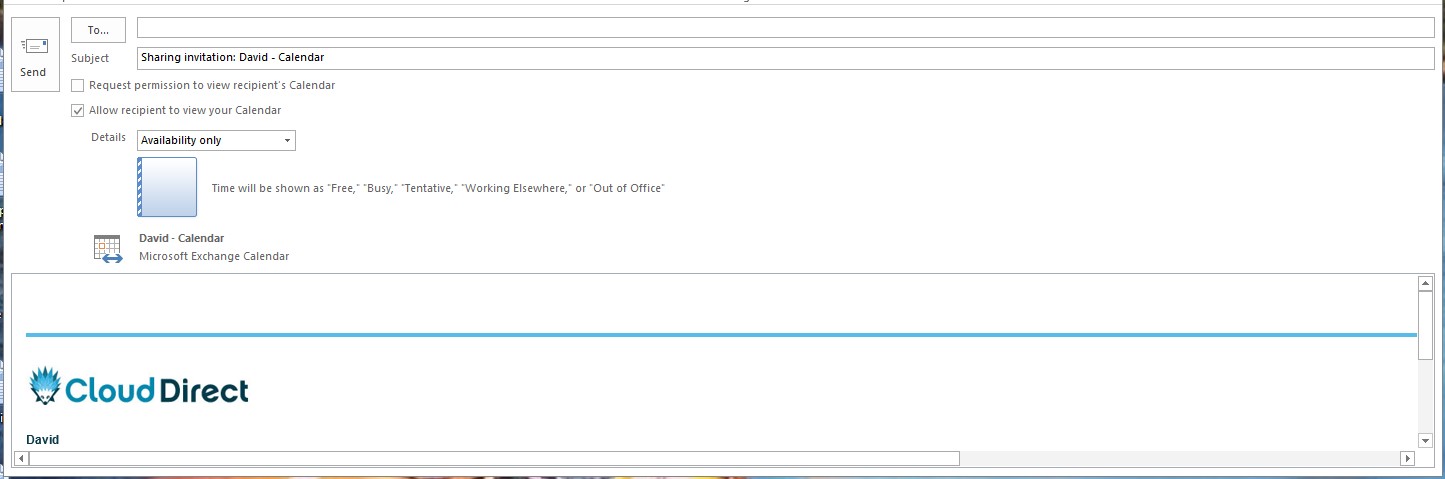
- Complete entries in the new email as follows:
- In the To box, type the name of the person in your organisation that you want to share your calendar with.
- Ensure the, Allow recipient to view your Calendar checkbox is ticked.
- Optionally, if you wish to view the recipient's Calendar, tick the, Request permission to view recipient's Calendar checkbox.
- In Details, from the drop-down options, select the level of detail that the invited person will see; Availability only, Limited details, or Full details.
- Click, Send.
The person in your organisation receives the sharing invitation in email, and then, from within his/her Outlook calendar, clicks, Open this calendar. The shared calendar displays in the person's Calendar list.
Sharing your calendar with people outside your organisation
With Outlook opened on your desktop, to share your calendar with people outside your organisation, proceed as follows.
- Follow Step 1 to Step 4 of, Sharing your calendar with people inside your organisation.
Note:
If the following error displays when you try to send your sharing invitation, you have tried to share more details than is supported by the settings in your organisation.
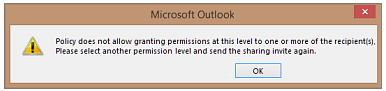
If this occurs, then, under Details, choose to share a different level of detail.
Only an admin in your organisation can change the sharing policy settings for your organisation. If you receive an error when you try to share more details that are supported by the sharing policy settings in your organisation, contact the person that manages your email account.
The person outside your organisation receives the sharing invitation in email, and then, from within his/her Outlook calendar, clicks, Open this calendar. The shared calendar displays in the person's Calendar list.
Changing permissions after you have shared your calendar with other people
With Outlook opened on your desktop, to change permissions after you have shared your calendar with other people, proceed as follows.
- At the bottom right hand corner of your Outlook window, click Calendar.
Your Calendar opens on the Home tab.
- In the Home tab, click Calendar Permissions.

The Calendar Properties window opens on the Permissions tab.
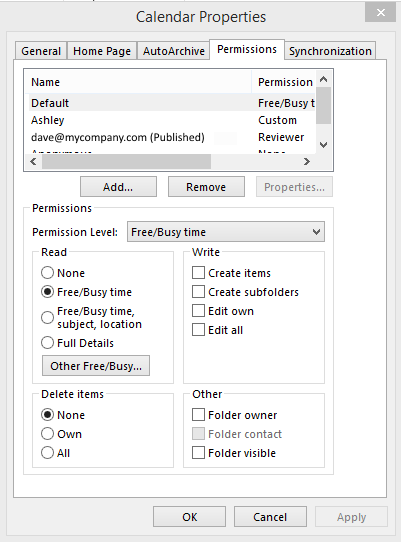
- In the Calendar Properties window, on the Permissions tab, make any changes to the calendar sharing permissions as follows:
- At the top of the Permissions tab, in the recipients section, select the name of the recipient who's permissions you want to change.
- If required, click Remove to revoke a recipients permissions so they can no longer see your shared calendar.
- To add a new recipient for your shared calendar, click Add, and follow on screen instructions.
- In the Permissions section, use the radio buttons, checkboxes and drop-down options to change permissions as required.
- When all required changes have been made, click OK.
Your changes are saved, and immediately effective.