

Forwarding or redirecting email messages (for Outlook on the web users)
You can use Inbox rules to automatically forward or redirect messages sent to your mailbox to another account. Messages that are forwarded will appear to be forwarded from you, while messages that are redirected will appear to come from the original sender.
This article is intended for Outlook on the web (previously known as Outlook Web App, or OWA) users. If you are using a standard desktop version of Outlook then please refer to, KB0011011, Forwarding or redirecting email messages (for Outlook users).
This article describes how to:
- Automatically redirect all messages to another account.
- Automatically forward all messages to another account.
Note:
Copies of messages that you redirect or forward will remain in your mailbox. If you add an action to delete a message, the message will go to your Deleted Items folder and will still be counted against your mailbox limit. If you exceed your mailbox limit, you may be blocked from sending or receiving new messages, and forwarding rules may not work until you delete enough messages to bring the total below your mailbox limit.
When you create a forward or redirect rule, you can add more than one address to send to. The number of addresses you can send to may be limited, depending on the settings for your account. If you add more addresses than are allowed, your rule won't work. If you create a rule with more than one address, test it to be sure it works.
Pre-requisites
It is assumed that the user is familiar with the Outlook on the web, and has the application open.
Automatically redirect all messages to another account
Messages that are redirected will appear to come from the original sender. When you reply to a message that has been redirected, the reply will be sent to the original sender. To redirect email messages, you must set up an inbox rule.
To automatically redirect all messages to another account, proceed as follows from within the Outlook on the web Mail app.
- At the top right hand corner of the page, click the Settings icon and, from the subsequent menu options, click Options.

The Mail options page opens.
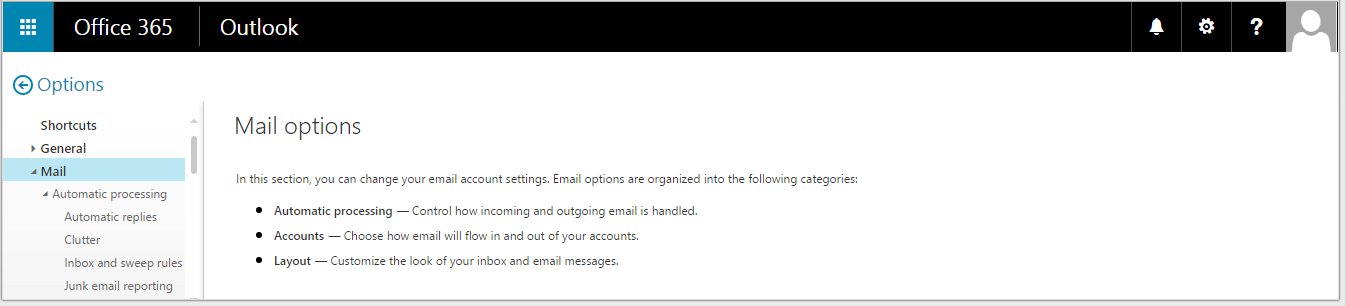
- On the left hand menu pane, click, Mail > Automatic processing > Inbox and sweep rules.
The Inbox rules page opens.
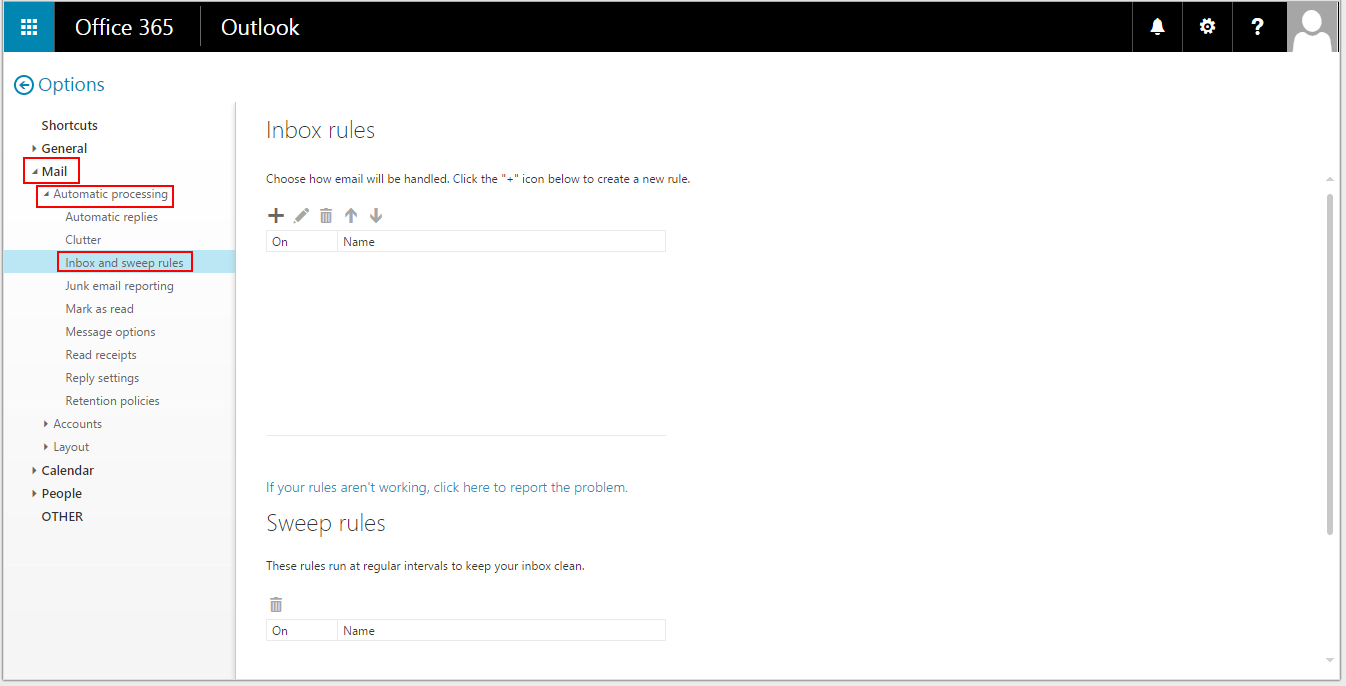
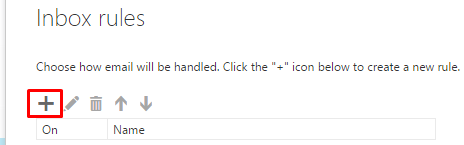
- Click the Add icon.
The New inbox rule page opens.
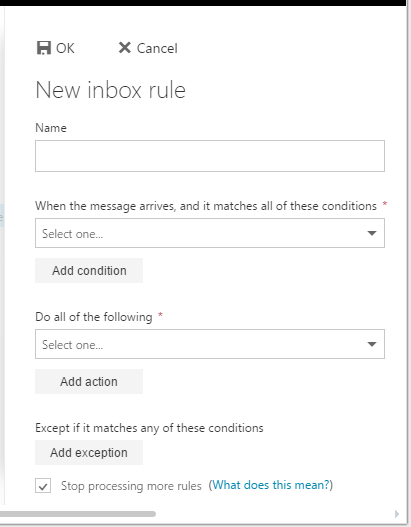
- Complete entries on this page as follows:
- Name – Enter a name for your new redirect rule.
- When the message arrives, and it matches all these conditions – Click on the drop-down box to reveal a list of conditional statements, and select, Apply to all messages.
Note:
If you do not want the redirect to apply to all messages then select the required conditional statement from the list, and follow any associated instructions.
- Do all of the following - Click on the drop-down box to reveal a list of actions to take, and click, Redirect message to.
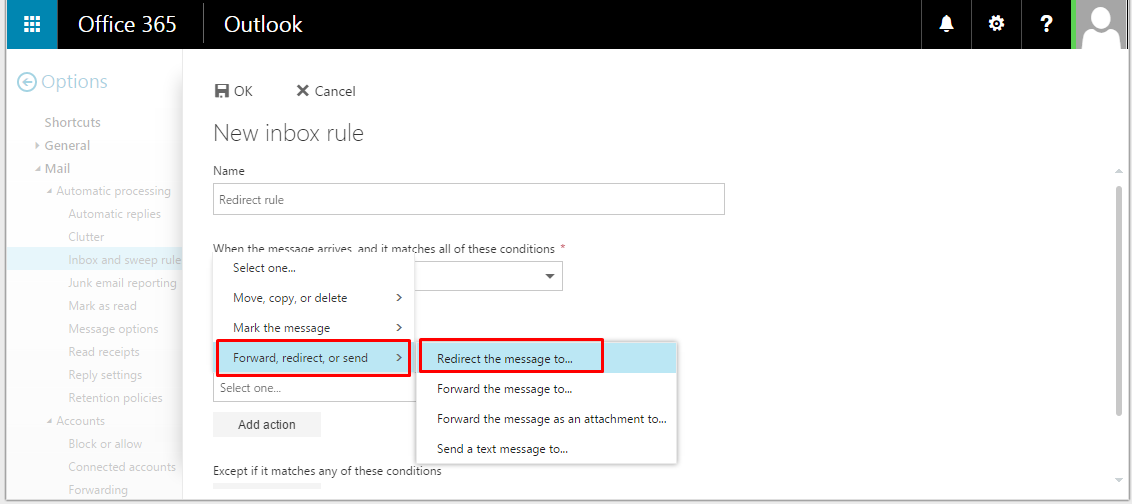
A blank text box opens to allow you to enter the address you wish to redirect to.
![]()
- Type the required redirect address in the text box. As you type the first few letters, a list of suggested directory entries will appear beneath the text box.
- From the list, click the required address.
Note:
If the address you require is not listed, click Search Directory, and locate the address manually.
The address appears on the New inbox rule page, next to the, Do all of the following text box.
- Click OK, at the top left hand corner of the New inbox rule page, to save your rule.
A Warning message appears.
Caution:
Using Outlook on the web to modify your rules will delete any rules that were previously turned off using Outlook. Click Cancel, and use Outlook to edit your rules if this is an issue. If you want to proceed, then click OK.
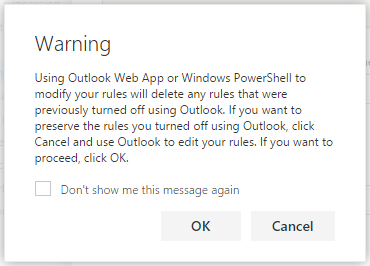
- Click OK to proceed.
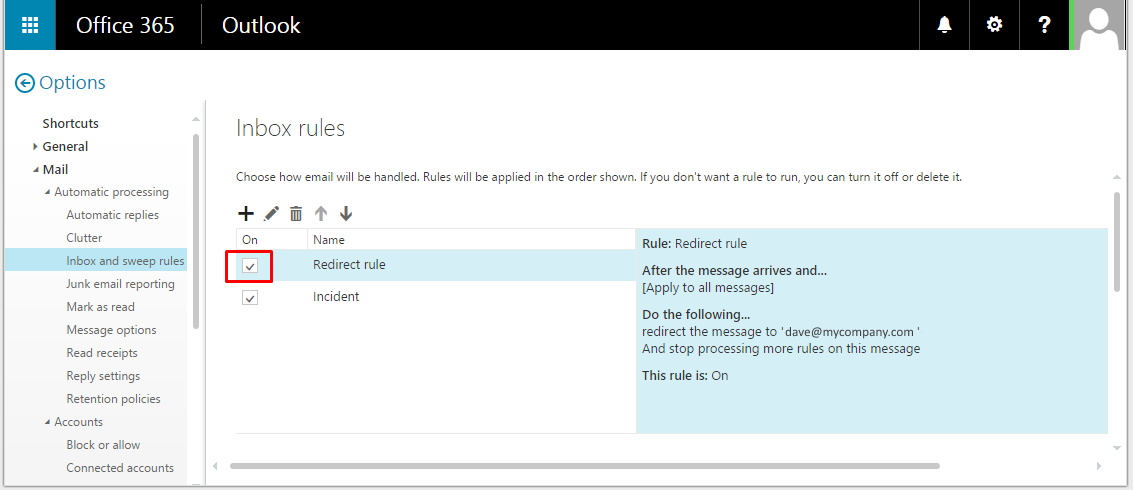
The redirect rule is saved, and now listed in the Inbox rules page.
To stop redirecting messages
To stop redirecting messages to another account, proceed as follows.
- Follow Step 1 and Step 2 of Automatically redirect all messages to another account, to open the Inbox rules page.
- On the Inbox rules page, locate the redirect rule in the list of rules.
- Untick the checkbox next to the redirect rule to switch off the rule and so stop redirecting messages.
Note:
Once a rule has been created, you can easily switch it on and off by ticking or unticking the check box on the Inbox rules page.
If you want to delete a rule then, on the Inbox rules page, highlight the rule then click the trashcan icon.
If you want to edit a rule then, on the Inbox rules page, highlight the rule then click the edit icon.
Automatically forward all messages to another account
Messages that are forwarded will appear to be forwarded from you. When you reply to a message that has been forwarded, the reply will be sent to the address the message was forwarded from, not to the original sender.
To automatically forward all messages to another account, proceed as follows.
- At the top right hand corner of the page, click the Settings icon and, from the subsequent menu options, click Options.
The Mail options page opens.
- On the left hand menu pane, click, Mail > Accounts > Forwarding.
The Forwarding page opens.
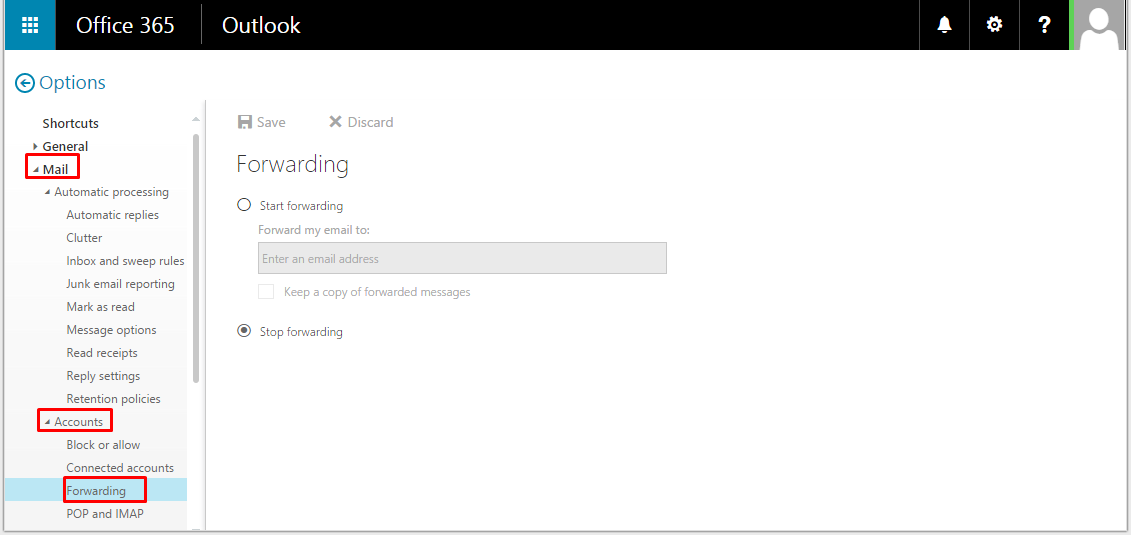
- Click the Start forwarding radio button.
- In the, Forward my email to text box, enter the email address to forward to.
- If required, tick the checkbox, Keep a copy of forwarded messages. If you leave this box unticked then you will not retain a copy of the forwarded message.
- Click Save, at the top left hand corner of the Forwarding page, to save your changes.
Your email messages will now be forwarded to the selected email address.
Note:
If you don't want to forward all email messages, then you can forward selected messages by using conditional rules on the New Inbox rules page. To do this, proceed as follows:
a. Follow Step 1 to Step 3 of, Automatically redirect all messages to another account.
b. On the New inbox rule page, enter a name for your new forwarding rule.
c. In When the message arrives, and it matches all of these conditions, select the conditions for forwarding messages.
d. In Do all of the following, select, Forward, redirect, or send,
e. Select either, Forward the message to, or Forward the message as an attachment to.
f. Enter the email address to forward to.
g. Click OK to save your rule.
To stop forwarding messages
To stop forwarding messages to another account, simply open the Forwarding page, click the Stop forwarding radio button, then click Save at the top left hand corner of the page.