


Forwarding or redirecting email messages (for Outlook users)
By using a rule, any received e-mail messages that match conditions specified in the rule can be automatically forwarded or redirected to another e-mail account. For example, all e-mail messages from a sender, or with a subject that you specify, can be forwarded or redirected. Messages that are forwarded will appear to be forwarded from you, while messages that are redirected will appear to come from the original sender
Note:
Redirection requires you to use a Microsoft Exchange Server account.
This article is intended for Outlook users. If you are using a Outlook on the web (previously known as Outlook Web App, or OWA) then please refer to, KB0011010, Forwarding and redirecting email messages (for Outlook on the web users).
This article describes how to:
- Automatically forward incoming messages to another account.
- Automatically redirect incoming messages to another account.
Note:
Copies of messages that you redirect or forward will remain in your mailbox. If you add an action to delete a message, the message will go to your Deleted Items folder and will still be counted against your mailbox limit. If you exceed your mailbox limit, you may be blocked from sending or receiving new messages, and forwarding rules may not work until you delete enough messages to bring the total below your mailbox limit.
When you create a forward or redirect rule, you can add more than one address to send to. The number of addresses you can send to may be limited, depending on the settings for your account. If you add more addresses than are allowed, your rule won't work. If you create a rule with more than one address, test it to be sure it works.
Pre-requisites
It is assumed that the user is familiar with the Outlook, and has the application open.
Automatically forward incoming messages to another account
Use this method if you want to forward a copy of messages to someone else. The recipient will see that the message was forwarded from a message originally delivered to your e-mail account.
Note:
The following steps explain how to create and apply a rule to your Inbox or one of your private folders. To create a rule for a public folder, you must do so from the folder's Properties dialog box.
To automatically forward incoming messages to another account, proceed as follows.
- From within Outlook, click the FILE tab.
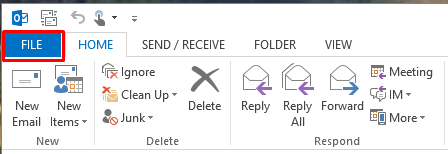
The Account Information page opens.
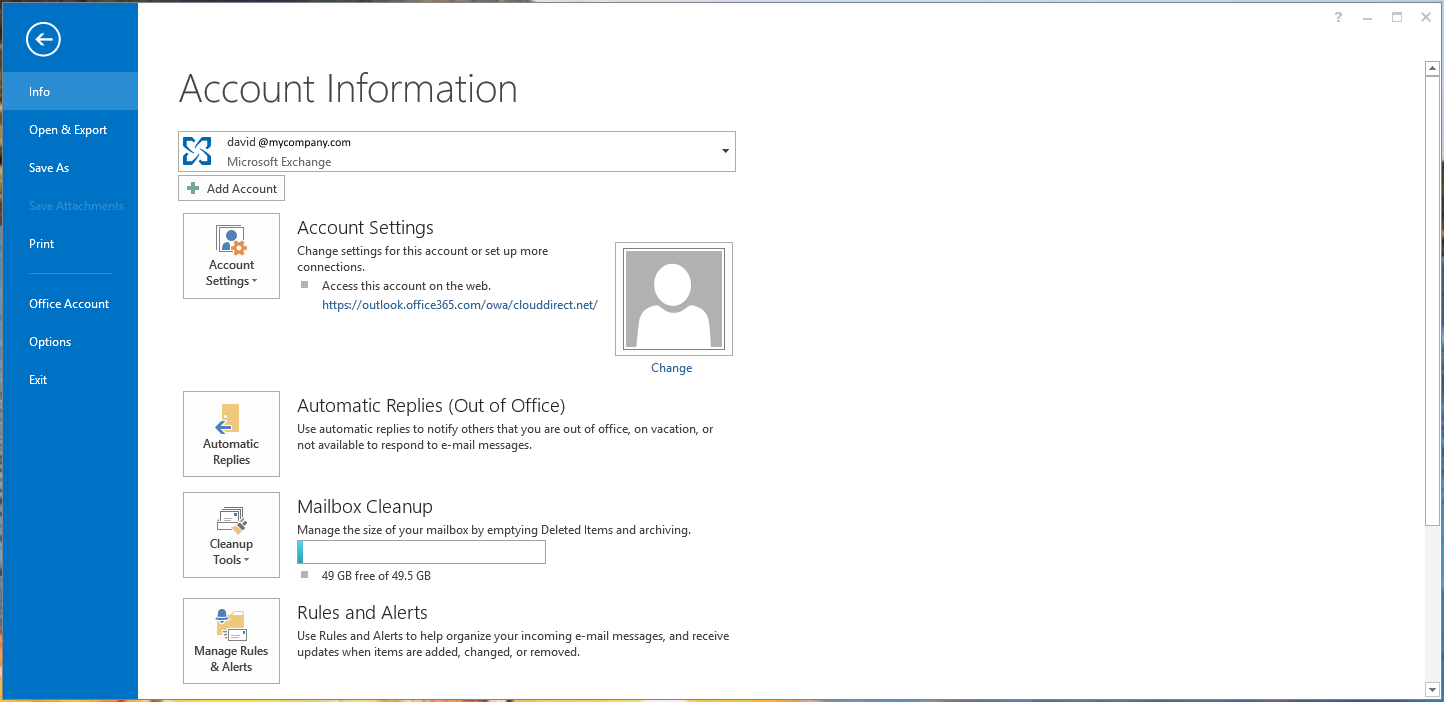
- Click, Manage Rules and Alerts.

The Rules and Alerts page opens.
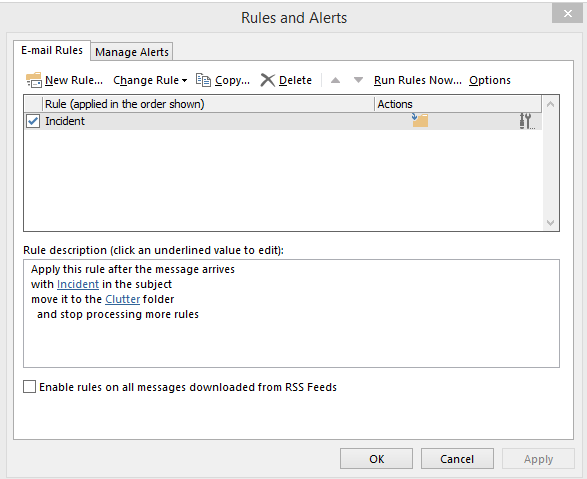
- At the top left hand corner of the E-mail Rules tab, click, New Rule.

The Rules Wizard opens.
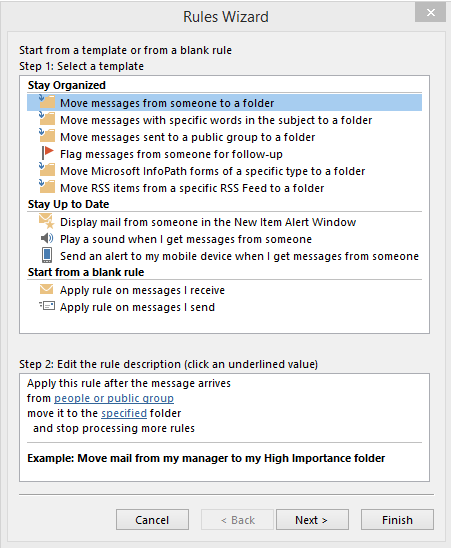
- Under, Start from a blank rule, click, Apply rule on messages I receive, and then click Next.
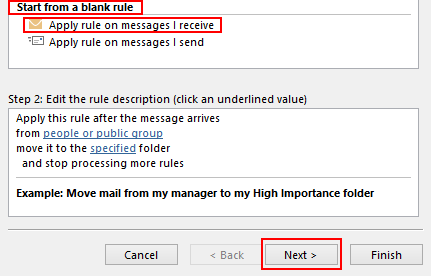
Which condition(s) do you want to check? Step 1: Select condition(s), appears.
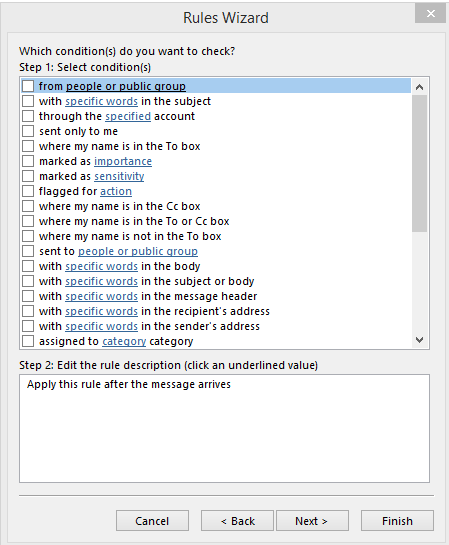
- Tick the check box next to each condition that you want the incoming message to match.
- Under, Step 2: Edit the rule description, click the underlined value that corresponds to the condition you have selected in Step 1, and then select or type the necessary information for the condition. For example: to automatically forward every message you receive from Joe Bloggs, then:
- Under Step 1: Select condition(s), tick the, from people or public group, check box.
- Under Step 2: Edit the rule description, click, people or public group.
A Rule Address book opens.
- In the address list, double-click Joe's name, and then click OK.
- Click Next.
What do you want to do with the message? Step 1 Select action(s) appears.

- Under Step 1: Select action(s), tick the, forward it to people or public group, check box.

A new entry, forward it to people or public group, appears under Step 2: Edit the rule description.
- Under Step 2: Edit the rule description, click, people or public group.
A Rule Address book opens.
- In the address list, double-click the name or public group to which you want to forward the messages, and then click OK.
- Click Next.
Are there any exceptions? Step 1 Select exception(s) (if necessary), appears.
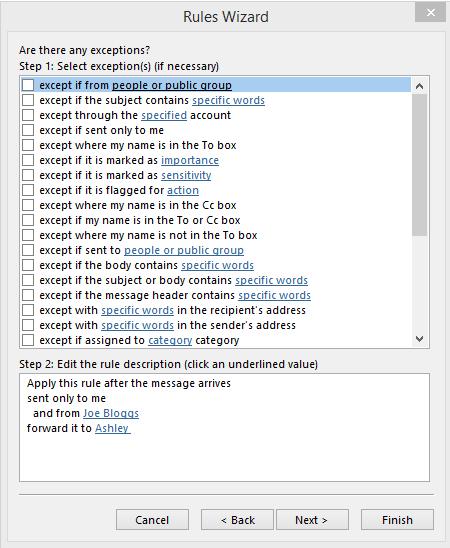
- If there are no exceptions then go to Step 13. If there are exceptions, then, in Step 1: Select the exception(s), tick the required exception condition(s), and in Step 2: Edit the rule description, click the underlined value, and select or type the necessary information for the condition.
- Click Next.
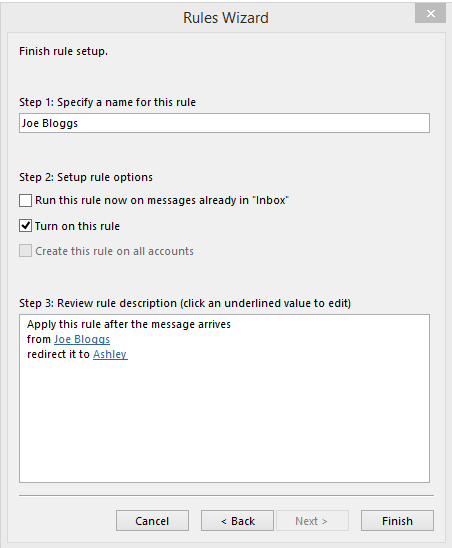
The Finish rule setup page appears.
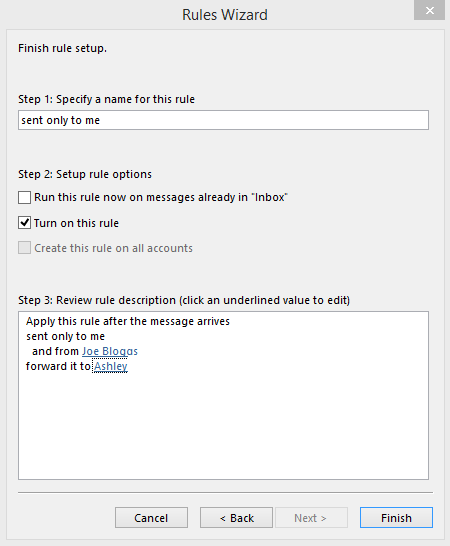
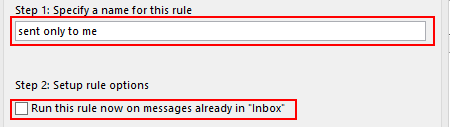
- Under, Step 1: Specify a name for this rule, type a name.
- Under, Step 2: Setup rule options, to run this rule on messages that are already in your Inbox, tick the, Run this rule now on messages already in "Inbox" check box.
Note:
If you have multiple email accounts and Inboxes, and want to apply this rule to all, then click the, Create this rule on all accounts check box. This option is grayed out if you do not have more than one e-mail account or Inbox.
- If you want this rule to be effective immediately then ensure the, Turn on this rule checkbox is ticked.
- Click Finish.
Your new forwarding rule appears in the list shown on the Rules and Alerts page.
Turning on or off your automatic forwarding rule
To turn on or off your automatic forwarding rule proceed as follows.
- Follow Step 1 and Step 2 of, Automatically forward incoming messages to another account.
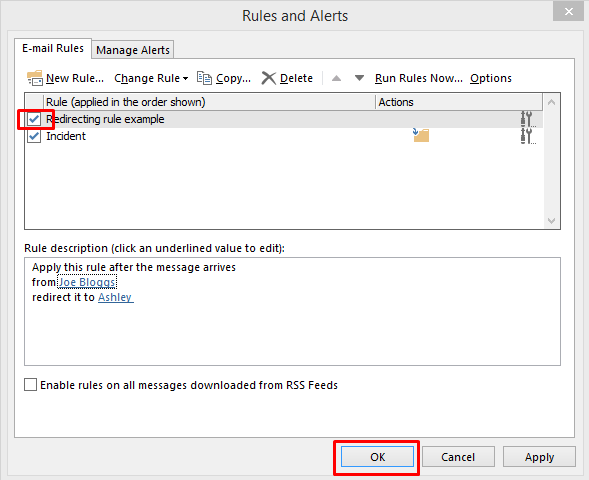
- On the E-mail Rules tab of the Rules and Alerts page, click on the required rule in the list.
- To turn on the rule, tick the checkbox. To turn off the rule, untick the checkbox.
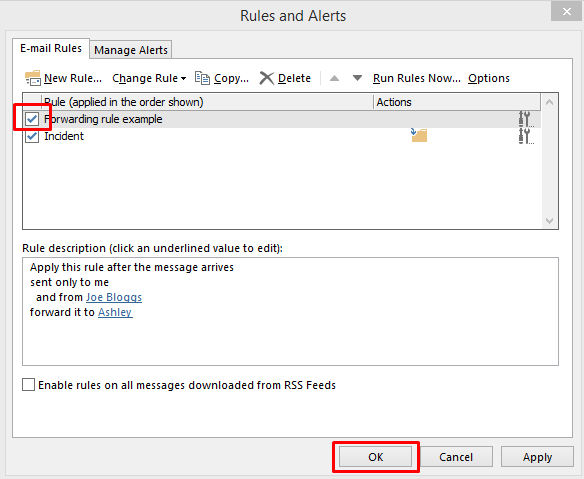
- Click OK.
Deleting or editing your automatic forwarding rule
To delete or edit your automatic forwarding rule proceed as follows.
- Follow Step 1 and Step 2 of, Automatically forward incoming messages to another account.
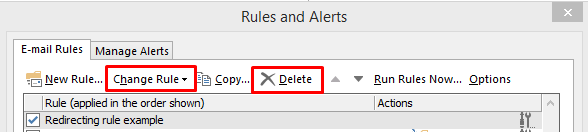
- On the E-mail Rules tab of the Rules and Alerts page, click on the required rule in the list.
- With the required rule highlighted, then,
- To delete the rule, click Delete.
- To edit the rule, click Change Rule, and select required changes.
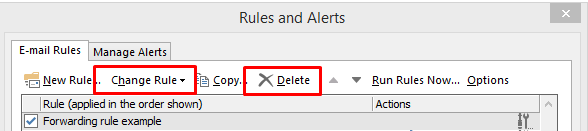
- Click OK.
Automatically redirect incoming messages to another account
Messages that are redirected will appear to come from the original sender. When you reply to a message that has been redirected, the reply will be sent to the original sender. To redirect email messages, you must set up an inbox rule. Use this method if you don't want recipients of the redirected messages to know that the messages were delivered by way of your e-mail account.
Note:
This feature requires a Microsoft Exchange 2000, 2003, or 2007 account. Most home and personal accounts do not use Exchange.
Note:
The following steps explain how to create and apply a rule to your Inbox or one of your private folders. To create a rule for a public folder, you must do so from the folder's Properties dialog box.
To automatically redirect messages to another account, proceed as follows.
- Follow Step 1 to Step 7 of, Automatically forward incoming messages to another account.
The Rules Wizard, What do you want to do with the message? Step 1 Select action(s) appears.
- Under Step 1: Select action(s), tick the, redirect it to people or public group, check box.

A new entry, redirect it to people or public group, appears under Step 2: Edit the rule description.
- Under Step 2: Edit the rule description, click, people or public group.
A Rule Address book opens.
- In the address list, double-click the name or public group to which you want to redirect the messages, and then click OK.
- Click Next.
Are there any exceptions? Step 1 Select exception(s) (if necessary), appears.
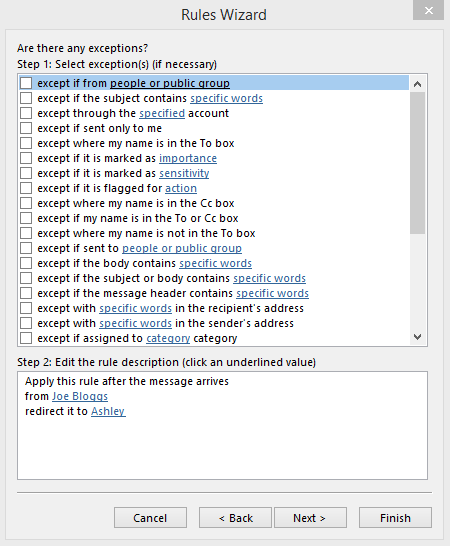
- If there are no exceptions then go to Step 7. If there are exceptions, then, in Step 1: Select the exception(s), tick the required exception condition(s), and in Step 2: Edit the rule description, click the underlined value, and select or type the necessary information for the condition.
- Click Next.
The Finish rule setup page appears.
- Under, Step 1: Specify a name for this rule, type a name.
- Under, Step 2: Setup rule options, to run this rule on messages that are already in your Inbox, tick the, Run this rule now on messages already in "Inbox" check box.

Note:
If you have multiple email accounts and Inboxes, and want to apply this rule to all, then click the, Create this rule on all accounts check box. This option is grayed out if you do not have more than one e-mail account or Inbox.
- If you want this rule to be effective immediately then ensure the, Turn on this rule checkbox is ticked.
- Click Finish.
Your new redirect rule appears in the list shown on the Rules and Alerts page.
Turning on or off your automatic redirect rule
To turn on or off your automatic redirect rule proceed as follows.
- Follow Step 1 and Step 2 of, Automatically forward incoming messages to another account.
- On the E-mail Rules tab of the Rules and Alerts page, click on the required rule in the list.
- To turn on the rule, tick the checkbox. To turn off the rule, untick the checkbox.
- Click OK.
Deleting or editing your automatic redirect rule
To delete or edit your automatic redirect rule proceed as follows.
- Follow Step 1 and Step 2 of, Automatically forward incoming messages to another account.
- On the E-mail Rules tab of the Rules and Alerts page, click on the required rule in the list.
- With the required rule highlighted, then,
- To delete the rule, click Delete.
- To edit the rule, click Change Rule, and select required changes.
- Click OK.