
Backup selection
File backup selection is configured when the backup policy is created. As time goes by however, requirements change and there may come a time when you need to change the selection of files to be backed up. This article guides you through the process of editing a backup policy to change backup selection to meet your new needs.
Editing a backup selection
Editing a LiveVault backup selection involves these main steps; logging in to the LiveVault Portal, selecting the server associated with the backup policy to be edited, editing backup selection within the backup policy. These steps are described below.
Log in to the LiveVault Portal
To login to the LiveVault Portal,
- Open an internet browser, such as Internet Explorer.
- In the address bar, enter the web portal address https://backupdirect.onlinebackup.com and click return.
The Backup Direct Welcome LOGIN page appears.
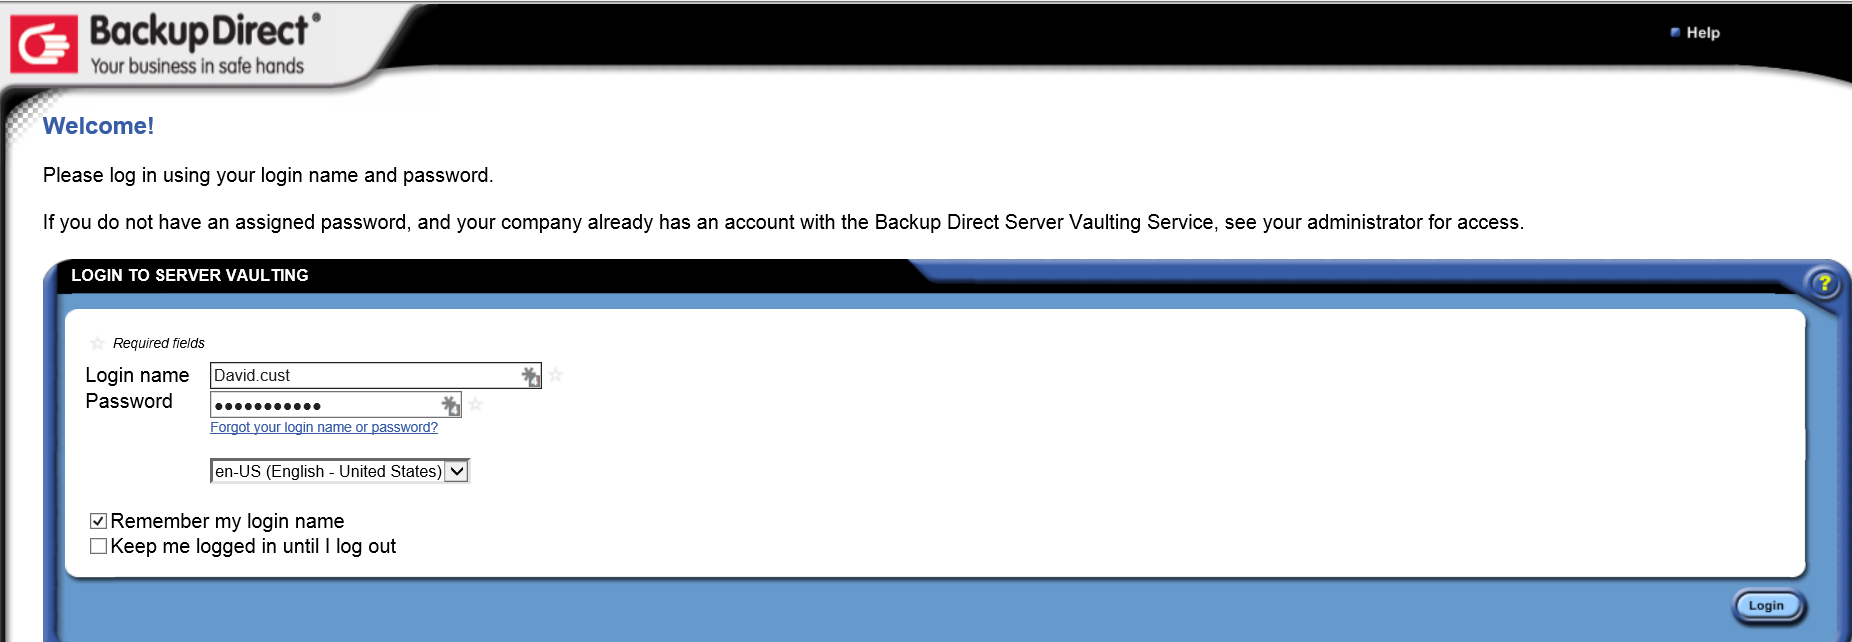
- Enter your Login name, which was provided in your registration email.
- Enter your Password, which you will have created during the registration process.
- Click Login.
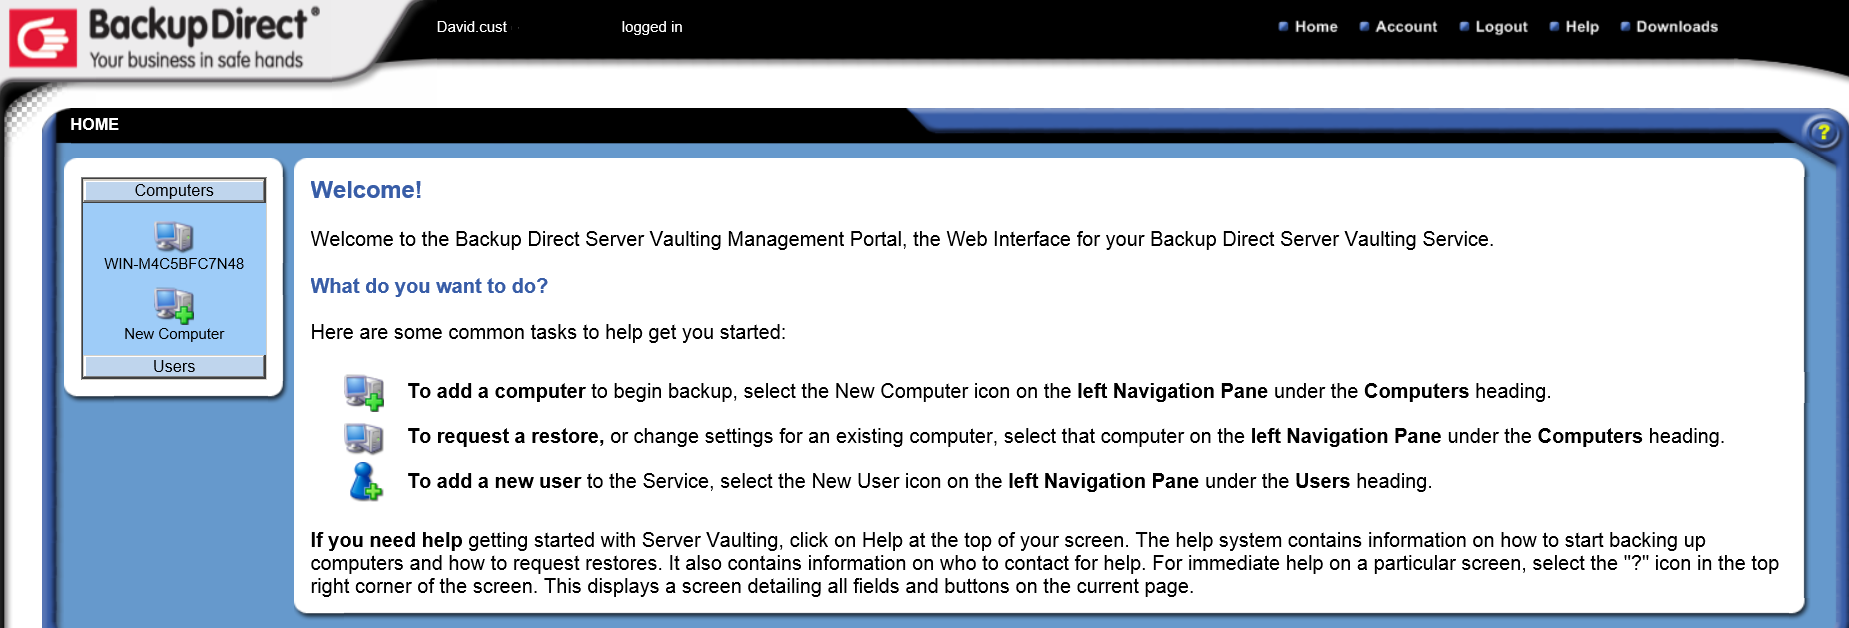
The Welcome HOME page for the LiveVault Portal appears.
Edit a backup selection
Backup selection must be edited from within the backup policy. To edit an existing standard backup policy, then from the LiveVault Portal Home page,
- In the left hand pane, locate the computer (server) associated with the backup policy to be modified, then left click on the computer name.
The Summary page opens.
- Select the Backup tab.
- Click edit policy.
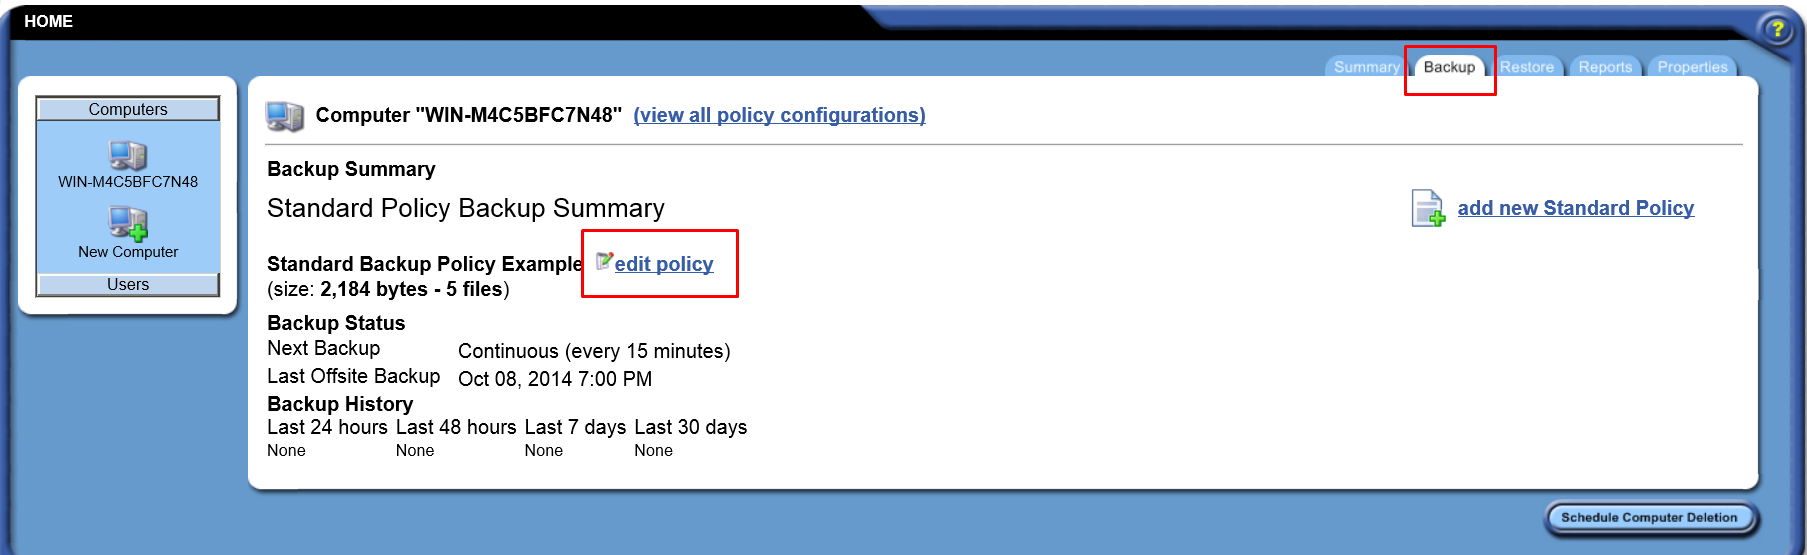
The required backup policy configuration page opens on the Selection tab.
To edit backup selection, and so add, modify or remove files protected with this policy, use the folder structure tree in the left hand pane to navigate through folders on the computer.
- Click on the desired folder name to bring up its file contents in the central window.
- View and individually select, or deselect, files by using the check boxes next to the individual files or folders in the central pane. Tick only the files you want to backup.
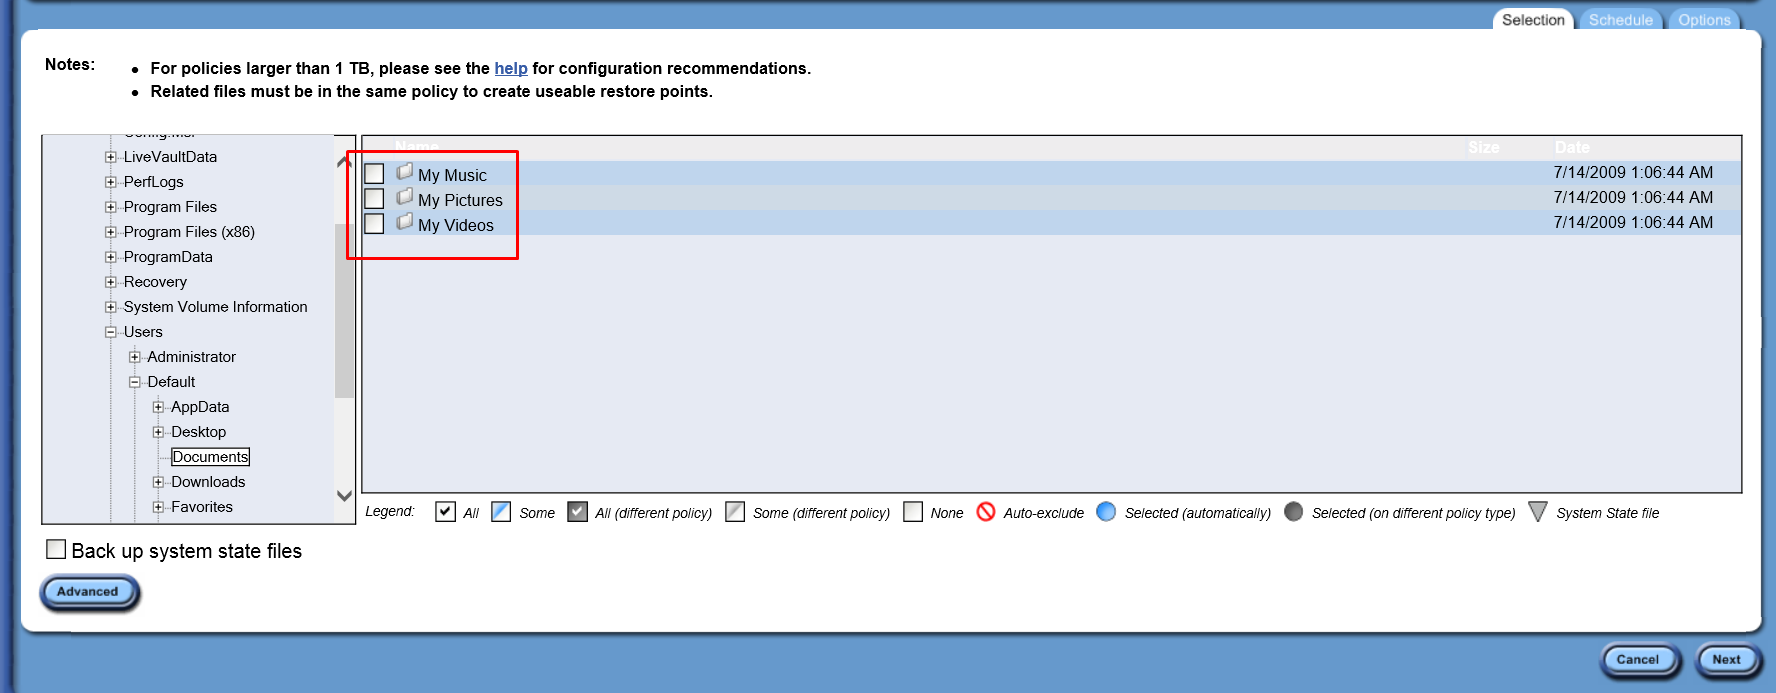
- Click on the computer name in the left hand pane to return to the overview level
Note:
You can select a whole drive for backup, but Cloud Direct do not recommend backing up the whole drive if it contains a large amount of data (50GB+).
- Click Next to process your changes.
Confirm the policy
The Review backup configuration page opens.
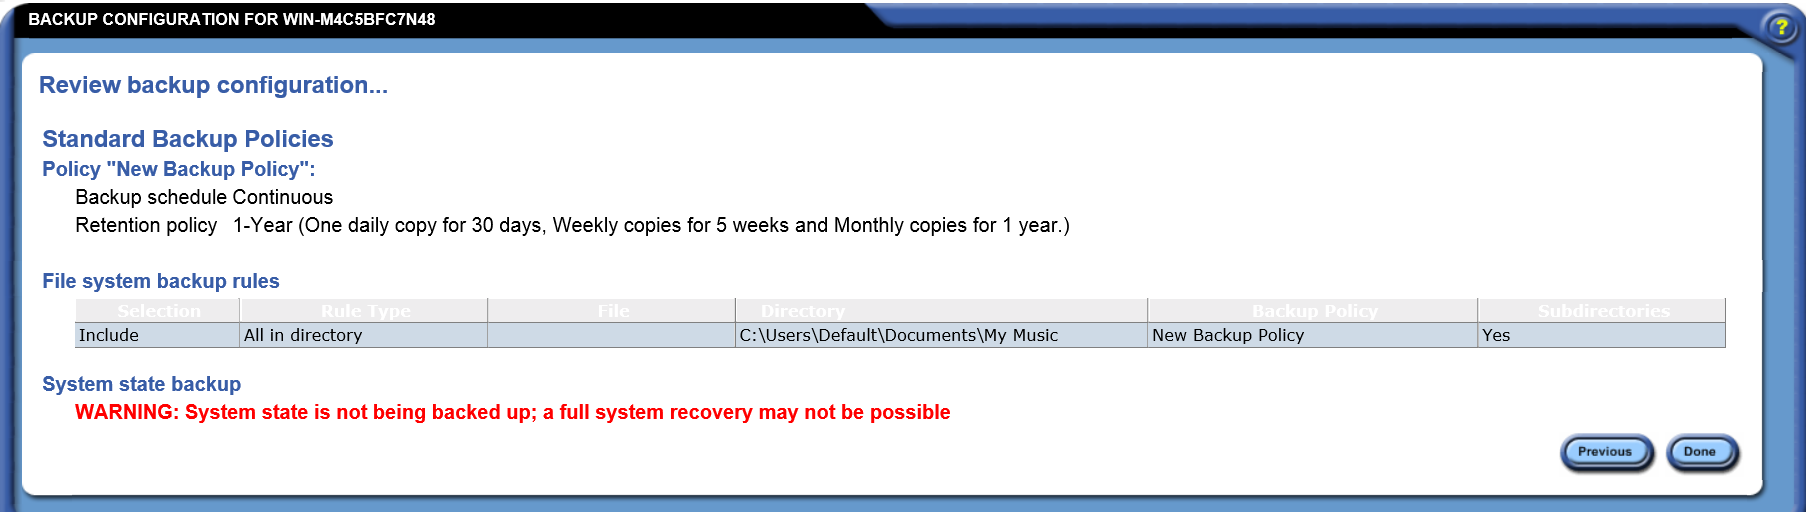
- Check the summary of the policy which you have modified, including the details of your retention. If you wish to make any changes click the Previous button and make required changes.
- Click Done.
The backup selection changes to the standard backup policy have now been accepted, and file backups will now be controlled by the newly modified policy.
