
Sharing or publishing your Office 365 calendar using Outlook on the web
If you have an Office 365 or other Microsoft Exchange account, you can use Outlook on the web (previously known as Outlook Web App, or OWA) to share your calendar with people inside or outside your organisation. When you share your calendar with someone inside your organisation, they're able to add it directly to their calendar view in Outlook or Outlook on the web. Depending on the permission you give them, they're able to view your calendar, to edit it, or to act as your delegate for meeting requests. People outside your organisation are sent a URL that they can use to view your calendar.
Note:
Calendar sharing may not be available for your account, or may be limited to people in your organisation.
This article describes how to share or publish your Office 365 calendar, using Outlook on the web. The article contains the following sections:
- Accessing Outlook on the web
- Sharing your calendar with people in your organisation
- Sharing your calendar with people outside your organisation
- Sharing your calendar with everyone
- Changing, or revoking, calendar sharing permissions
- Adding another person's calendar to my calendar view
Note:
If you are using Outlook, then please refer to Cloud Direct knowledge article, KB0011004, Sharing or publishing your Office 365 calendar.
Accessing Outlook on the web
Outlook on the web is the web browser version of Outlook that is used by businesses and organisations. You can use Outlook on the web to access the email, contacts, and calendar in your Office 365 for business or other Microsoft Exchange-based email via a web browser. The web address you'll use to sign in to Outlook on the web depends on the type of account you have. For example, if you're using Office 365 for business, go to the Office 365 sign-in page.
Note:
Outlook on the web can only be used to access Office 365 for business and other accounts that are hosted on a server that's running Microsoft Exchange Server 2013. If your email address ends in @outlook.com, @hotmail.com, @live.com, or @msn.com, then you're using the free Outlook.com (formerly Hotmail.com) email service, and not Outlook on the web.
Signing into your Outlook on the web account
To sign in to your Outlook on the web account, proceed as follows.
Note:
If you don't know your email address and password then contact the person who manages your email account to obtain these details before continuing.
- Open your web browser or, if it's already open, open a new window.
- Go to the sign-in page at Office 365 sign-in.
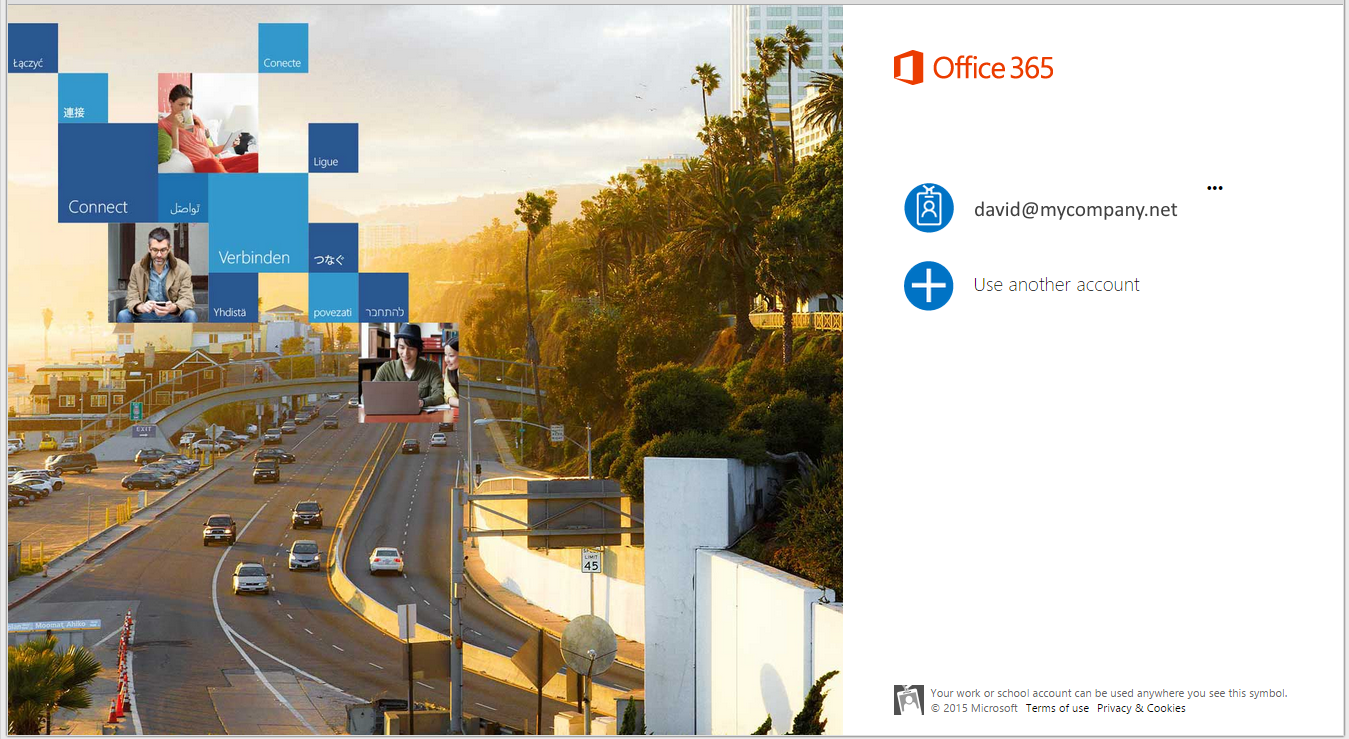
- Enter the full email address for your Office 365 for business, Office 365 Education, or other Exchange-based email (for example, someone@contoso.com).
Note:
If your email address is already visible on the Office 365 sign-in page, then simply click on the email address.
- If prompted, enter your password, then click Sign in.
You're now signed into your Outlook on the web account.
Sharing your calendar with people in your organisation
When signed into Outlook on the web, to share your calendar with people in your organisation proceed as follows.
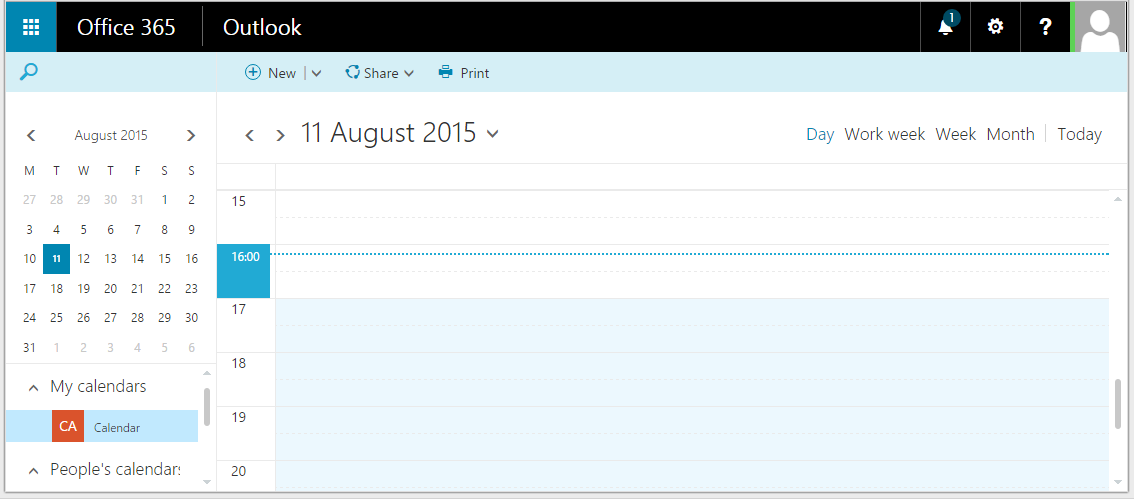
- Access your calendar as follows:
- Click the App Launcher, then select Calendar.
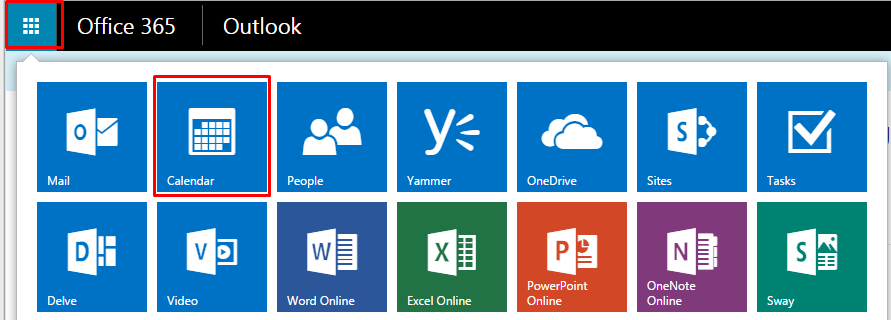
The Outlook Calendar page opens.
- Click, Share, and then from the drop-down option, click, Calendar.
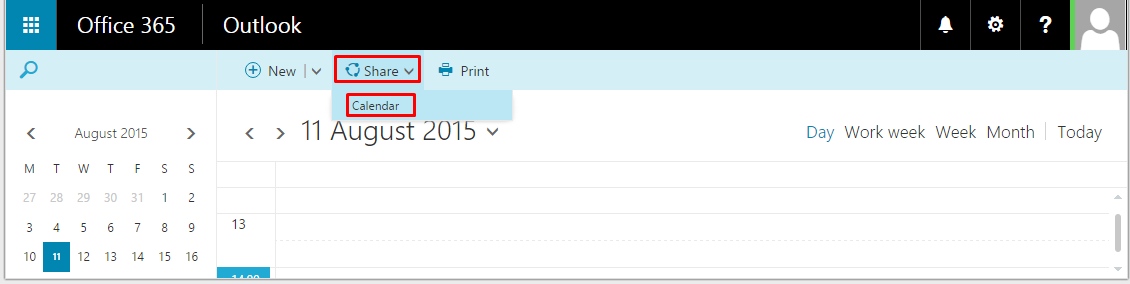
The calendar share page opens.
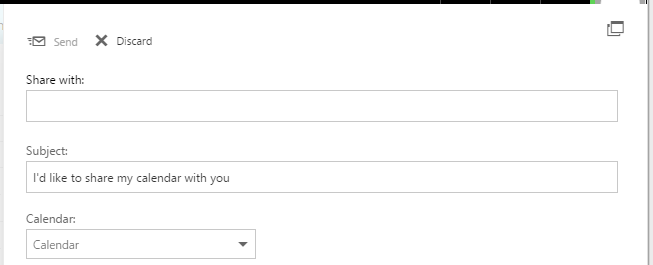
- Complete entries on this page as follows:
- Share with - Type the name or email address of the person you want to share your calendar with. This box works like the To box in an email message. You can add more than one person to share your calendar with.
- Subject – Optionally, you may type your own message in the Subject field.
- Calendar - By default, your primary calendar is shared. If you created other calendars, then they will be listed in the drop-down and may be selected to share instead of the primary calendar.
The name of the person you want to share your calendar with appears on the calendar share page.
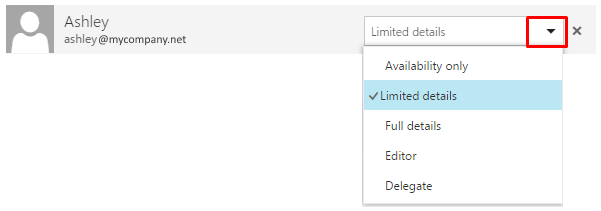
- Choose how much information you want the person to see as follows:
- Click the drop-down options box and select the required option.
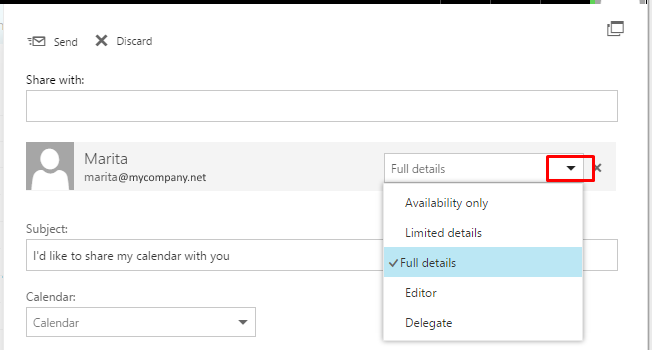
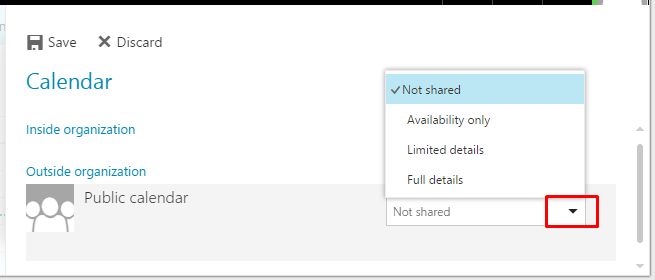
- Full details show the time, subject, location, and other details of all items in your calendar.
- Limited details show the time, subject, and location, but no other information.
- Availability only shows the time of items on your calendar and no other details.
Notes:
You can also give someone permission to edit your calendar by choosing Editor or Delegate. An editor can edit your calendar. A delegate can edit your calendar, and can send and respond to meeting requests on your behalf.
If you share a calendar other than your primary calendar then you can give permission only for Full details or Editor access to that calendar.
5. When you have finished adding people to share with, setting their access levels, and choosing which calendar to share with them, click, Send, at the top right hand corner of the calendar share page. (If you decide not to share your calendar right now, choose Discard).
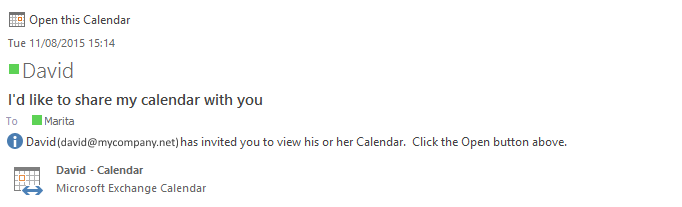
Each person in your organisation that you share your calendar with, is sent an invitation in an email message telling them that you've shared your calendar. The email message includes a URL to access the calendar.
If selected by the recipient, then your calendar is listed under, Shared calendars, at the bottom of the left hand pane on the other person's Outlook calendar. If the other person is using Outlook on the web, then your calendar is listed under People's calendars.
Note:
Calendar items marked Private are protected. Most people you share your calendar with see only the time of items marked Private, and not the subject, location, or other details. The only exception to this is that you can give a delegate permission to see the details of items marked Private.
Sharing your calendar with people outside your organisation
When signed into Outlook on the web, to share your calendar with people outside your organisation proceed as follows.
- Follow Step 1 to Step 5 of Sharing your calendar with people in your organisation.
Each person outside your organisation that you share your calendar with, is sent an invitation in an email message telling them that you've shared your calendar. The email message includes a URL to access the calendar.
Note:
If the external user's organisation and your organisation are federated through Office 365 or Exchange, then the person sees your calendar under, People's calendars. If the external user's organisation and your organisation are not federated through Office 365 or Exchange, then the user will need to access your mailbox by clicking the URL in the body of the message.
Note:
Calendar items marked Private are always protected. Anyone you share your calendar with outside your organisation sees only the time of items marked Private, and not the subject, location, or other details.
Sharing your calendar with everyone
Note:
This feature may not be available for your account.
When signed into Outlook on the web, to share your calendar publicly, with everyone, proceed as follows.
- Access your calendar as follows:
- Click the App Launcher, then select Calendar.
The Outlook Calendar page opens.
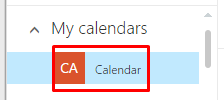
- In the left hand calendar navigation pane, under My calendars, right-click the calendar you want to share. If you have not created additional calendars then only your primary calendar will be listed.
- From the resultant list of options, click Permissions.
The Calendar page opens.
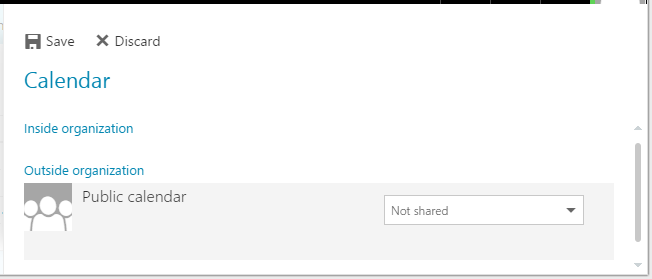
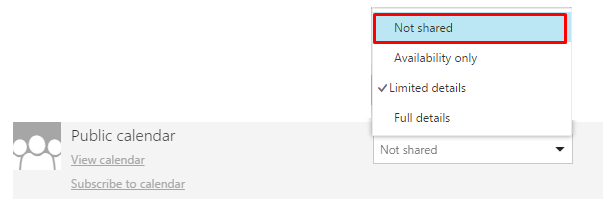
- Under Outside organization, Public calendar, click the drop-down option box and choose the level of access you want to give users.
- Click, Save.
The public access configuration is now saved. You may now invite people to view or subscribe to your calendar by sending them a URL.
- To find and select the public URL needed to view or subscribe to your calendar, proceed as follows:
- Return to the My calendars list,
- Right-click on the selected calendar again, and again choose Permissions.
There are two links listed under Public calendar.
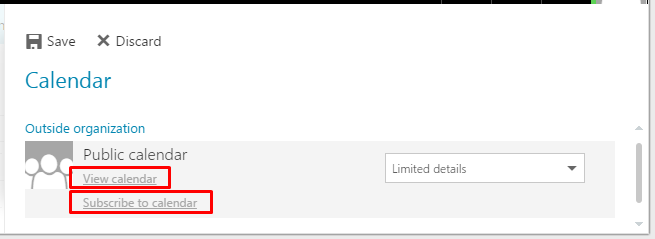
- Right-click one of the following options, and select Copy link address:
i. View calendar – This opens your calendar as a webpage.
ii. Subscribe to calendar – This downloads a calendar.ics file. Click to open this file and add your calendar to the recipients email client, such as Outlook or Outlook on the web.
- Send the copied link address to required recipients so that they can view your calendar on a web page or from within their Outlook client or Outlook on the web.
Changing, or revoking, calendar sharing permissions
You can change the permissions you've set for a calendar, or stop others from seeing your calendar. To do this, proceed as follows.
- In the left hand calendar navigation pane, under My calendars, right-click the calendar you want to share.
- From the resultant list of options, click Permissions.
The Calendar page opens in the right hand pane, showing details of people who have access to your shared calendar.
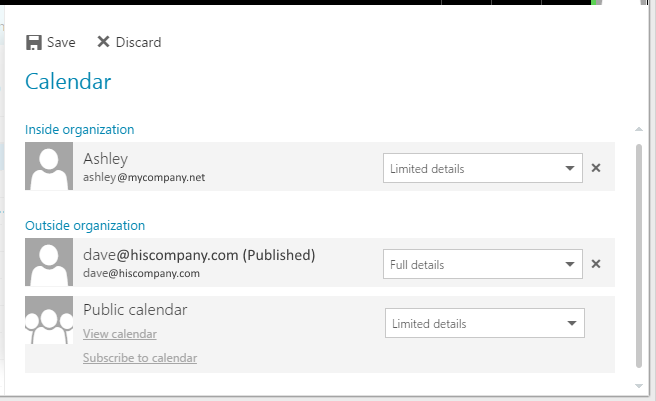
- To change permissions, or stop sharing your calendar with a person (ie. revoke permissions), find the person you want to change permissions for and either,
- Click the drop-down options box and choose a new level of permissions,
or,
- Click the Remove recipient icon to remove their permissions completely.

- To stop sharing your calendar publicly, then change the Public calendar setting to Not shared.
- Click, Save, in the top left hand corner of the Calendar page, to keep your changes, or Discard to cancel.
Note:
When you delete a person from the list of people you shared your calendar with, the URL that was sent to them stops working.
When you set your Public calendar to Not shared, the associated URLs created when you shared your calendar also stop working.
Adding another person's calendar to my calendar view
If you receive an invitation to share someone else's calendar, you can select the link in the invitation to add their calendar to your calendar view. You can also go your Calendar to add other people's calendars to your view.
To add another person's calendar to your view from within your Calendar, proceed as follows.
- In the left hand navigation pane, right-click, Other calendars, then click, Open calendar.
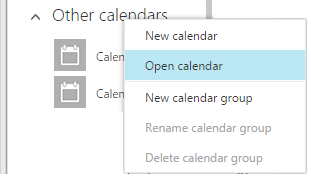
The Open calendar page opens.
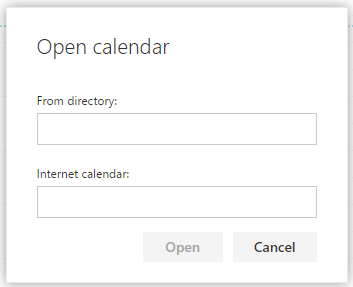
- To add a calendar that belongs to someone in your organisation, then,
- In the From directory box, type their name. The From directory box works like the To box in a new email message.
- Click Open to add the calendar.
- To add a calendar from outside your organisation, then,
- In the Internet calendar box, type the URL. (This will probably end with the .ics file extension).
- Click Open to add the internet calendar.
After you add another calendar, you can select it to add it to, or remove it from, your calendar view. You can also right-click on the calendar name to change the calendar colour or delete it from your view.
