
Uninstalling the Azure Backup agent
This article describes how to remove the Azure Backup agent from your computer. It contains the following sections:
- Uninstalling the Azure Backup agent from a Windows computer, or
- Uninstalling the Azure Backup agent from a Mac computer.
Please refer to the appropriate section.
Uninstalling the Azure Backup agent from a Windows computer
The procedure to remove the Azure Backup agent software from a Windows computer varies slightly depending on your version of Windows. To remove the Azure Backup agent software from a Windows computer, proceed as follows.
- Go to the Windows Start menu. (For Windows 8 or Windows 10, right-click the window icon at the bottom left-hand corner of the screen, to access Control Panel via a dropdown menu).
- Click Control Panel.
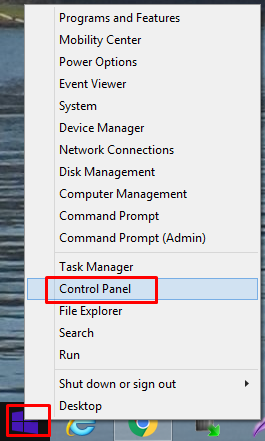
The Control Panel opens.
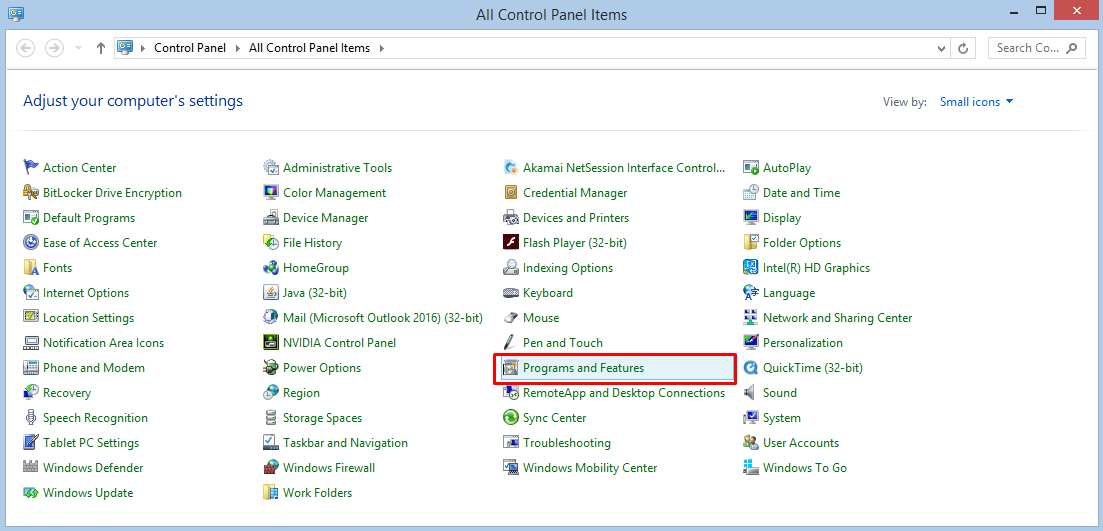
- From the Control Panel, click Programs and Features (if using Windows 10), or,
- For Windows XP, click Add or Remove Programs, or,
- For Windows Vista, 7, or 8, click Uninstall Programs.
A list of programs appears.
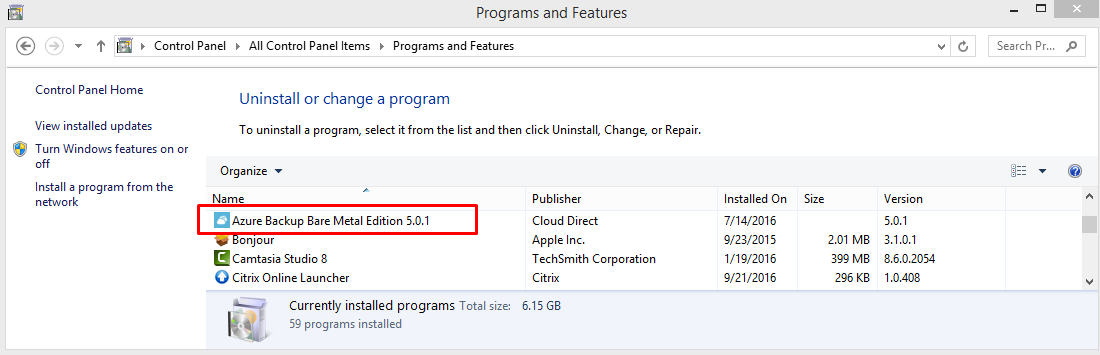
- From the list of programs, locate Azure Backup. (In the example shown, the Azure Backup version is Bare Metal Edition 5.0.1, but it may be different on your computer).
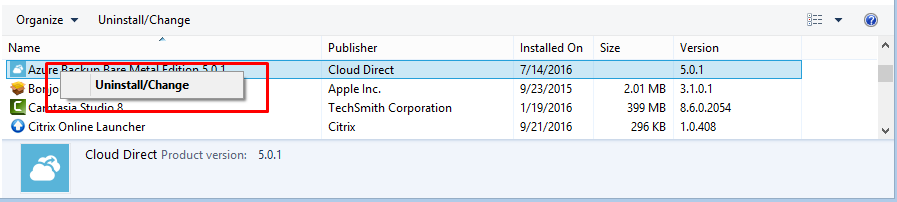
- Right click on Azure Backup (if using Windows 10), and click Uninstall/Change, or,
- For Windows XP, click the Remove, or Change/Remove, tab to the right of the program name, or,
- For Windows Vista, 7, or 8, click Uninstall.
The Azure Backup agent software is removed from your Windows computer.
Uninstalling the Azure Backup agent from a Mac computer
To uninstall the Azure Backup agent software from an Apple Mac computer, proceed as follows.
- On the Mac hard drive, open the Applications folder, and then open the Utilities folder.
- In the Utilities folder, open the Activity Monitor.
- In the Process Name column, select Azure Backup.
- Click, Quit Process.
- Return to the Applications folder, and drag the Azure Backup folder to the Trash.
The Azure Backup agent software is removed from your Mac computer.
