
Backing up network locations with Azure Backup
Azure Backup is a service to back up and restore data in the cloud. This may be data from your own computer, but can also be data from a network location (mapped drive) such as a Network Attached Storage (NAS) or an external hard drive.
This article describes how to back up data from an external network location using Azure Backup. The steps required are:
- Configure an Azure Backup account with drive access for Online Backup Service
- Configure a separate network account for each network-shared folder
- Add a network share to the Backup Plan
Data from network locations may then be backed up in the same way as data from your local computer.
Note:
If you are backing up local files and folders from your own computer, see knowledge article KB0011330, Backing up files and folders to Microsoft Azure.
Configuring an Azure Backup account with drive access for Online Backup Service
In order to back up data from the mapped drives, users will need to configure an account on Azure Backup with drive access for Online Backup Service. By default, the service is running under the user's Local System Account, without network access.
To change the Online Backup Service account, proceed as follows.
- Open your Azure backup agent.
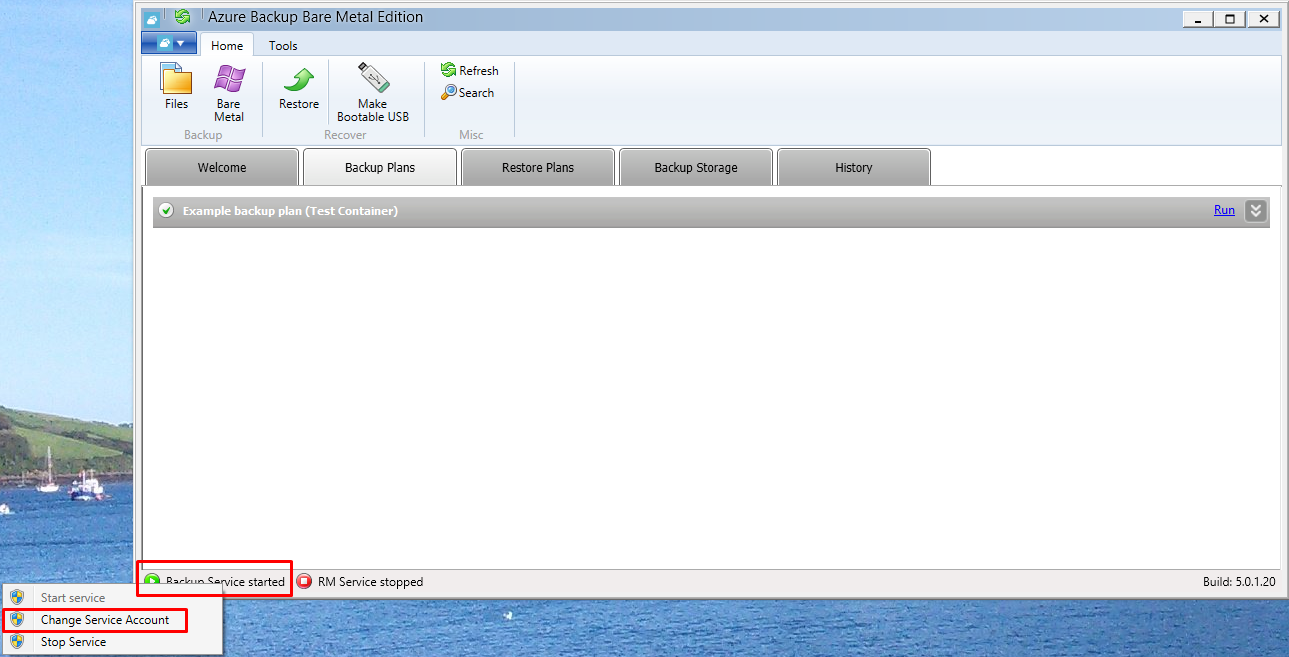
- On the bottom-left status bar, right-click on Backup Service started, and, from the drop-down options, click Change Service Account.
A User Account Control dialogue box appears.
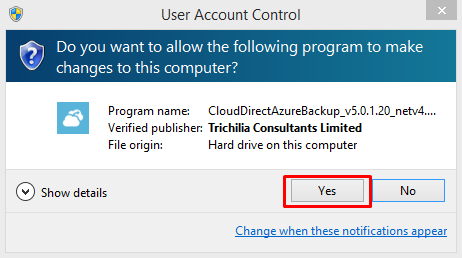
- Click Yes.
The Azure Backup Service Account dialogue box appears.

- Click on the This account radio button.
- Enter an account name and password, then click OK.
The service will be automatically restarted with the new account.
Configuring a separate network account for each network-shared folder
Once an account is configured with drive access for Online Backup Service, then, to back up data from network shares, you will need to configure a separate network account for each network-shared folder. To do this, proceed as follows.
- In the top menu bar, click Tools, then click Network Credentials.
The Network Credentials dialogue box appears.
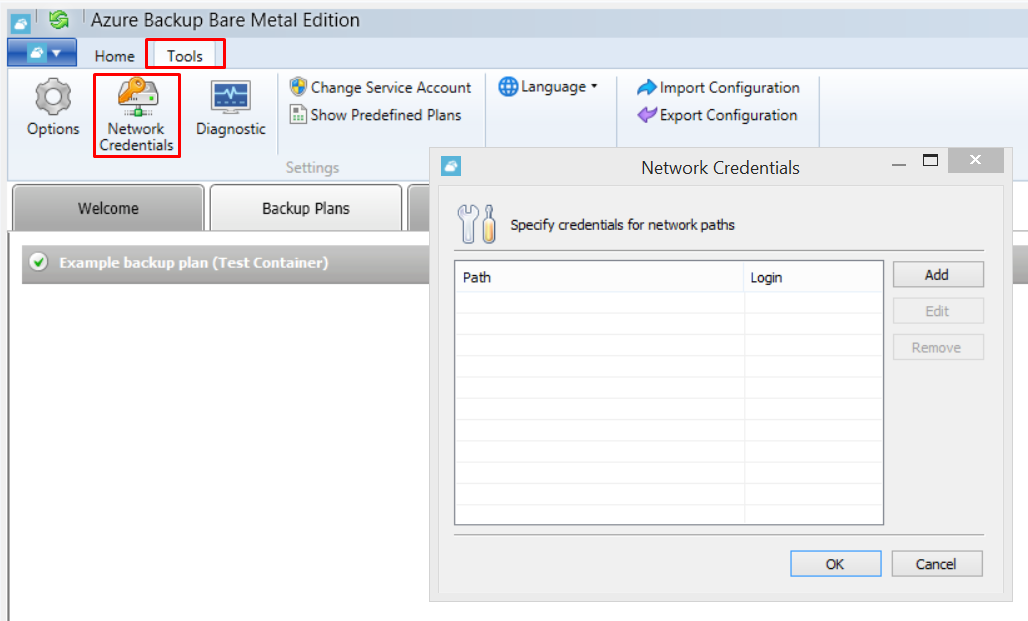
- On the right hand side of the Network Credentials dialogue box, click Add.
The Add/Edit Network Path dialogue box appears.
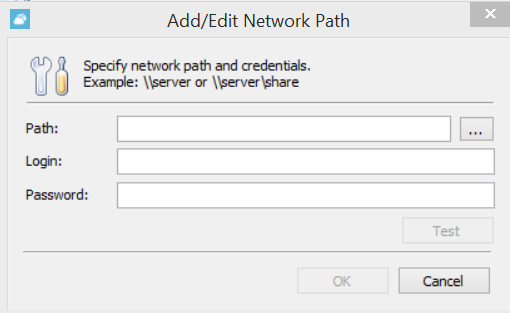
- Enter the Path to the network-shared folder. (Click the ellipsis button on the right, to open a browser window, and browse to the required network folder if required).
- Enter Login details and Password for access to the network-shared folder.
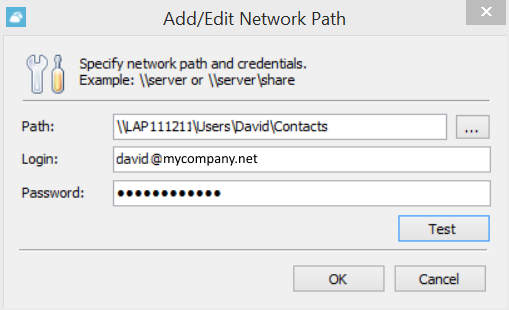
- If required, click Test to test the connection to the network-shared folder before proceeding. (A successful test will return a message "Operation completed successfully").
- Click OK.
The Network Credentials dialogue box re-appears, with your network-share entry saved and listed.
- Repeat Step 2 to Step 6 for each network-shared folder that you would like to back up.
- Click OK to close the Network Credentials dialogue box.
Adding a network share to the Backup Plan
To add a network share to the Backup Plan, proceed as follows.
- From the Azure Backup agent, launch the Create Backup Plan Wizard, and follow steps through the wizard until you reach the Backup Source page. (If you are unsure of how to do this, please refer to knowledge article KB0011330, Backing up files and folders to Microsoft Azure).
- On the Backup Source page, click the Add network share link at the bottom of the page.
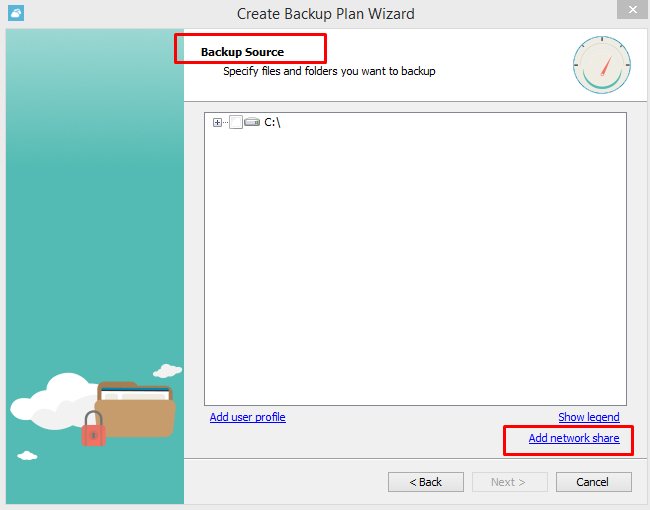
The Add Network Share dialogue box appears.
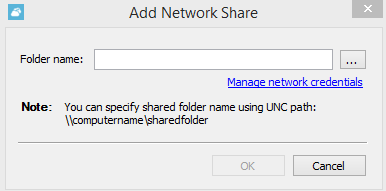
- In the Folder name textbox, enter the path to the network-shared folder. (Click the ellipsis button on the right, to open a browser window, and browse to the required network folder if required).
Note:
If you did not enter network credentials for the shared folder, as described previously in Configure a network account for each network-shared folder, then click the Manage network credentials link now, to specify network access credentials for the network shared folder.
- Click OK.
The Backup Source page re-appears, with your network-shared folder now listed as a backup source option.
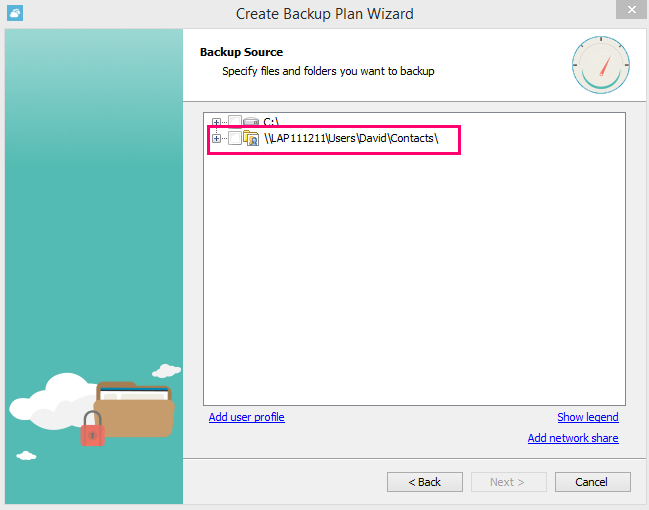
- Click the checkbox next to the network share, to select the network share as a backup source.
- Repeat Step 2 to Step 5 for each network share that you would like to back up.
- Click Next.
The wizard continues. The Advanced Filter page appears, followed by Compression and Encryption Options, Retention Policy, Schedule, Pre/Post Actions, Notification, and finally Summary.
- Step through the wizard, setting up the remaining Backup Plan features as required (refer to knowledge article KB0011330, Backing up files and folders to Microsoft Azure for more information if necessary).
Your network share will now be backed up in accordance with the Backup Plan.
