
Backup schedules
Backup runs according to a backup schedule set up in the backup policy. You can use a different schedule for each policy. If you have multiple backup policies, each policy's schedule is independent of the other policies. Under Windows, your backups run continuously by default, but you can change the policies to run under a different schedule. As time goes by, requirements change and there may come a time when you need to change the backup schedule. This article guides you through the process of editing a backup policy to change the backup schedule to meet your new needs.
The backup schedule grid
Using a grid that consists of hours of the day and days of the week, you specify the intervals during which a backup runs for the policy. An interval can consist of one or more successive half-hours, and can span multiple days. Unless the backup is continuous, only one backup will run during each interval. All schedules are run based on your computer's time zone. For example, a backup scheduled to begin at 10:00 p.m. will begin when it is 10:00 p.m. on the computer on which the backup is scheduled to run.
The schedules you set up do not affect the backup for your Windows System State. System State backup is an option for each policy. By default, the System State is backed up once per day at times defined by LiveVault backup.
Editing a backup schedule
Editing a LiveVault backup schedule involves these main steps; logging in to the LiveVault Portal, selecting the server associated with the backup policy to be edited, opening the required backup policy and editing the backup schedule. These steps are described below.
Log in to the LiveVault Portal
To login to the LiveVault Portal,
- Open an internet browser, such as Internet Explorer.
- In the address bar, enter the web portal address https://backupdirect.onlinebackup.com and click return.
The Backup Direct Welcome LOGIN page appears.
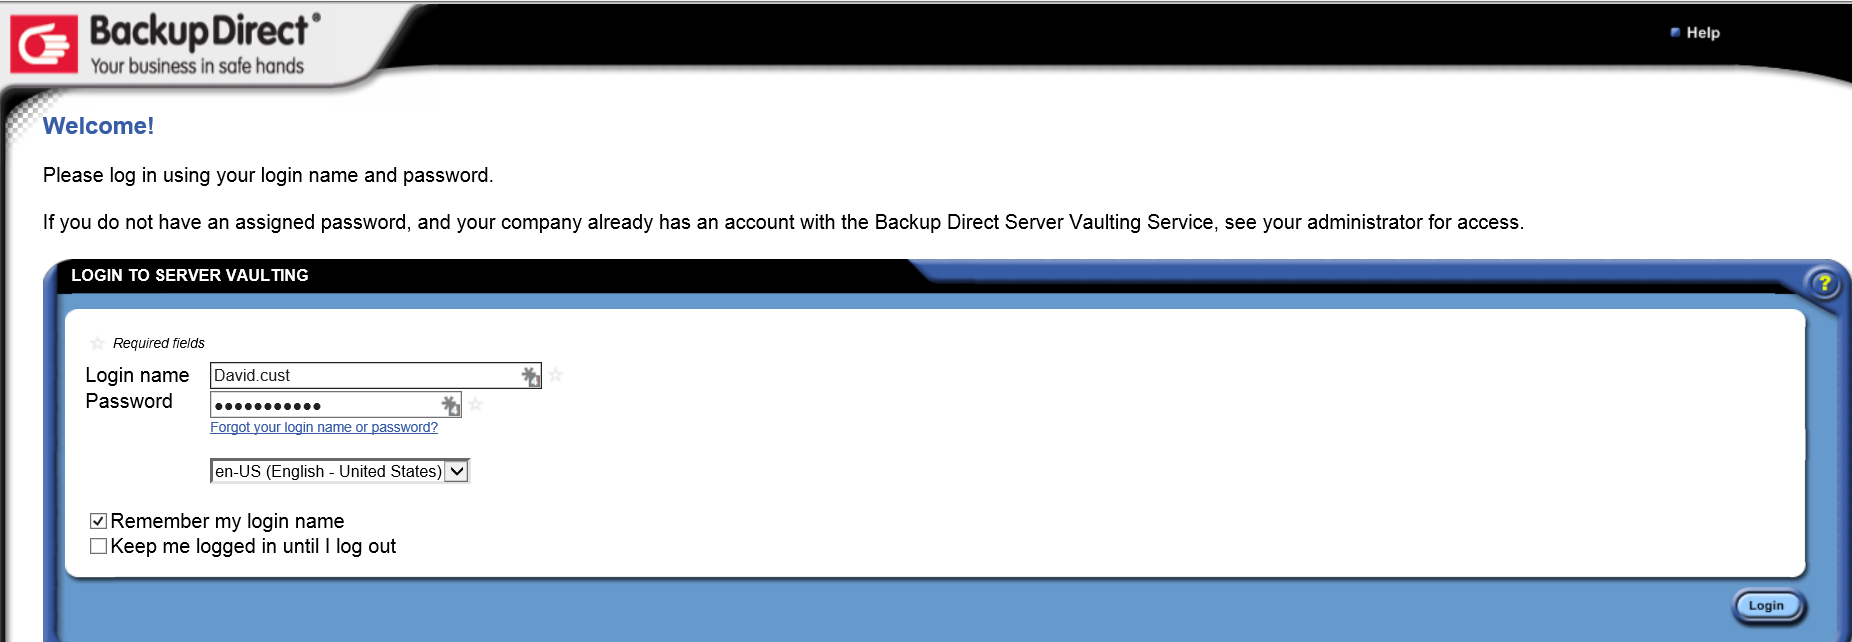
- Enter your Login name, which was provided in your registration email.
- Enter your Password, which you will have created during the registration process.
- Click Login.
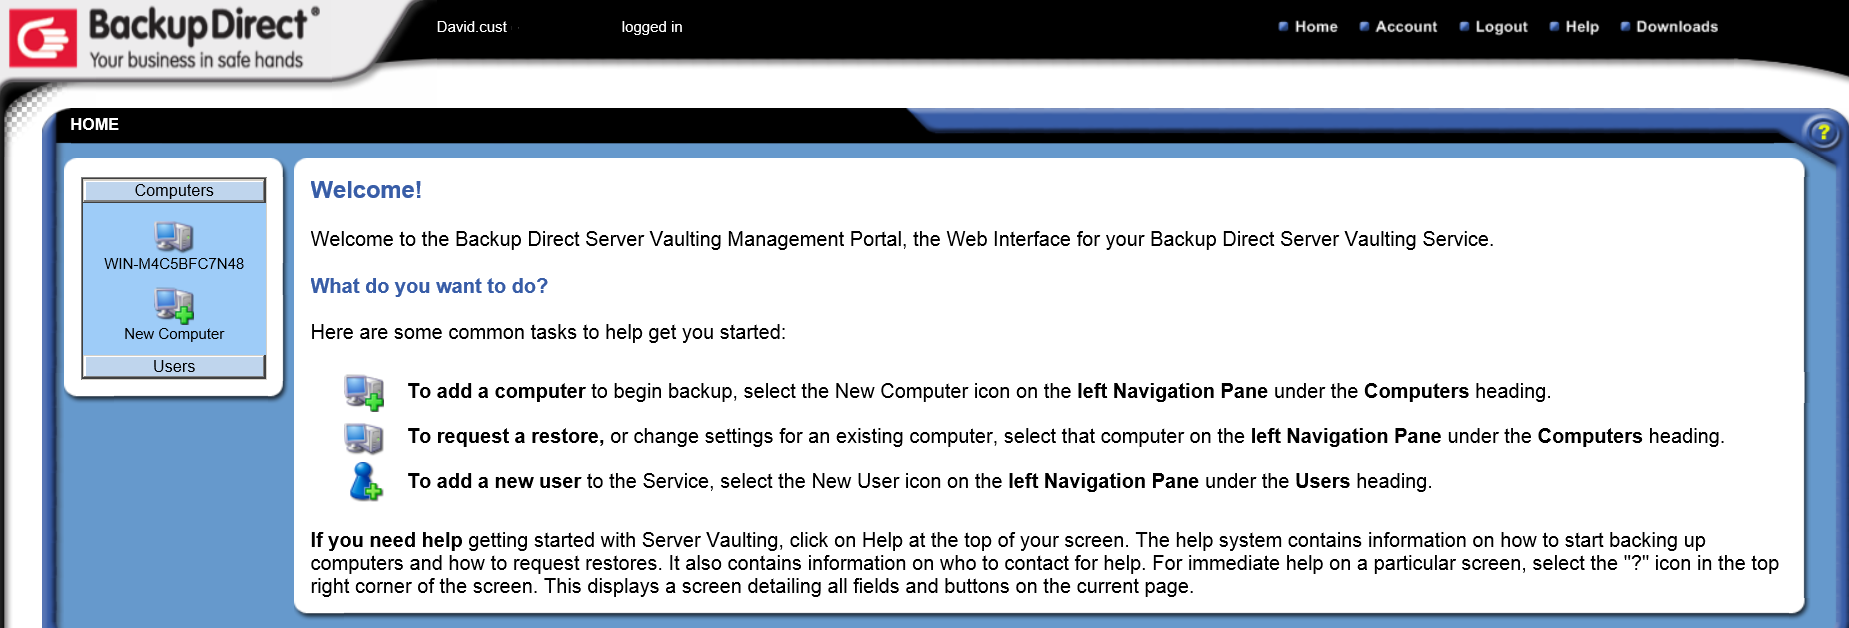
The HOME page for the LiveVault Portal appears.
Edit the backup schedule
The backup schedule must be edited from within the backup policy. To edit an existing standard backup policy, from the LiveVault Portal Home page,
- In the left hand pane, locate the computer (server) associated with the backup policy to be modified, then left click on the computer name.
The Summary page opens.
- Select the Backup tab.
- Click edit policy.
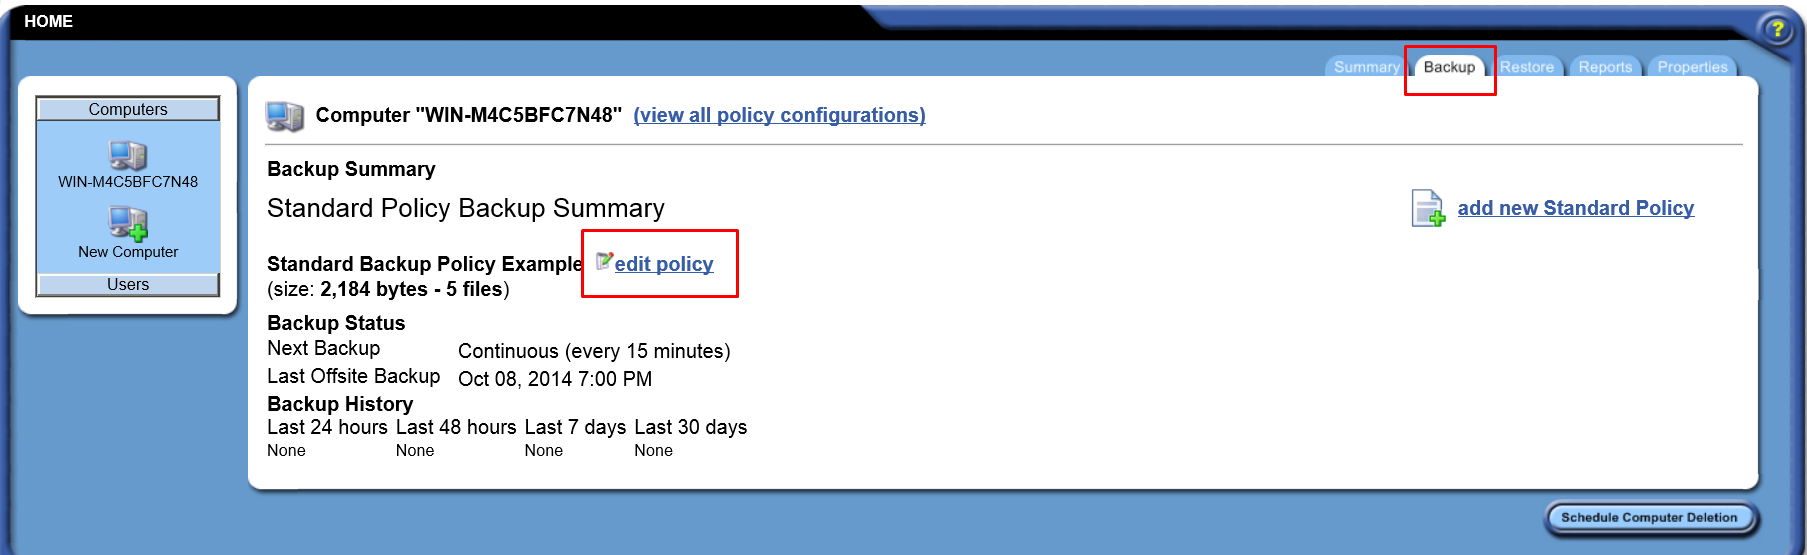
The required backup policy configuration page opens on the Selection tab.
To edit the backup schedule,
- Click the Schedule tab.
The scheduling page opens
- Click on the drop-down list to see available backup schedule options.
|
Backup schedule option |
Description |
|
Nightly Backup |
Backups will complete during the default hours of 8pm and 6am. Useful if you want to limit use of bandwidth during working hours when other people are likely to be using your network. Also notice the number of scheduled backups per week, which is automatically calculated and listed. Caution: Cloud Direct do not recommend you use this option, as if a backup is not completed within the 10 hour allocated time period then it will never complete. |
|
Custom |
Manually specify when you want backups to run. As a default, the option Run beyond scheduled time until backup is complete is checked, meaning that backups will be allowed to complete provided they are started within a permitted time slot. To toggle a 30 minute window, click on it. Click other 30 minute slots as desired and build your custom backup schedule. You can also click and drag to select a block of times during which you wish backups to occur. |
|
Continuous |
Backups processed on a 15 minute basis. This is the default option, and provides near real-time protection but may consume considerable bandwidth depending on your data selection. |
- Select the required backup schedule option.
- Click Next to process your changes.
Confirm the policy
The Review backup configuration page opens.
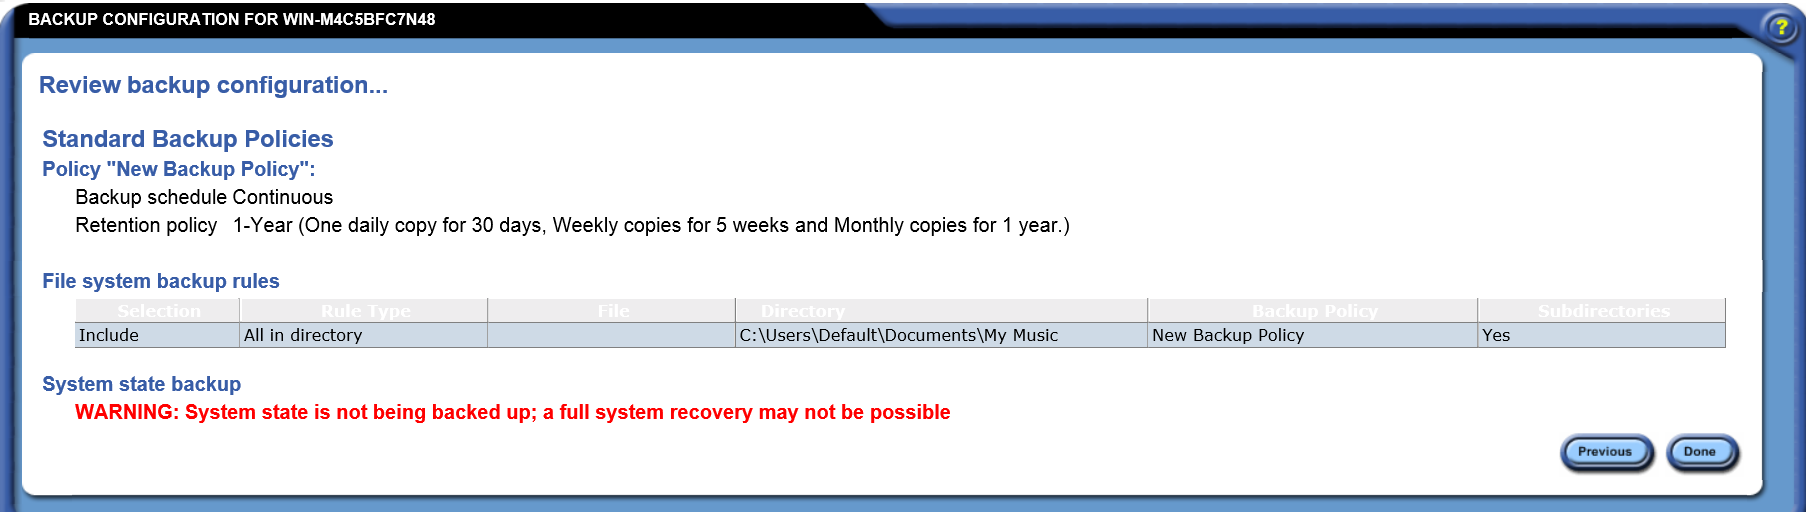
- Check the summary of the policy which you have modified, including the details of your retention. If you wish to make any changes click the Previous button and make required changes.
- Click Done.
The backup schedule changes to the standard backup policy have now been accepted, and file backups will be controlled by the newly modified policy.
