
Sharing Workplace projects with Public Links
Datto Workplace, from Cloud Direct, enables teams to work together on projects, with access to project data stored in shared folders and files. Project data may be shared with teams and individuals within your organization (Full Team Members), or with external teams and individuals (Guest Members).
- Full Members (within your Team)
- These are people within your team/organisation, and may be simply and routinely invited to join your Datto Workplace project.
- Guest Members (Public Links)
- These allow you to share a single file or folder for a fixed period through a web link that you can send to as many people as you like. You can password protect the link and even allow people to upload files to the link, but their desktop content will not be synchronised with the Datto Workplace project. These would usually be used to allow quick access to files for clients or short-term partners.
This article shows how to share folders and files with Guest Members by creating Public Links that may then be forwarded to the external users. It contains the following sections:
- Sharing a Datto Workplace project Folder using public links
- Sharing a Datto Workplace project File using public links
To share your Datto Workplace projects with Full Team Members, please refer to:
Prerequisite
It is assumed that the reader is the project owner, or has full access rights, before starting this task.
Public sharing a Datto Workplace project folder
Enabling public access
To enable public access to a folder within Datto Workplace, proceed as follows.
- Open the Workplace Online at the Projects tab.
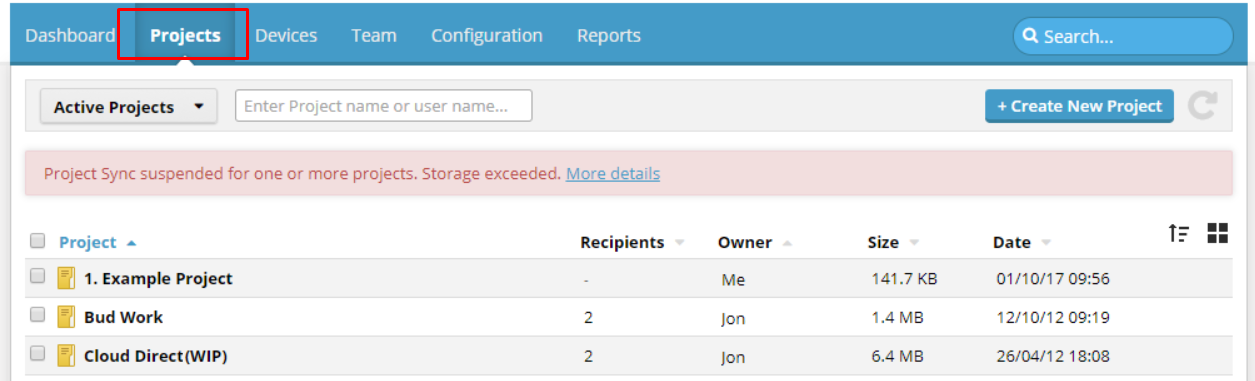
- Locate the folder name that requires sharing, and then tick the checkbox to the left of it.
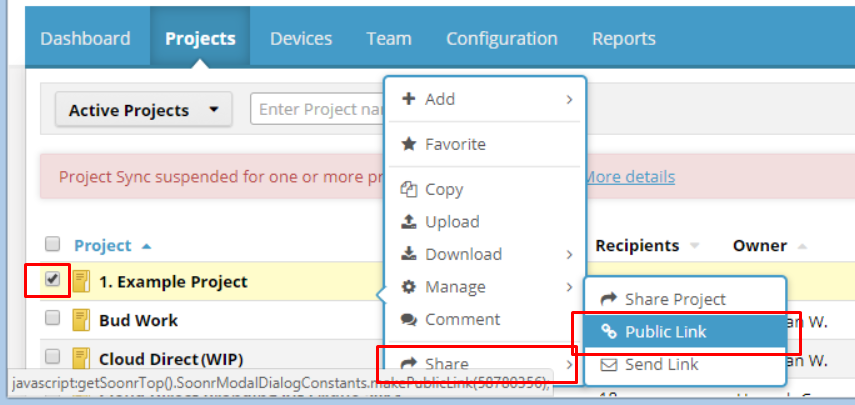
- Click Share, and then click Public Link.
Note:
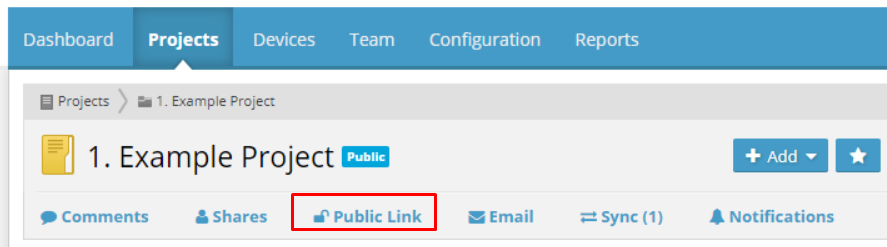
Alternatively, if available, click Public Link on the menu bar.
The following page appears.
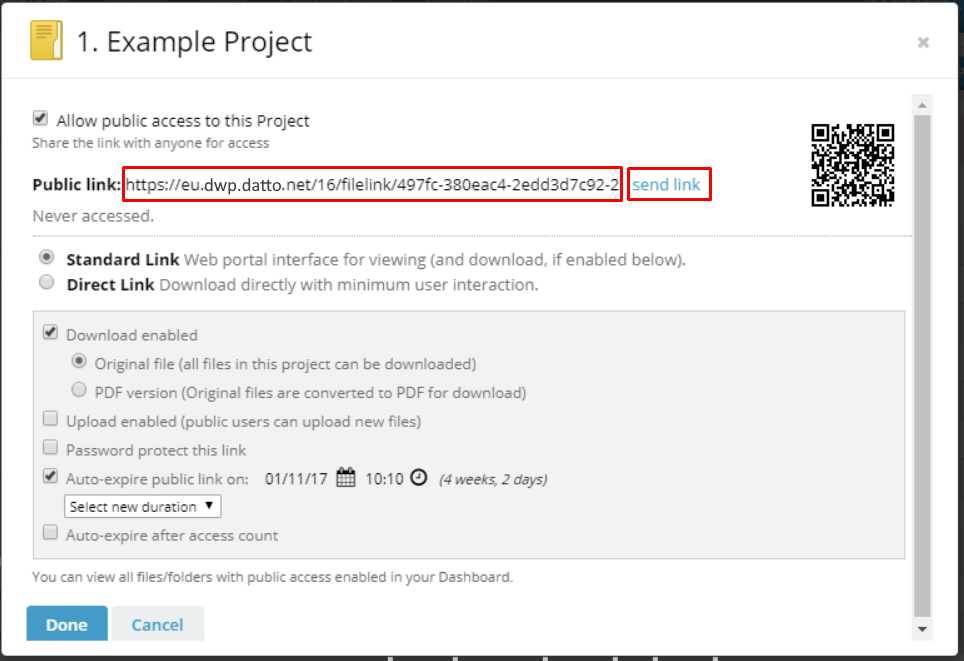
- To send the Public link to a guest member, either:
- Copy the Public link to your clipboard, and paste it into an email to the Guest Member, or,
- Click send link, to open the following page:
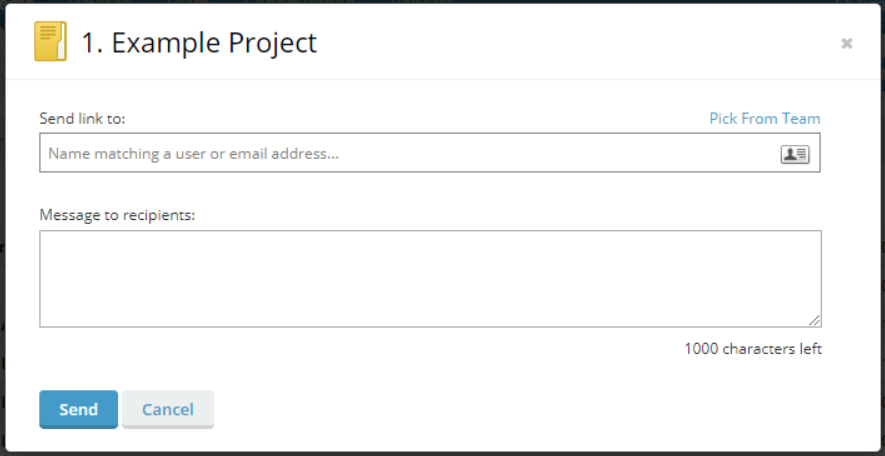
In Send link to, enter the recipient's email address.
Tip:
Use the Pick From Team function.
Enter a Message to recipients. Then click Send.
The Public link is emailed to the Guest Member(s).
Setting Public link options
You can set Public link options to enable or disable functionality for the recipient. There are two types of Public link; Standard, and Direct.
- Select the required Public link type, then set up options as required. (See below for Standard Link and Direct Link options).
- Click Done when finished.
Standard Link
The Standard Link option shows an entire folder, and allows the user to preview, or download a file from the folder. It also allows a user to upload a new file to the folder.
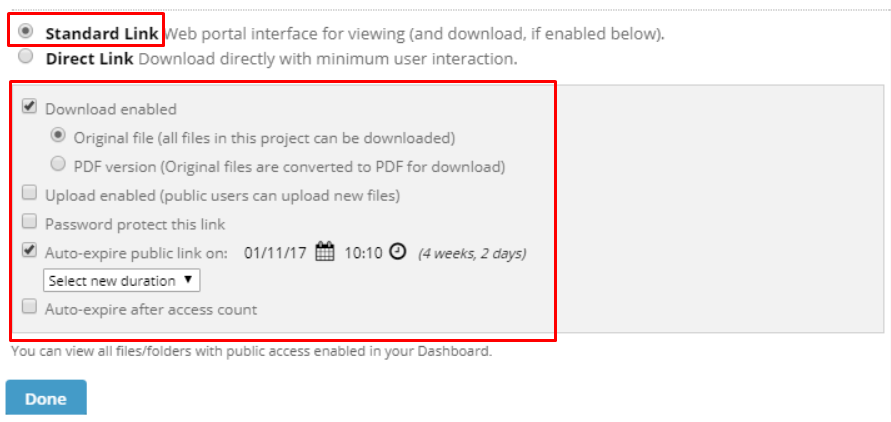
Set Standard Link options as follows:
- Download enabled – Tick the checkbox to enable file downloads.
- Original file – Files are downloaded in their original format.
- Pdf version – Pdf versions of original files are downloaded.
- Upload enabled - Tick the checkbox to enable file uploads.
- Password protect this link – Tick the checkbox to password protect the Public link. A textbox appears. Enter a password, or click generate password. This password must then be used before the folder can be accessed.
- Auto-expire public link on - Tick the checkbox, then use the drop-down option box to select a duration before the Public link expires. (Selectable ranges from 1 day to Unlimited).
- Auto-expire after access count – Tick the checkbox. A textbox appears. Enter the number of times that recipients can access the shared folder before the Public link expires. Click Apply Changes.
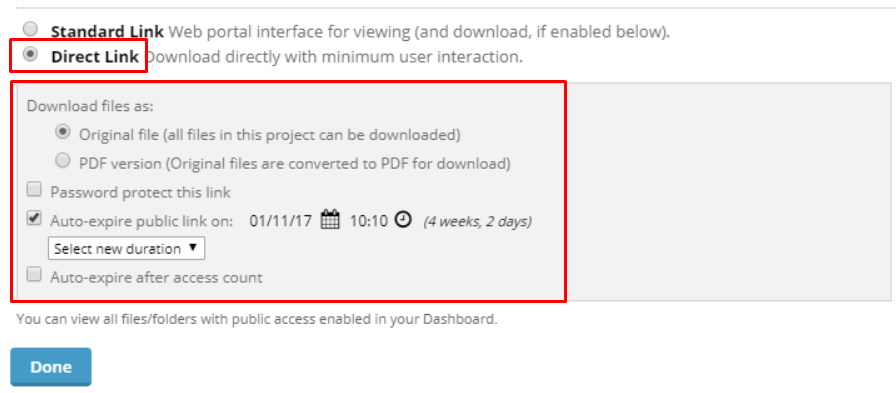
Direct Link
The Direct Link option enables a file to be downloaded directly, with minimum user interaction. It has no upload functionality, and does not allow a preview option. Set Direct Link options in the same way as previously explained for Standard Links.
Guest Member access
The Guest Member receives a notification email.
To access the shared folder, the Guest Member simply clicks on the Click here… entry in the email to go to the folder location. If a password has been set for folder access, then enter the password when prompted.
Public sharing a Datto Workplace project file
Enabling public access
To enable public access to an individual file within Datto Workplace, proceed as follows.
- Open the Workplace Online at the Projects tab.
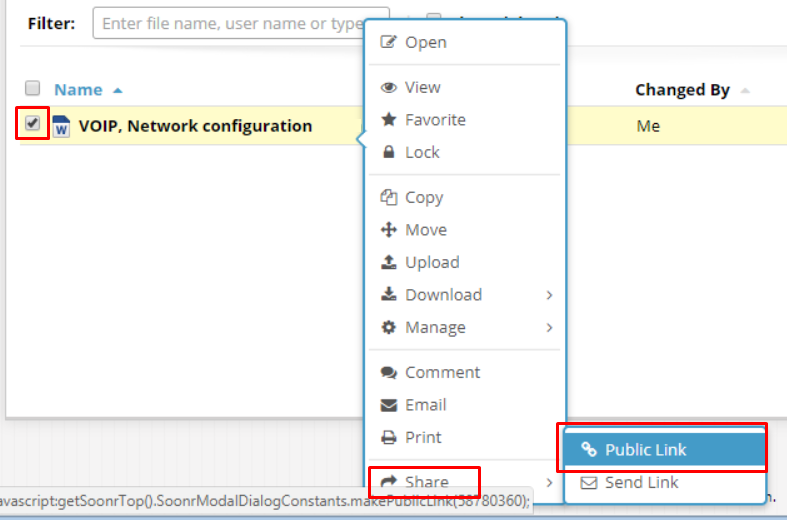
- Within the folders listed, locate the file name that requires sharing, and then tick the checkbox to the left of it.
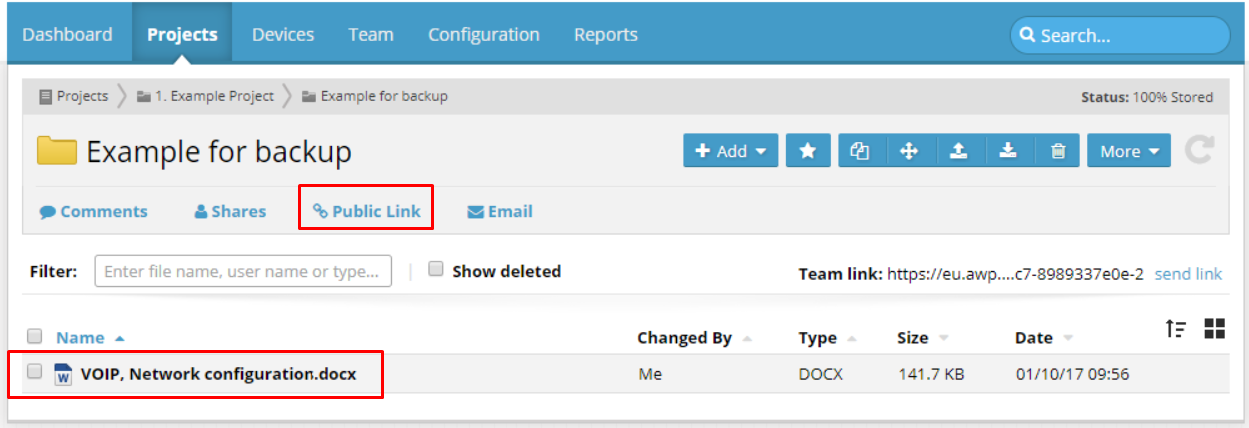
- From the menu options that appear, click Share, and then click Public Link.
The following page appears.
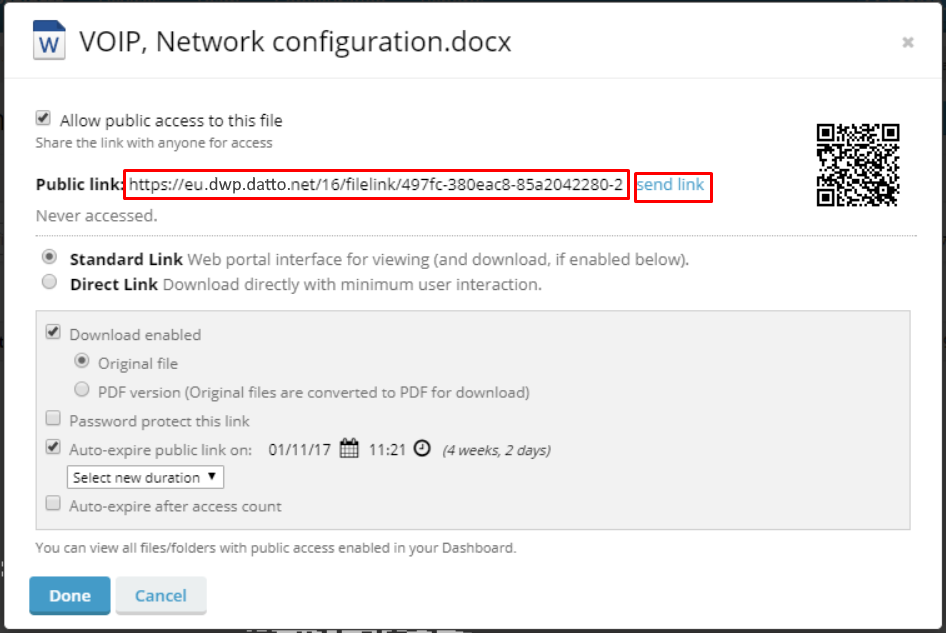
- To send the Public link to a guest member, either:
- Copy the Public link to your clipboard, and paste it into an email to the Guest Member, or,
- Click send link, to open the following page:

In Send link to, enter the recipient's email address.
Tip:
Use the Pick From Team function.
Enter a Message to recipients. Then click Send.
The Public link is emailed to the Guest Member(s).
Setting Public link options
You can set Public link options to enable or disable functionality for the recipient. There are two types of Public link; Standard, and Direct.
- Select the required Public link type, then set up options as required. (See below for Standard Link and Direct Link options).
- Click Done when finished.
Standard Link
The Standard Link option shows the individual file, and allows the user to preview, or download it. (There is no option to upload any new files to the parent folder).
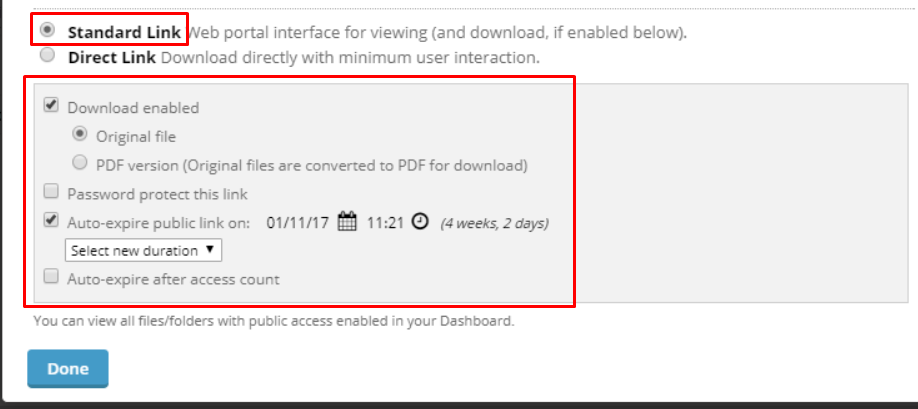
Set Standard Link options as follows:
- Download enabled – Tick the checkbox to enable a file download.
- Original file – Files are downloaded in their original format.
- Pdf version – A Pdf versions of the original file is downloaded.
- Password protect this link – Tick the checkbox to password protect the Public link. A textbox appears. Enter a password, or click generate password. This password must then be used before the file can be accessed.
- Auto-expire public link on - Tick the checkbox, then use the drop-down option box to select a duration before the Public link expires. (Selectable ranges from 1 day to Unlimited).
- Auto-expire after access count – Tick the checkbox. A textbox appears. Enter the number of times that recipients can access the shared file before the Public link expires. Click Apply Changes.
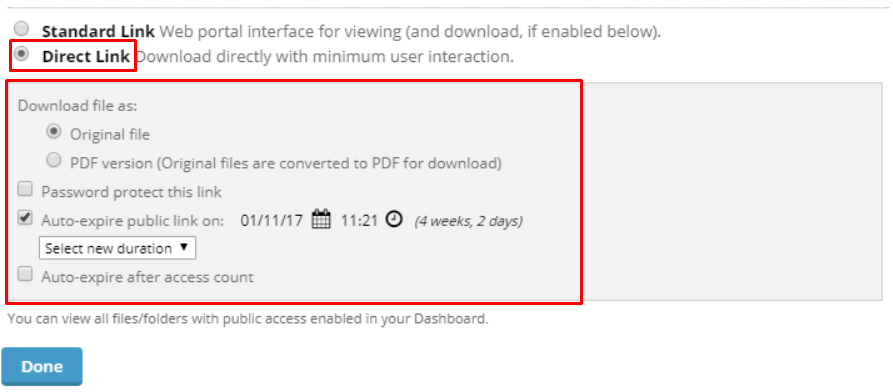
Direct Link
The Direct Link option enables a file to be downloaded directly, with minimum user interaction. It has no upload functionality, and does not allow a preview option. Set Direct Link options in the same way as previously explained for Standard Links.
Guest Member access
The Guest Member receives a notification email.
To access the shared file, the Guest Member simply clicks on the Click here… entry in the email to go to the file location. If a password has been set for file access, then enter the password when prompted.
