
Accessing and navigating the Azure Backup agent
Azure Backup is a service to back up and restore data in the cloud. It replaces existing on-premises or off-site backup solutions with a cloud-based solution that is reliable, secure, and cost-competitive. It delivers protection for customers' data no matter where it resides – in the enterprise data centre, in remote and branch offices or in the public cloud – while being sensitive to the unique requirements that these scenarios pose.
This article explains how to access and navigate the Cloud Direct Azure Backup agent. It provides a brief overview of the agent, but does not attempt to cover detailed tasks such as installation, and subsequent backup activities. These are covered in additional articles that may be found on the Cloud Direct knowledge base.
Prerequisites
Before commencing this task, you must have the Azure Backup agent installed on your computer/server. Please refer to knowledge article KB0011324, Installing the Azure Backup agent, if you require information regarding Azure Backup download and install.
Accessing the Azure Backup agent
To access the Cloud Direct Azure Backup agent, double click on the Azure Backup icon located on your desktop.

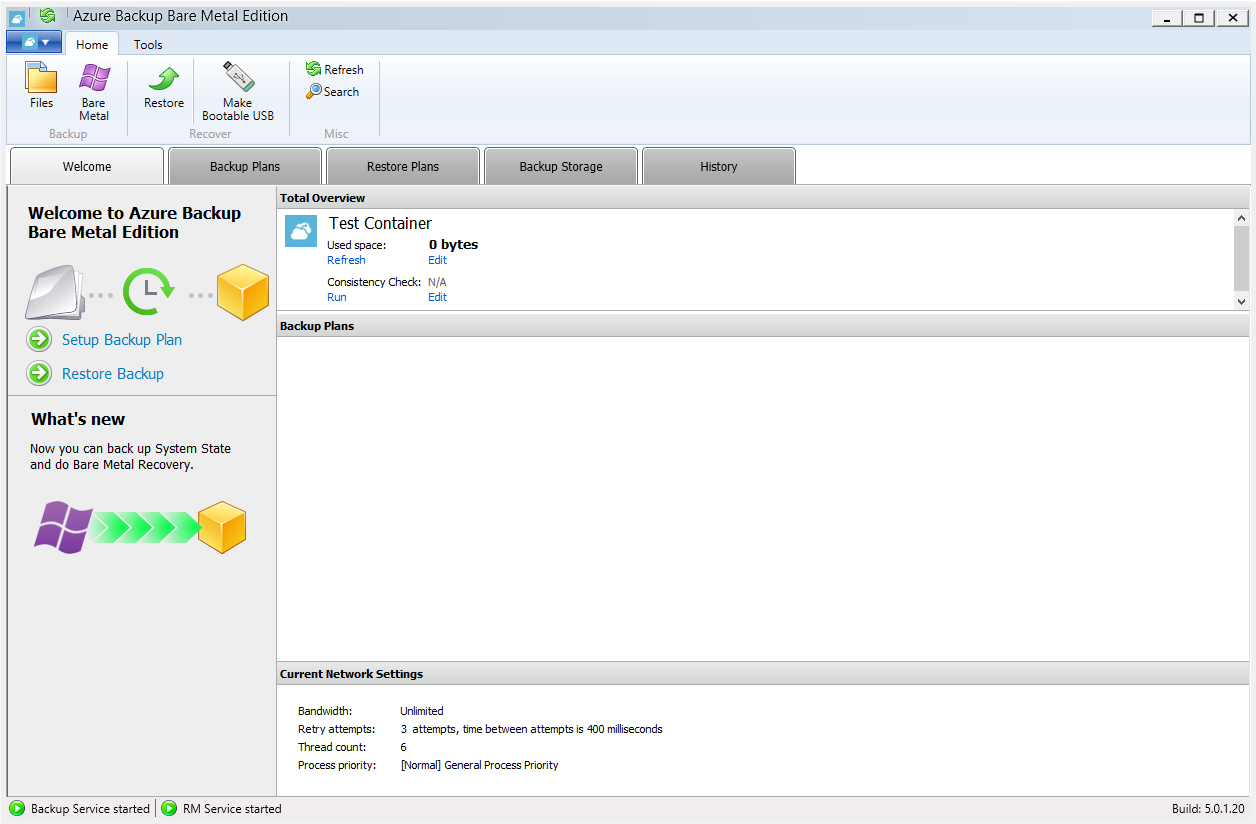
The Azure Backup agent window appears.
Note:
You automatically access the Azure Backup agent interface immediately following installation if, during installation, you ticked the Run Azure Backup… checkbox, then entered your login details.
Navigating the Azure Backup agent
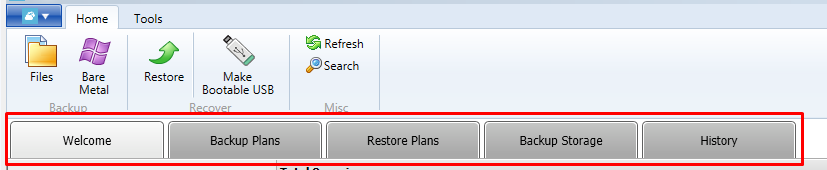
The Cloud Direct Azure Backup agent is navigated by means of a menu bar, and five separate tabs.
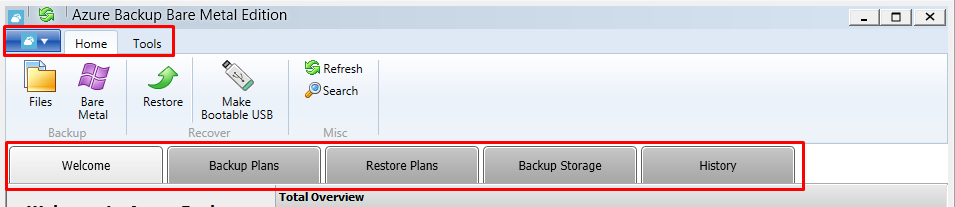
Menu bar
The menu bar contains two main tabs (Home, and Tools) with sub-options, and an Azure dropdown tab.
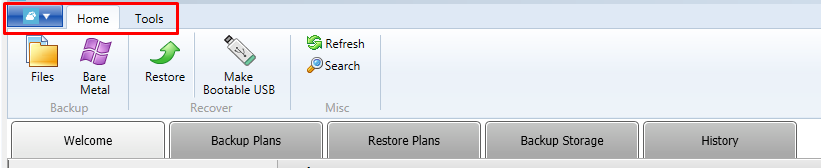
Home

The Home tab contains Backup, Recover, and Misc, icons;
- Backup – Files, and Bare Metal
- Click on these icons to start the Backup Create wizard.
- Recover – Restore, and Make Bootable USB
- Click Restore to start the Restore wizard.
- Click Make Bootable USB to create a Recovery Disk for bare metal restore.
- Misc – Refresh, and Search
- Click Refresh to refresh the current tab page. (This icon is also available at the top of the agent window).
- Click Search to open a Backup Storage Search facility.
Tools

The Tools tab contains Settings, and Import/Export, icons;
- Settings – Options, Network Credentials, Diagnostic, Change Service Account, Show Predefined Plans, and Language.
- Click Options for multiple setup options, including connection parameters, bandwidth usage and retention policy.
- Click Network Credentials to specify credentials for network paths.
- Click Diagnostics to send a problem description to Cloud Direct to aid diagnostics.
- Click Change Service Account to change the Azure Backup account that you are logged into. Note that in order to do this, you must have the login name and password of the account you want to change to.
- Click Show Predefined Plans to reveal any predefined plans.
- Click the Language dropdown to select an alternative language.
- Import/Export – Import Configuration, and Export Configuration.
- Import an external backup configuration.
Important Note:
Imported settings and backup plans will overwrite your own settings and backup plans.
- Export your backup plan(s) to a Zip file.
Azure dropdown
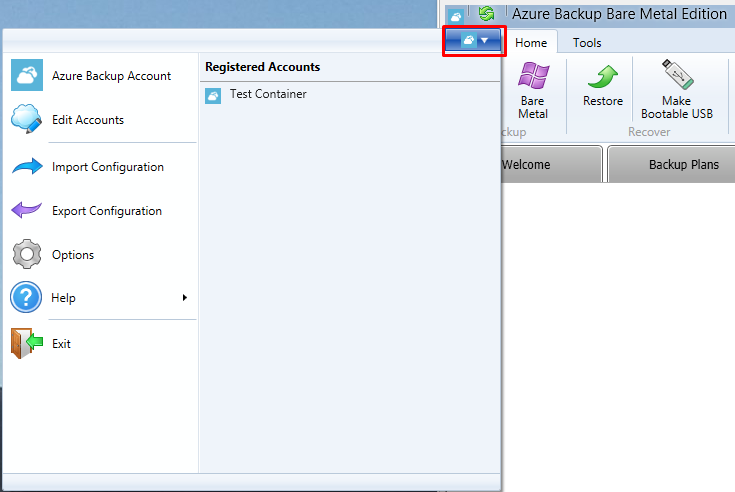
The Azure dropdown left hand pane contains a list of Registered Accounts. Click on an account to reveal account details. The right hand pane contains the following additional options:
- Azure Backup Account – Opens the Azure Backup Account Login dialogue box, enabling you to change password, or log in as a different user (provided you have the correct user credentials).
- Edit Accounts – Opens the list of Registered Accounts (as shown in right hand pane).
- Import Configuration - Import an external backup configuration.
Important Note:
Imported settings and backup plans will overwrite your own settings and backup plans.
- Export Configuration - Export your backup plan(s) to a Zip file.
- Options - Click Options for multiple setup options, including connection parameters, bandwidth usage and retention policy.
- Help – Contains the following options: Contents, Web Site, Send Feedback, and About.
- Contents – Opens the Online Help contents list in a separate window.
- Web Site – Link to www.clouddirect.net.
- Send Feedback – Opens a dialogue box to return feedback to Cloud Direct.
- About – Cloud Direct Azure Backup version details.
- Exit – Exits the Azure Backup agent.
Tabs
There are five tabs; Welcome, Backup Plans, Restore Plans, Backup Storage, and History.
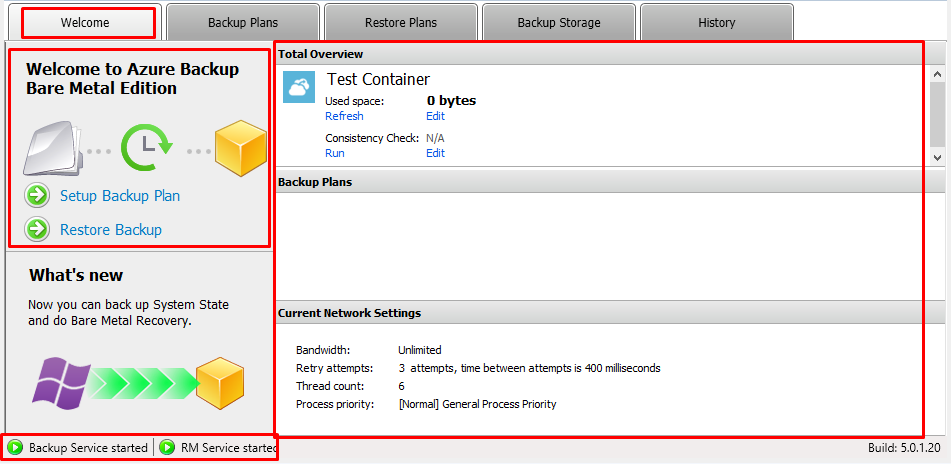
Welcome
In the Welcome tab left hand pane are quick links to Setup Backup Plan, or Restore Backup. The right hand pane contains a Total Overview of your Azure Backup agent, including any configured Backup Plans, and Current Network Settings. Status information is summarized at the bottom of the window.
Backup Plans
Contains details of your current Backup Plan(s).
Restore Plans
Contains details of your current Restore Plan(s).
Backup Storage
Contains Backup Storage details for your computer.

Click on an icon to show further details.
History
Contains historical data (last day, last week, or last month) concerning your Backup and Restore Plans.

This concludes a brief overview of the features provided by the Cloud Direct Azure Backup agent. For details of how to complete specific tasks using the agent, please refer to Azure articles on the Cloud Direct knowledge base.
